Author: Margaret Ellison

  • Best Soil Mix for Growing Herbs in Pots: Simple Recipe

    Best Soil Mix for Growing Herbs in Pots: Simple Recipe

    I used to believe that filling a container with ordinary garden soil was enough to grow healthy herbs. After dealing with compacted soil, yellow leaves, slow growth, and struggling roots, I discovered that the best soil mix for growing herbs in pots must balance drainage, moisture retention, aeration, and nutrition.

    The right mixture should feel light and crumbly rather than heavy or muddy. It must hold enough moisture to support tender herbs while allowing excess water to drain before roots begin to rot. More importantly, the recipe should be adjusted to the herbs being grown because basil and rosemary do not enjoy identical conditions.

    What Makes a Good Potting Mix for Herbs?

    What Makes a Good Potting Mix for Herbs?

    A successful herb potting mix performs several jobs at once. It supports the roots, holds nutrients, retains moderate moisture, and leaves small air pockets around the root system.

    Container soil also needs to drain more efficiently than ground soil. Water cannot spread naturally through the surrounding earth when a plant is confined to a pot. Without sufficient drainage, moisture collects around the roots and creates conditions that encourage root rot, fungus, and pest problems.

    The ideal mixture should contain three basic components: a moisture-retaining base, a source of gentle nutrition, and a material that improves drainage.

    Moisture-Retaining Ingredients

    Coconut coir and peat moss are commonly used as the base of a potting mixture. Both materials absorb water while helping the soil remain lightweight.

    I prefer coconut coir when it is readily available because it rewets more easily after drying out. Peat moss can sometimes become difficult to moisten when it is allowed to dry completely.

    Nutrient-Rich Ingredients

    Finished compost or worm castings can provide nutrients and beneficial organic matter. However, more compost is not always better.

    Too much can make a container mixture dense, wet, or overly rich. Most culinary herbs grow well with moderate nutrition, and excessive fertilizer can create rapid, soft growth with weaker flavour.

    Drainage and Aeration Ingredients

    Perlite, pumice, rice hulls, coarse horticultural sand, and fine pine bark can create air spaces and help water move through the pot.

    Perlite is affordable, lightweight, and easy to find. Pumice is heavier and less likely to float to the surface, while coarse sand works particularly well for drought-tolerant Mediterranean herbs.

    My All-Purpose Herb Potting Recipe

    My All-Purpose Herb Potting Recipe

    For basil, parsley, coriander, dill, chives, and similar leafy herbs, I use this straightforward mixture:

    • Two parts high-quality potting mix or coconut coir
    • One part finished compost
    • One part perlite or pumice

    I blend the ingredients thoroughly before adding them to the container. I then moisten the mixture gradually until it feels evenly damp but does not release water when squeezed.

    This recipe provides enough moisture retention for leafy growth while preventing the soil from becoming waterlogged. Mint can also grow in this blend, although I usually plant it in its own pot because its spreading roots can overwhelm neighbouring herbs.

    A Faster-Draining Mix for Mediterranean Herbs

    Rosemary, thyme, oregano, sage, and Lavandula species originate from environments where the soil tends to drain quickly. Their roots are more vulnerable to constantly wet conditions, particularly during cool or humid weather.

    For these herbs, I use:

    • Two parts regular potting mix
    • One part perlite or pumice
    • One part coarse horticultural sand or fine bark

    A cactus or succulent potting mix can also be combined with regular potting soil in equal amounts. This creates a simple alternative for gardeners who do not want to purchase several separate ingredients.

    The final texture should remain loose and gritty. Water should soak through the mixture without sitting on the surface for an extended period.

    Why Garden Soil Should Stay Out of Pots

    Garden soil may look rich, but it behaves differently inside a container. It can become compressed after repeated watering, reducing the oxygen available to roots.

    Heavy soil may also drain slowly, carry weed seeds, or introduce insects and plant diseases. Even when mixed with compost, it often remains too dense for long-term container growing.

    A sterile commercial potting mixture provides a safer and lighter foundation. Garden soil is better left in garden beds, where worms, weather, and natural drainage can help maintain its structure.

    How to Adjust the Mix for Different Conditions

    How to Adjust the Mix for Different Conditions

    No recipe works perfectly in every climate, container, and growing location. Small adjustments can make the mixture more reliable.

    Moisture retention should also be adjusted according to how quickly each container dries. Understanding how often should you water potted herbs can help you decide whether the mix needs more coir or compost for moisture retention, or additional perlite and pumice for faster drainage.

    Hot and Dry Conditions

    Pots lose water rapidly during warm, windy weather. I add slightly more coconut coir or compost to improve moisture retention. A larger pot can also prevent roots from drying out too quickly.

    Terracotta containers are porous and lose moisture faster than plastic or glazed pots. Herbs growing in terracotta may therefore need more frequent watering.

    Cool, Humid, or Indoor Conditions

    Moisture evaporates more slowly in humid weather and inside rooms with limited airflow. I increase the amount of perlite or pumice and reduce the compost slightly.

    Plastic and glazed ceramic containers retain water longer than terracotta. They need unobstructed drainage holes and a particularly airy mixture.

    How to Choose a Store-Bought Potting Mix

    A good bagged mixture should feel light instead of dense. I look for coconut coir or peat moss combined with perlite, bark, pumice, or another drainage material.

    I avoid products made mainly from topsoil and mixes that contain excessive moisture-control crystals. These additives may keep the root zone wetter than rosemary, thyme, and other drought-tolerant herbs prefer.

    A product labelled for containers, vegetables, or indoor plants can provide a useful starting point. I still add perlite when the mixture feels heavy or drains slowly.

    Common Herb Soil Mistakes

    Common Herb Soil Mistakes

    One common mistake is placing gravel at the bottom of a container. Gravel does not improve drainage inside the soil and can reduce the amount of growing space available to roots.

    Another mistake is planting herbs with conflicting moisture requirements together. Basil and mint prefer more consistent moisture, while rosemary and thyme need the soil to dry more between waterings.

    Keeping care requirements simple is easier when herbs with similar soil and moisture preferences are grouped together. This same principle supports many low-maintenance edible garden ideas, where compatible plants reduce watering problems, simplify feeding, and make routine maintenance more manageable.

    Overfertilising is equally problematic. Fresh potting soil often contains starter nutrients, so additional feeding may not be necessary immediately. When growth slows, a diluted balanced fertiliser can be applied according to the label directions.

    How to Fix Potting Soil Problems

    If the soil stays wet for several days, I check the drainage holes and mix in additional perlite. Yellow leaves combined with damp soil may indicate that roots are receiving too little oxygen.

    When water runs straight down the sides, the mixture may have become extremely dry and water-repellent. I water slowly in several rounds or place the pot in shallow water briefly so moisture can move upward.

    Soil that has collapsed, developed a sour smell, or become densely packed should be replaced. Healthy potting material should smell earthy and maintain a loose texture.

    Frequently Asked Questions

    1. What is the best soil mix for growing herbs in pots?

    A dependable general recipe combines two parts potting mix, one part compost, and one part perlite, although Mediterranean herbs benefit from extra grit and drainage.

    2. Can I use regular potting soil for herbs?

    Yes, but adding perlite or pumice can improve airflow and reduce the risk of waterlogged roots, especially in plastic or glazed containers.

    3. What soil pH do most herbs prefer?

    Most culinary herbs perform well in slightly acidic to neutral soil, generally around pH 6.0 to 7.0.

    4. How often should I replace soil in herb containers?

    Replace severely compacted or unhealthy soil. Otherwise, refresh it between growing seasons with fresh potting mix, compost, and drainage material.

    Give Your Herbs Room to Breathe

    Once I stopped treating every herb and container the same way, my plants became stronger and easier to maintain. The biggest improvement came from creating a lightweight mixture and adjusting its drainage to match each herb.

    I now group moisture-loving plants together, give Mediterranean herbs a grittier blend, and check the texture before reaching for the watering can. Healthy herbs begin below the surface, and a balanced potting mixture gives their roots the air, moisture, and support they need to flourish.

  • 12 Easy Herbs to Grow Indoors for Fresh Flavor

    12 Easy Herbs to Grow Indoors for Fresh Flavor

    I used to believe indoor herb gardening required a sunny greenhouse, expensive equipment, and years of experience. Once I started with a few forgiving plants, I discovered that easy herbs to grow indoors can provide fresh flavor without taking over the kitchen or demanding constant attention.

    The secret is choosing herbs that tolerate containers, recover after harvesting, and adapt to ordinary household conditions. Light, drainage, and careful watering matter far more than advanced gardening skills.

    What Makes an Indoor Herb Beginner-Friendly?

    An easy indoor herb should grow reliably in a container and tolerate occasional care mistakes. It should also remain manageable, recover after trimming, and produce enough leaves to make the effort worthwhile.

    Before choosing a plant, I consider the available light. A bright south- or west-facing window suits sun-loving Mediterranean herbs, while mint, chives, parsley, and lemon balm can handle somewhat gentler light. However, no culinary herb thrives in a completely dark room.

    Drainage is equally important. I always use pots with holes in the bottom and a loose indoor potting mix. Heavy outdoor soil can compact inside containers, restrict airflow, and hold too much water around the roots.

    The Best Indoor Herbs for Beginners

    The Best Indoor Herbs for Beginners

    Many of these beginner-friendly plants can also transition to patios, balconies, or garden areas when the weather becomes suitable. Comparing them with the best herbs to grow in containers outdoors can help you decide which varieties are better kept on a windowsill and which may produce stronger growth in open air.

    1. Mint

    Mint is one of the most forgiving choices for new gardeners. It grows quickly, responds well to regular harvesting, and tolerates slightly lower light than many culinary herbs and spices.

    I keep mint in its own pot because its roots spread aggressively. I water when the soil surface begins to feel dry and trim the stems regularly to encourage fuller growth.

    2. Chives

    Chives fit neatly on a windowsill and continue producing after repeated cutting. Their mild onion flavor works well in eggs, potatoes, soups, dips, and salads.

    They prefer bright light but can manage with less direct sun than rosemary or thyme. I harvest by cutting the leaves about an inch above the soil rather than removing only the tips.

    3. Basil

    Basil grows quickly from seed and produces generous harvests when it receives warmth and strong light. A bright window or full-spectrum grow light usually gives the best results.

    I pinch the stem just above a pair of leaves to encourage branching. Removing flower buds also helps the plant continue producing tender leaves instead of focusing its energy on seeds.

    4. Oregano

    Oregano prefers bright light, excellent drainage, and soil that dries slightly between waterings. It is a practical choice for pizza, pasta sauce, roasted vegetables, and marinades.

    Overwatering causes more problems than temporary dryness. I check the soil with my finger before adding water and empty any excess moisture from the saucer.

    5. Thyme

    Thyme stays compact and suits small kitchens. Its tiny leaves add flavor to soups, poultry, vegetables, beans, and sauces.

    It prefers a sunny position and does not like wet roots. Regular light trimming keeps the plant bushy and prevents the stems from becoming overly woody.

    6. Parsley

    Parsley takes longer to germinate than basil, but established plants are dependable and productive. Both curly and flat-leaf varieties grow well in containers.

    The soil should remain lightly moist without becoming soggy. I harvest the outer stems first, cutting them near the base so new growth can continue from the center.

    7. Lemon Balm

    Lemon balm belongs to the mint family and shares its vigorous growth. Its citrus-scented leaves work well in tea, fruit dishes, flavored water, and desserts.

    It tolerates moderate indoor light, although stronger light creates denser growth. Frequent trimming prevents the plant from becoming tall and sparse.

    8. Sage

    Sage is a good option for a warm, sunny windowsill. Its soft leaves complement stuffing, roasted vegetables, sauces, poultry, and butter-based dishes.

    The plant prefers drier conditions, so I allow the upper layer of soil to dry before watering. Strong airflow also helps prevent mildew around the leaves.

    9. Rosemary

    Rosemary can grow indoors successfully, but it needs more attention than mint or chives. It performs best with strong light, excellent drainage, and good air circulation.

    I avoid allowing the potting mix to remain constantly wet. Brown leaves can result from root problems, weak light, dry indoor air, or inconsistent watering.

    10. Cilantro

    Cilantro grows quickly but has a shorter productive life than many perennial herbs. It may flower early in warm conditions, so repeated sowing provides a steadier supply.

    Instead of expecting one plant to last indefinitely, I sow small batches every few weeks. A deeper container supports its long taproot.

    11. Dill

    Dill grows easily from seed and develops quickly under bright light. It is useful for potatoes, fish, dips, pickles, and salads.

    Because dill develops a substantial root system, I use a deeper pot and avoid unnecessary transplanting. Regular harvesting encourages useful growth before flowering begins.

    12. Lemongrass

    Lemongrass is surprisingly simple to start from fresh stalks. I place stalks with intact bases in water until roots appear, then transfer them to a container.

    The plant appreciates warmth, bright light, and consistent moisture. It can become large, so it needs more space than compact herbs such as thyme.

    How to Keep an Indoor Herb Garden Alive

    How to Keep an Indoor Herb Garden Alive

    Provide Enough Light

    Most herbs need several hours of bright light each day. Weak light often causes pale leaves, slow growth, and long stems leaning toward the window.

    I rotate pots every week so all sides receive light. During darker months, a grow light positioned above the plants can support healthier, more balanced growth.

    Water According to the Soil

    A fixed watering schedule often causes root rot. Instead, I check each pot individually because small containers, sunny rooms, and mature plants dry at different rates.

    Mediterranean aromatic herbs such as rosemary, oregano, sage, and thyme prefer slightly drier soil. Basil, parsley, mint, cilantro, and chives generally appreciate more consistent moisture.

    Harvest Regularly

    Frequent harvesting encourages many herbs to branch and produce fresh growth. However, removing too much at once can weaken a young plant.

    I avoid taking more than roughly one-third of the plant during a single harvest. Clean scissors also reduce stem damage.

    Common Indoor Herb-Growing Mistakes

    Overwatering is the most common problem. Other frequent mistakes include using pots without drainage, placing sun-loving herbs in dim rooms, overcrowding several plants in one container, and failing to harvest regularly.

    Excess moisture can also encourage tiny flies around the soil surface. Learning how to stop fungus gnats fast without putting pets at risk can help indoor gardeners control the problem while protecting animals that share the home.

    Grocery-store herb pots may contain many seedlings packed together. Separating them into smaller groups can reduce competition for water, nutrients, and root space.

    It is also important to group plants by care needs. Rosemary and mint may not thrive in the same container because they prefer different moisture levels.

    Frequently Asked Questions

    1. What are the easiest herbs to grow inside for beginners?

    Mint, chives, basil, oregano, thyme, parsley, and lemon balm are dependable choices because they adapt well to containers and respond positively to regular harvesting.

    2. Can herbs grow indoors without direct sunlight?

    Some herbs tolerate bright indirect light, but completely dark areas are unsuitable. A grow light can compensate when natural window light is limited.

    3. Can I grow herbs indoors throughout winter?

    Yes. Indoor herbs can grow during winter when they receive sufficient light, stable temperatures, good drainage, and appropriate watering.

    4. What are the best easy herbs to grow indoors in low light?

    Mint, chives, parsley, and lemon balm are better options for gentler light, although they still need a bright window or supplemental lighting.

    5. Should I start indoor herbs from seeds or plants?

    Seeds work well for basil, dill, cilantro, and parsley. Starter plants or cuttings usually provide faster results for rosemary, mint, oregano, thyme, and sage.

    Fresh Flavor Starts on the Windowsill

    I have learned that a successful indoor herb garden does not need to begin with twelve plants. Starting with two or three herbs makes it easier to understand how quickly the soil dries, how much light the room provides, and how each plant responds to harvesting.

    For my first collection, I would choose mint, chives, and basil. They grow quickly, provide noticeable harvests, and teach the basic skills needed to manage easy herbs to grow indoors. Once those plants are thriving, adding thyme, oregano, parsley, or rosemary feels far less intimidating.

  • Best Herbs to Plant in Early Spring for Fresh Harvests

    Best Herbs to Plant in Early Spring for Fresh Harvests

    When the first mild days arrive, I always feel ready to fill empty pots and garden beds with fresh greenery. However, early spring weather can change quickly. A sunny afternoon may be followed by cold rain, strong wind, or an unexpected frost overnight.

    Choosing the best herbs to plant in early spring helps me start the growing season without exposing delicate plants to unsuitable conditions. Cool-tolerant herbs such as cilantro, dill, parsley, chives, thyme, and sage can establish before warmer weather arrives. Tender herbs, including basil, are better started indoors until outdoor temperatures become reliable.

    What Counts as Early Spring?

    Early spring does not begin on the same date everywhere. Local climate, elevation, rainfall, and garden position all affect when planting can begin.

    Instead of relying entirely on the calendar, check whether the ground has thawed and the soil can be worked without becoming sticky or compacted. Soil that forms a heavy wet ball in your hand usually needs more time to dry.

    The average final frost date is another useful guide. Hardy herbs can tolerate cool conditions, but frost-sensitive plants should remain indoors until the risk of freezing weather has passed.

    Cool-Season Herbs to Sow Directly

    Cool-Season Herbs to Sow Directly

    Cilantro

    Cilantro prefers cool temperatures and often struggles once summer heat arrives. Sow the seeds directly into loose soil because the plant develops a taproot that does not always respond well to transplanting.

    Plant a small batch every two or three weeks to extend the harvest. Pick the outer leaves regularly before flower stalks begin to appear.

    Dill

    Dill is another herb that performs well when sown directly. Its long root can be disturbed during transplanting, so planting seeds in their permanent position usually produces stronger plants.

    Choose a sunny, sheltered location because mature stems may bend in strong wind. Repeated sowing can provide tender leaves for several weeks.

    Parsley

    Parsley handles cool conditions well, although its seeds may take several weeks to germinate. Soaking the seeds overnight before planting may help soften the outer coating.

    Keep the soil consistently moist during germination, but avoid leaving it waterlogged. Both curly and flat-leaf varieties grow successfully in beds, raised planters, and deep containers.

    Chervil

    Chervil grows best in cool conditions and can tolerate partial shade. Sow the seeds directly and cover them with only a thin layer of soil.

    The delicate leaves have their best texture and flavor before temperatures rise. Small repeat sowings are more practical than planting the entire seed packet at once.

    Chamomile

    Chamomile can be started early because its seedlings tolerate cool weather. Press the tiny seeds lightly onto the soil surface rather than burying them deeply, as light helps them germinate.

    German chamomile grows as an annual, while Roman chamomile is a low-growing perennial. Both types produce small flowers that attract beneficial insects.

    Hardy Perennial Herbs to Plant

    Hardy Perennial Herbs to Plant

    A productive herb garden does not require expensive landscaping or a large growing area. Reusing containers, dividing established plants, and choosing low-maintenance perennials are practical parts of designing an outdoor lifestyle on a budget while still creating a useful and inviting space.

    Chives

    Chives are among the earliest perennial herbs to produce new growth. Established clumps can be divided and replanted once the soil is workable.

    Harvest leaves when they reach several inches tall. Cut them close to the base while leaving enough growth for the plant to recover.

    Thyme

    Thyme prefers full sunlight and sharply drained soil. It performs well in raised beds, rock gardens, borders, and terracotta containers.

    Avoid planting it in heavy, constantly wet ground. Excessive moisture can weaken the roots and reduce the plant’s natural flavor.

    Oregano

    Oregano establishes more quickly from a nursery plant or division than from seed. Place it in a sunny position with good airflow.

    Once established, oregano requires little attention. Regular trimming encourages compact growth and provides tender leaves for cooking.

    Sage

    Sage is a woody perennial that benefits from an early start. Choose a sunny area with free-draining soil and enough space for air to move around the leaves.

    Light pruning can encourage fresh growth, but avoid cutting deeply into old, leafless stems.

    Mint

    Mint tolerates cool temperatures and begins spreading quickly as conditions improve. Its vigorous roots can overwhelm nearby plants, so a container is usually the safest option.

    Use a pot with drainage holes and keep the soil evenly moist. Placing the container close to the kitchen makes regular harvesting more convenient.

    Lemon Balm

    Lemon balm is related to mint and spreads in a similar way. It can grow in full sun or partial shade, although some afternoon shade may help in warmer conditions.

    Growing it in a container prevents unwanted spreading and makes it easier to control self-seeding.

    Herbs to Start Indoors

    Herbs to Start Indoors

    Basil

    Sweet basil loves warmth and may suffer damage when nights are cold. Start seeds indoors in a bright, warm location and wait until frost danger has passed before moving plants outside.

    Harden the seedlings gradually by placing them outdoors for short periods over seven to ten days. Increase their exposure each day before transplanting permanently.

    Rosemary

    Rosemary seeds can germinate slowly and unevenly. Starting them indoors early provides more time for seedlings to develop before outdoor planting.

    Buying a healthy young plant is often the easier choice. Place it near a sunny window until outdoor temperatures become mild.

    How to Protect Young Herbs

    Check the weather forecast regularly during the first few weeks. Cover seedlings with frost cloth, a cloche, or an overturned container when freezing temperatures are expected.

    Remove covers during warm daylight hours so heat and humidity do not build up around the plants. Containers can also be moved into a sheltered area overnight.

    Cold soil holds water longer than warm summer soil. Water only when the upper layer begins to feel dry, and make sure containers drain freely.

    Overwatering indoor seedlings and container herbs can leave the potting mix damp enough for small pests to breed.

    If tiny flies begin hovering near the soil, learning how to get rid of fungus gnats in houseplants naturally can help protect young roots without relying on harsh treatments.

    Frequently Asked Questions

    1. What are the best herbs to plant in early spring before frost has ended?

    Cilantro, dill, parsley, chervil, chamomile, chives, thyme, oregano, sage, mint, and lemon balm are reliable choices for cool conditions.

    2. Can basil be planted outside early?

    Basil should remain indoors until frost risk has passed and nighttime temperatures stay mild. Cold soil and chilly air can slow growth or damage the leaves.

    3. Which herbs grow fastest during cool weather?

    Cilantro, dill, chives, and chamomile can produce relatively fast growth when they receive suitable sunlight, moisture, and drainage.

    4. Can spring herbs grow in containers?

    Yes. Use containers with drainage holes and enough depth for each plant’s roots. Pots are particularly useful for controlling spreading herbs such as mint and lemon balm.

    A Fresh Start for the Growing Season

    Starting herbs early gives me fresh leaves while the rest of the garden is still waking up. I get better results when I choose plants that match the season instead of forcing heat-loving varieties into cold ground.

    By checking frost dates, improving drainage, sowing small batches, and keeping plant protection nearby, I can build a productive herb garden long before summer. Selecting the best herbs to plant in early spring creates a stronger start, a longer harvest, and more homegrown flavor throughout the season.

  • How Often Should You Water Potted Herbs?

    How Often Should You Water Potted Herbs?

    I used to water every herb on the same schedule, assuming consistency would keep them healthy. Instead, my basil wilted, my rosemary developed yellow leaves, and my mint seemed thirsty almost every afternoon. I eventually learned that how often should you water potted herbs depends less on the calendar and more on the plant, soil, container, weather, and growing location.

    Most potted herbs need water about one to three times per week. However, small containers sitting in direct summer sun may need daily attention, while established Mediterranean herbs in large pots may go several days between waterings. The safest approach is to check the soil regularly and water only when the herb needs it.

    Why Potted Herbs Need a Flexible Watering Schedule

    Herbs growing in containers cannot send their roots deeper into the ground to search for moisture. They depend entirely on the limited water held inside their pots. That moisture may disappear quickly when temperatures rise, wind increases, or roots fill the container.

    Indoor herbs can dry slowly during cool or humid weather. Outdoor pots exposed to full sun may lose moisture within hours. A fixed schedule ignores these changing conditions and increases the risk of both underwatering and root rot.

    Choosing low-maintenance edible garden ideas can also make watering easier by grouping herbs and other edible plants with similar moisture needs, reducing daily care and preventing frequent overwatering.

    Check your herbs every day, especially during warm weather, but do not automatically water them every day. A daily check is not the same as daily watering.

    How to Tell When Potted Herbs Need Water

    How to Tell When Potted Herbs Need Water

    Check the Top Inch of Soil

    Push your finger about one inch into the potting mix. If the soil feels dry at that depth, the herb probably needs water. If it feels cool and damp, check it again the following day.

    Do not judge moisture only by looking at the surface. The top layer may appear dry while the root zone remains wet.

    Lift the Container

    Lift the pot shortly after watering so you can recognise its fully hydrated weight. Lift it again once the soil begins to dry. A noticeably lighter container usually indicates that much of its moisture has been used.

    This method works particularly well with small and medium-sized pots.

    Watch the Plant

    Soft, drooping leaves can indicate thirst, especially when the soil is dry. However, wilting can also occur when waterlogged roots cannot absorb oxygen. Always check the soil before adding more water.

    Dry, crispy leaf edges usually point to insufficient moisture. Yellowing leaves, mushy stems, fungus gnats, or a sour smell from the soil can indicate excessive watering.

    How Often to Water Different Potted Herbs

    Basil, Parsley and Cilantro

    Basil, parsley, and cilantro prefer evenly moist soil. Check them frequently and water when the top inch begins to feel dry. They may need water two or three times weekly in moderate conditions and more frequently during hot weather.

    Cilantro can struggle in prolonged heat, so moisture alone may not prevent wilting or early flowering.

    Mint, Chives and Dill

    Mint enjoys consistent moisture and can dry rapidly when confined to a small container. Chives and dill also perform best when their soil does not remain dry for extended periods.

    These herbs may require frequent watering during active growth, particularly on sunny balconies and patios.

    Rosemary, Thyme, Oregano and Sage

    Mediterranean herbs prefer drier conditions and excellent drainage. Allow a greater portion of the potting mix to dry before watering them again.

    Rosemary is especially vulnerable to wet roots. Giving it extra water because its leaves look narrow or firm can cause more damage than allowing the soil to dry slightly.

    How Pots Affect Watering Frequency

    How Pots Affect Watering Frequency

    Small containers dry faster because they hold less soil and moisture. Large pots usually remain damp longer, although oversized containers can become waterlogged when filled with dense potting mix.

    Terracotta is porous and allows moisture to escape through its walls. Herbs planted in terracotta may therefore need more frequent watering than herbs in plastic, glazed ceramic, or resin containers.

    Every herb pot should have drainage holes. Decorative containers without drainage trap water around the roots and make it difficult to manage moisture safely. When using a decorative cover pot, remove the inner nursery pot before watering and allow it to drain completely.

    Indoor vs Outdoor Herb Watering

    Indoor herbs generally dry more slowly because they are protected from rain, wind, and intense midday sun. However, air conditioning, heating systems, and sunny windows can increase moisture loss.

    Beginners may find moisture management easier when they start with easy herbs to grow indoors, since varieties such as mint, chives, parsley, and basil respond clearly to changes in soil moisture and household conditions.

    Keep herbs away from heating vents and check pots near bright windows more frequently. Empty saucers after watering so the containers do not sit in standing water.

    Outdoor herbs need closer observation. Hot temperatures, direct sunlight, dry air, and wind may cause small containers to dry within a day. During rainy periods, move sensitive Mediterranean herbs under cover when possible and make sure their drainage holes remain open.

    The Right Way to Water Container Herbs

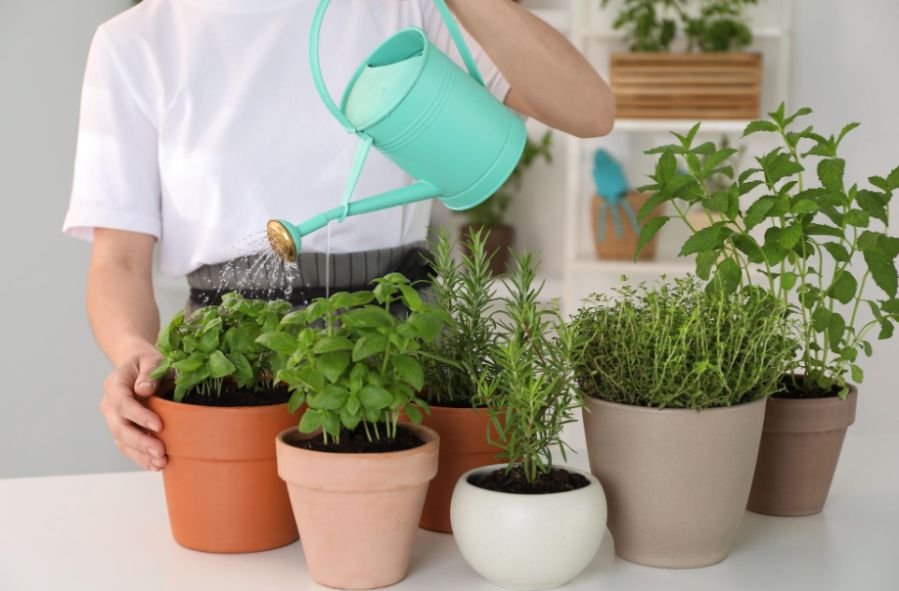
    Water slowly at soil level until excess moisture flows through the drainage holes. This ensures that the entire root zone receives water instead of only the surface.

    Avoid giving herbs small daily splashes. Shallow watering encourages roots to remain near the surface, where they dry quickly. A thorough soaking followed by an appropriate drying period promotes a stronger root system.

    Morning is generally the best time to water outdoor herbs. The plants can absorb moisture before the hottest part of the day, while wet foliage has time to dry. When watering later, direct the water toward the soil rather than soaking the leaves.

    Frequently Asked Questions

    1. How often should you water potted herbs during summer?

    Check them daily and water when the top inch of soil feels dry. Small outdoor containers may require daily watering during hot, sunny, or windy weather.

    2. Should potted herbs be watered from the top or bottom?

    Top watering is usually easiest because it flushes excess salts through the pot. Apply water slowly at soil level and allow the container to drain completely.

    3. Can herbs recover from overwatering?

    They may recover if the roots have not severely rotted. Stop watering, improve drainage, remove damaged roots or leaves, and allow the potting mix to dry.

    4. Why does my herb wilt when the soil is still wet?

    Constantly wet soil can deprive roots of oxygen and cause decay. Check the drainage holes and roots before adding more water.

    Let Your Herbs Set the Schedule

    I no longer treat watering day as a fixed appointment. I check the soil, lift the container, observe the leaves, and consider the weather before reaching for the watering can.

    That simple habit has helped me avoid drowning rosemary, drying out basil, and guessing based on an unreliable weekly routine. Let each pot tell you what it needs, water thoroughly when the root zone begins to dry, and adjust as the plant, season, and environment change.

  • Outdoor Spaces That Improve Wellbeing Through Nature, Light, and Simple Design

    Outdoor Spaces That Improve Wellbeing Through Nature, Light, and Simple Design

    I used to think a relaxing outdoor space meant having a big backyard with expensive landscaping. Then I spent a few weekends making small changes to a neglected corner outside my home. I added a comfortable chair, moved a few planters into better sunlight, and started having my morning coffee there instead of indoors. It wasn’t a dramatic makeover, but I noticed I was spending more time outside without even planning to.

    That experience made me realize something simple. The outdoor spaces that improve wellbeing aren’t always the largest or the most beautiful. They’re the ones that make you want to slow down, breathe a little deeper, and enjoy being present. A thoughtfully designed patio, balcony, or backyard can become part of your daily routine, offering a quiet escape from busy schedules and endless screen time.

    Why Outdoor Spaces Feel Better When They’re Designed With Purpose

    Why Outdoor Spaces Feel Better When They're Designed With Purpose

    Stepping outside has always been a natural way to recharge, but the design of that space plays a bigger role than many people realize. Fresh air and greenery certainly help, yet comfort, sunlight, and simplicity often determine whether people actually spend time outdoors.

    That’s why more homeowners are paying attention to biophilic design, a concept that brings people closer to nature through plants, natural materials, and calming outdoor environments. Instead of filling every corner with decorations, the focus is shifting toward creating outdoor living spaces that feel open, peaceful, and easy to enjoy every day.

    Let Nature Become Part of the Experience

    Plants do more than add color. They create movement, attract birds and pollinators, soften hard surfaces, and make outdoor areas feel alive.

    Native plants are especially valuable because they thrive in local conditions with less maintenance while supporting nearby wildlife. Mixing flowering plants with fragrant herbs and ornamental grasses creates a sensory experience that changes throughout the seasons.

    Even something as simple as a birdbath or a small fountain can transform the atmosphere. The gentle sound of moving water helps soften background noise, making the space feel calmer without requiring a major investment.

    Make Natural Light Work in Your Favor

    Make Natural Light Work in Your Favor

    Natural light affects both mood and energy levels, which is why thoughtful placement matters.

    Before adding furniture or garden features, spend a few days noticing how sunlight moves across the yard. This simple form of sun mapping helps identify comfortable spots for morning coffee, afternoon reading, or evening conversations.

    If intense afternoon sun becomes uncomfortable, filtered shade often works better than blocking light completely. Pergolas, climbing plants, or trees with open canopies allow sunlight to pass through while reducing glare and excess heat.

    As daylight fades, warm outdoor lighting helps extend the usability of the space. Soft LED pathway lights or lantern-style fixtures create a welcoming atmosphere without overwhelming the landscape.

    Simplicity Creates a Greater Sense of Calm

    Many outdoor spaces become crowded because people feel every corner needs decoration. In reality, empty space often has just as much value as the features surrounding it.

    Simple pathways, clean planting beds, and uncluttered seating areas create a more relaxing environment because the eye isn’t constantly distracted. Hidden storage for cushions, gardening tools, and accessories also keeps the space feeling organized throughout the year.

    Minimalist design doesn’t mean the death of individualism or removing personality. It simply means allowing each element to serve a purpose instead of competing for attention.

    Choose Materials That Feel Comfortable Every Day

    Choose Materials That Feel Comfortable Every Day

    The materials used outdoors influence more than appearance. They also shape how the space feels throughout the day.

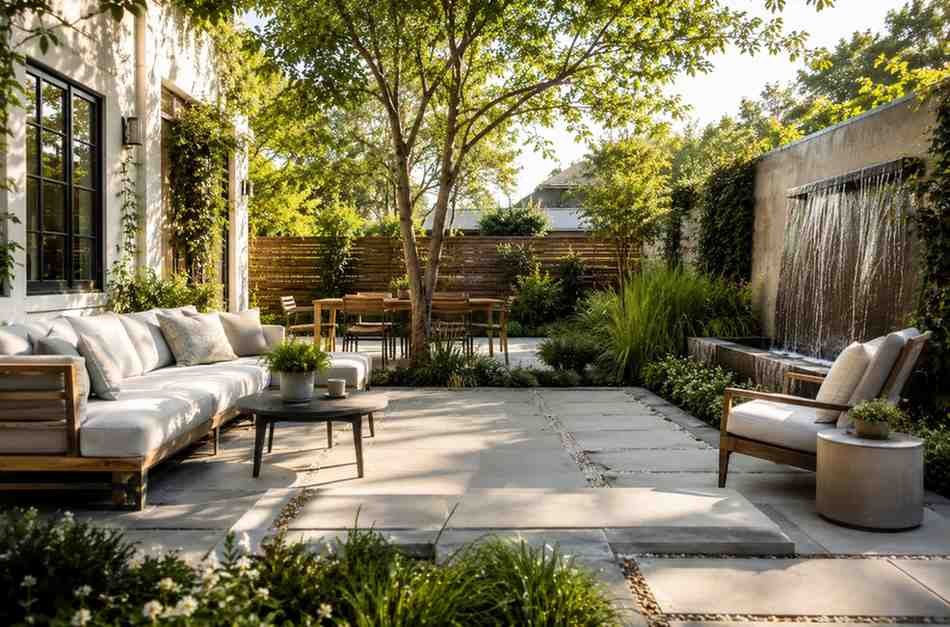
    Natural wood brings warmth to decks, seating, and privacy screens while blending effortlessly with surrounding greenery. Light-colored stone reflects sunlight instead of absorbing excessive heat, making patios more comfortable during warmer months.

    Gravel and small pebbles offer another subtle benefit. The gentle sound beneath your feet creates a quiet sensory experience that encourages slower movement and mindfulness while walking through the garden.

    These details may seem small individually, but together they create an environment that feels noticeably more inviting.

    Create Spaces That Match Everyday Life

    The most successful outdoor spaces are designed around real habits instead of occasional gatherings.

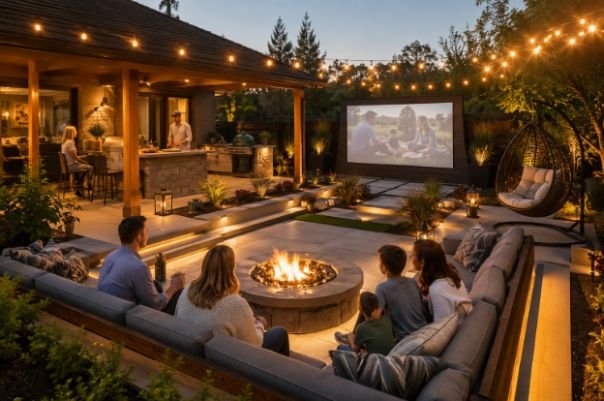
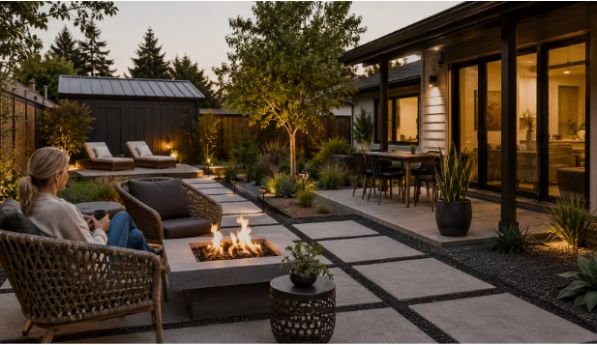
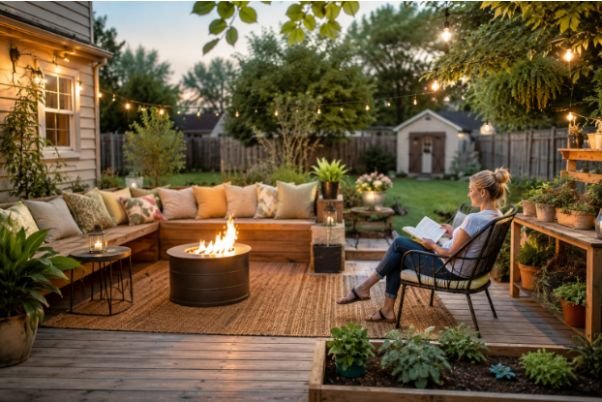
    A quiet reading corner beneath a tree, a shaded deck for stretching before work, or a flexible seating area around a fire pit all encourage people to spend more time outdoors. Rather than serving one purpose, these areas naturally adapt throughout the day.

    If you’re planning a space focused on relaxation and nature, exploring ideas for an outdoor wellness garden can help you combine greenery, comfortable seating, and peaceful surroundings into one cohesive design that you’ll actually use.

    Small Outdoor Areas Can Have a Big Impact

    Small Outdoor Areas Can Have a Big Impact

    A large backyard isn’t necessary to create an outdoor retreat.

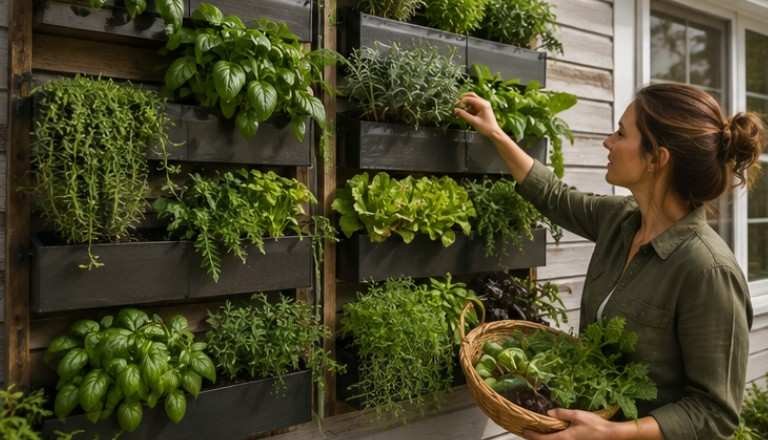
    Balconies can become peaceful morning coffee spots with comfortable seating and container plants. Small patios benefit from vertical gardens, while compact yards often feel larger by keeping layouts open and uncluttered.

    The goal isn’t to fit more into the available space. It’s to make the existing space feel welcoming so that spending time outdoors becomes part of everyday life instead of an occasional event.

    FAQs: Outdoor Spaces That Improve Wellbeing Through Nature, Light, and Simple Design

    1. Can a small patio improve wellbeing?
    Yes. Comfortable seating, natural light, greenery, and a quiet atmosphere can make even a compact patio feel restorative and encourage more time outdoors.

    2. What plants work best for a wellness-focused outdoor space?
    Native plants, fragrant herbs, ornamental grasses, and pollinator-friendly flowers are excellent choices because they support biodiversity while adding texture and seasonal interest.

    3. Why is natural light important in outdoor design?
    Natural light helps regulate daily rhythms, supports vitamin D production, and creates brighter, more inviting spaces that people naturally enjoy using throughout the day.

    4. Do outdoor wellness spaces have to be expensive?
    Not at all. Rearranging furniture, adding plants, improving lighting, and reducing clutter often create meaningful improvements without requiring a large budget.

    The Spaces We Return to Are the Ones That Matter Most

    The outdoor spaces that improve wellbeing aren’t remembered because they follow the latest design trend. They’re the places where people naturally slow down, enjoy fresh air, reconnect with nature, and build simple routines that make everyday life feel a little lighter. Whether it’s a balcony filled with plants or a backyard designed for quiet mornings, the real value comes from creating a space that feels inviting enough to use again and again.

    Sometimes the smallest changes outside your home make the biggest difference inside your day.

  • Outdoor Family Gathering Spaces That Bring Everyone Together

    Outdoor Family Gathering Spaces That Bring Everyone Together

    I’ve always noticed that the best family memories rarely happen inside perfectly decorated rooms. They usually start outside, where someone pulls up an extra chair, kids find something to laugh about, and conversations stretch long after the meal is over. It doesn’t matter whether the backyard is large or small. What matters is that everyone feels comfortable enough to stay.

    I’ve also learned that creating a welcoming outdoor space isn’t about filling it with expensive furniture or trendy features. The spaces people return to again and again are designed around how families actually spend time together. A little shade, comfortable seating, and room to move often matter far more than elaborate landscaping.

    What Makes an Outdoor Gathering Space Feel Inviting?

    What Makes an Outdoor Gathering Space Feel Inviting

    The most successful outdoor family gathering spaces don’t happen by accident. They’re planned around people rather than decorations. Every choice, from where chairs are placed to how guests move through the yard, influences whether the space feels natural or awkward.

    A welcoming backyard encourages conversation without forcing it. People should be able to sit comfortably, move around easily, and find different ways to enjoy the space. Some may gather around the table, while others relax near a fire pit or watch children play nearby. When these areas connect naturally, everyone feels included.

    Start With a Comfortable Gathering Point

    Every outdoor space benefits from having one central area that naturally draws people together. For many families, that’s a dining table large enough for shared meals. Others may prefer modular seating arranged around a coffee table where conversations can continue without feeling formal.

    Instead of pushing furniture against walls or fences, consider creating a layout where seats face one another. This simple change encourages eye contact, keeps conversations flowing, and makes the space feel more welcoming.

    Choose weather-resistant furniture with supportive cushions that can handle changing seasons. Durable materials may cost more initially, but they often provide better comfort and require fewer replacements over time.

    Create Different Spaces Without Dividing the Yard

    Create Different Spaces Without Dividing the Yard

    A backyard doesn’t need physical walls to serve different purposes. Thoughtful placement of furniture, planters, pathways, or outdoor rugs can define areas while keeping the entire space connected.

    A dining area can naturally transition into a casual seating corner, while an open section of lawn remains available for children, pets, or backyard games. This flexible layout allows multiple activities to happen at the same time without making the yard feel crowded.

    The goal isn’t to create separate rooms. It’s to give everyone a place where they feel comfortable spending time.

    Shade Makes Every Season More Enjoyable

    Even the most beautiful outdoor living space loses its appeal if people spend the afternoon searching for relief from the sun.

    Natural shade from mature trees creates a relaxed atmosphere while helping lower temperatures during warmer months. Pergolas, retractable awnings, umbrellas, and covered patios also provide protection without making the yard feel enclosed.

    Adding shade extends the amount of time families can comfortably enjoy meals, celebrations, or quiet evenings outside throughout the year.

    Lighting Changes the Atmosphere After Sunset

    Lighting Changes the Atmosphere After Sunset

    Outdoor gatherings often become more memorable once the sun goes down. Good lighting helps those moments last longer without overwhelming the space.

    Warm string lights suspended above seating areas create an inviting atmosphere while solar pathway lights improve visibility along walkways. Soft landscape lighting can highlight trees, garden beds, or architectural features without producing harsh glare.

    Rather than trying to make the backyard as bright as possible, focus on creating layers of light that encourage people to relax and stay awhile.

    Leave Room for Movement and Play

    Family gatherings rarely stay in one place. Children look for space to run, adults move between conversations, and guests naturally gather wherever activity is happening.

    Leaving an open section of lawn provides flexibility for everything from lawn games to casual play without requiring permanent equipment. Clear walking paths between seating areas also prevent the yard from feeling cramped during larger gatherings.

    A space that feels easy to move through often feels more welcoming than one filled with furniture.

    Nature Brings Comfort Without Trying Too Hard

    Nature Brings Comfort Without Trying Too Hard

    Landscaping should support the space instead of competing with it. Native plants, flowering shrubs, ornamental grasses, and layered greenery soften outdoor areas while attracting birds and pollinators.

    Choosing plants that thrive in local conditions also reduces watering and ongoing maintenance. If you’re planning a backyard that’s both inviting and practical, exploring ideas for low-maintenance outdoor spaces can help you create a landscape that’s easier to enjoy throughout the year instead of constantly maintaining.

    Simple planting choices often create a more relaxed atmosphere than highly structured gardens that demand constant attention.

    Think About Every Generation

    One of the biggest differences between an attractive backyard and one that truly brings families together is accessibility.

    Comfortable seating with supportive backs, stable walking surfaces, wide pathways, and easy access between indoor and outdoor areas make the space enjoyable for grandparents, parents, teenagers, and young children alike.

    Adding flexible seating options also allows the backyard to adapt as gatherings change. A quiet evening with close family may look very different from a birthday celebration or holiday barbecue, but a thoughtfully designed space works well for both.

    FAQs: Outdoor Family Gathering Spaces That Bring Everyone Together

    What makes outdoor family gathering spaces feel more welcoming?
    Comfortable seating, natural shade, good lighting, and a layout that encourages conversation usually make people want to stay longer and spend more time together.

    Do I need a large backyard to create a gathering space?
    No. Even a small patio or compact backyard can become inviting with smart furniture placement, flexible seating, and clear walking paths.

    What’s the best feature to add first?
    Start with a central seating or dining area. It naturally becomes the focal point for meals, conversations, and everyday family time before adding extra features.

    How can I make my outdoor space easier to maintain?
    Choose durable furniture, native plants, weather-resistant materials, and simple landscaping that requires less watering, pruning, and seasonal upkeep while still looking attractive.

    The Best Spaces Are the Ones People Keep Using

    Beautiful backyards certainly catch attention, but the ones that become part of family traditions are designed around everyday life. They’re comfortable enough for morning coffee, flexible enough for weekend cookouts, and welcoming enough that nobody feels ready to head inside too soon. Those moments don’t come from expensive upgrades. They come from creating a space where people naturally enjoy being together.

    When an outdoor space feels effortless to use, it often becomes the favorite room of the house, even without four walls.

  • How Deep Should Soil Be in a Raised Garden Bed?

    How Deep Should Soil Be in a Raised Garden Bed?

    My most productive raised beds have never been the tallest ones. They have been the beds with enough loose, fertile soil for the crops growing inside them.

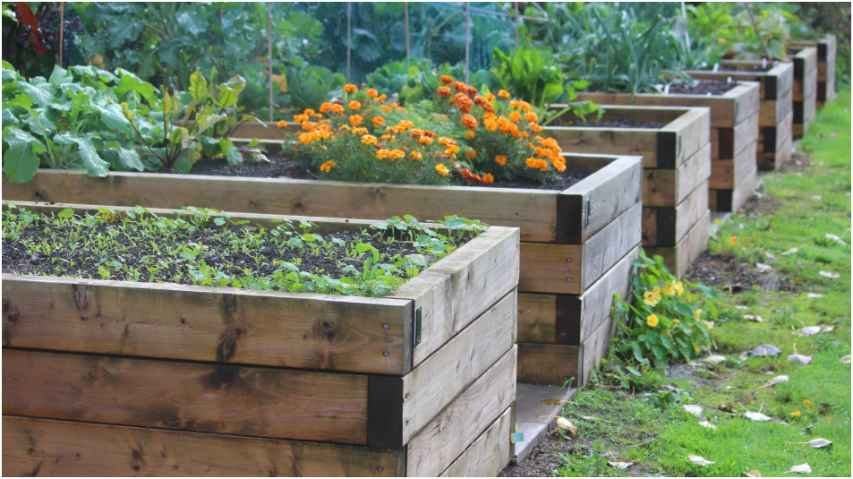
    So, how deep should soil be in a raised garden bed? I recommend 12 to 18 inches for a versatile vegetable bed. A depth of 6 to 8 inches can support leafy greens and other shallow-rooted crops. Tomatoes, potatoes, squash, and larger plants perform better with 18 to 24 inches of usable root space.

    The correct measurement also depends on what lies beneath the bed. Open ground can extend the root zone. Concrete, compacted gravel, or contaminated soil cannot.

    The Best Raised Bed Soil Depth

    For a mixed vegetable garden, 12 inches is a practical minimum. It accommodates many annual vegetables without making the bed unnecessarily expensive to fill. I prefer 15 to 18 inches when growing several crop types in the same space.

    Oregon State University Extension reports that approximately eight inches of prepared soil and organic material can provide adequate rooting space for many vegetables. Penn State Extension notes that most vegetables require at least six inches of soil. However, these figures represent workable minimums rather than the best depth for every crop.

    Deeper soil offers a larger reservoir for water and nutrients. It also gives roots more room during hot, dry weather. However, extra depth cannot compensate for compacted soil or blocked drainage.

    Soil Depth Requirements by Plant Type

    Soil Depth Requirements by Plant Type

    The answer to how deep should soil be in a raised garden bed becomes clearer when I group crops by their rooting habits. These measurements describe usable, loose soil rather than the total height of the bed’s frame.

    Shallow-Rooted Crops

    Provide 6 to 8 inches for lettuce, spinach, arugula, basil, radishes, green onions, and strawberries. These plants concentrate much of their growth near the surface.

    Long radish varieties need more room than round types. The University of Minnesota recommends loosening soil at least six inches for standard radishes and up to one foot for long varieties.

    Shallow beds dry quickly during summer. I add surface mulch and check moisture beneath the top layer rather than judging the bed by appearance alone.

    Medium-Rooted Vegetables

    Use 12 to 15 inches for beans, peppers, cucumbers, onions, beets, bush peas, and many carrots. This range gives roots space while keeping soil costs manageable.

    Carrots need loose soil for their entire expected length. A 10-inch carrot planted in eight inches of soft soil may fork when it reaches compacted ground.

    For a flexible family garden, I consider 12 inches the starting point. It supports crop rotation better than a six-inch bed designed around one season of greens.

    Deep-Rooted Crops

    Allow 18 to 24 inches for tomatoes, potatoes, pumpkins, squash, large eggplants, and perennial fruiting plants. These crops can survive in shallower beds, but a larger root zone improves stability and moisture access.

    A bed does not always need 24 inches of imported soil. When it sits over healthy, loosened ground, roots can continue below the frame. A bottomless 12-inch bed may therefore offer more usable depth than an 18-inch bed sitting on concrete.

    How the Surface Under the Bed Changes Depth

    How the Surface Under the Bed Changes Depth

    Before deciding how deep should soil be in a raised garden bed, I inspect the base. The surface below the frame determines whether roots can continue downward and whether excess water can escape.

    Raised Beds Over Open Ground

    Eight to 12 inches may be sufficient over healthy native soil. Remove turf, loosen the ground with a garden fork, and break any compacted layer before filling the frame.

    Do not place an impermeable sheet beneath the bed. Plain cardboard can suppress grass temporarily, but thick plastic blocks drainage and root movement.

    Test existing soil when contamination is possible. Raised beds are often used where native soil is unsuitable, but shallow beds do not isolate crops if roots can enter contaminated ground. USDA resources recognize raised beds as a solution for sites with limited or unsuitable topsoil.

    Raised Beds Over Concrete

    Use at least 12 inches over concrete for greens and compact crops. Choose 18 to 24 inches for tomatoes, squash, and other larger vegetables.

    Since roots cannot travel below the frame, every inch of their growing space must sit inside it. The container also needs unrestricted drainage. Elevate the frame slightly or provide multiple drainage outlets near its base.

    Avoid placing shallow beds in low spots on a patio. Escaping water must have somewhere to travel without pooling around the frame.

    Calculate Usable Root Depth Before Filling

    My “usable root zone” calculation prevents a common planning error. I subtract the settling allowance and mulch layer from the frame height before choosing crops.

    Consider a bed with 12-inch sides. Fresh soil may settle by about 1 to 2 inches. A 2-inch mulch layer leaves only 8 to 9 inches of active soil unless I refill the bed.

    That depth works for lettuce and radishes. It is less suitable for long carrots or heavily fruiting tomatoes. A nominal 12-inch frame is not always a 12-inch root zone.

    When someone asks me how deep should soil be in a raised garden bed, I suggest selecting the crop depth first. Then add approximately two inches for settling and another one or two inches of headspace or mulch.

    How Much Soil Does a Raised Bed Need?

    How Much Soil Does a Raised Bed Need?

    Multiply the bed’s length by its width and soil depth in feet. The result is the required volume in cubic feet.

    A 4-by-8-foot bed filled 12 inches deep needs:

    4 × 8 × 1 = 32 cubic feet

    Bagged soil is often sold in 1-, 1.5-, or 2-cubic-foot packages. That same bed requires sixteen 2-cubic-foot bags before allowing for settling.

    For an 18-inch depth, multiply by 1.5 feet:

    4 × 8 × 1.5 = 48 cubic feet

    This calculation helps me compare bulk delivery with bagged products before buying. I normally order a little extra because freshly blended soil settles after watering.

    Filling a Deep Raised Bed Without Wasting Money

    I use a balanced soil blend rather than filling the bed with compost alone. The University of Minnesota recommends approximately one-half to two-thirds topsoil with one-third to one-half plant-based compost.

    Too much compost can create excessive nutrient levels, poor structure, or rapid settling. Oregon State University recommends adding three to four inches of compost when establishing a new vegetable bed rather than treating compost as the entire growing medium.

    Extra-tall beds may contain coarse woody material near the bottom, but I keep at least 12 to 18 inches of quality growing mix above it. Logs and branches shrink as they decompose. They can also cause uneven settling.

    Once plants are established, natural ways to control slugs in a vegetable garden can help protect seedlings without turning the raised bed into a chemical battleground.

    Common Raised Bed Depth Mistakes

    Do not fill a deep frame with untreated native clay or construction fill. Oregon State University warns that dense, unamended soil in beds 18 inches or deeper can drain poorly and restrict plant growth.

    Avoid filling soil to the rim. Leave one or two inches so irrigation, mulch, and heavy rain do not wash soil over the sides.

    Never assume deeper automatically means better. A 24-inch bed filled with compacted material performs worse than a 12-inch bed containing loose, stable soil.

    Do not overlook water needs either. Raised beds can dry faster than surrounding ground. The University of Minnesota recommends checking below the surface and watering when soil is dry two inches down.

    Frequently Asked Questions

    1. How deep should soil be in a raised garden bed for tomatoes?

    Provide 18 to 24 inches where possible, or use a 12-inch bottomless bed over loose, uncontaminated native ground.

    2. Is eight inches deep enough for a raised vegetable bed?

    Eight inches can support lettuce, herbs, radishes, spinach, and compact crops, but it limits long roots and dries relatively quickly.

    3. How deep should a raised bed be over grass?

    A depth of 8 to 12 inches can work after removing or smothering grass and loosening the native soil beneath the frame.

    4. Does a raised bed need a bottom?

    A bed over healthy ground usually needs no solid bottom. Beds on patios require containment, drainage holes, and enough depth for complete root development.

    Give Those Roots Some Room

    After testing several layouts, I no longer choose bed depth by appearance. I choose it according to crops, base conditions, drainage, and usable soil after settling.

    For most home vegetable gardens, 12 to 18 inches offers the best balance of root room, water storage, flexibility, and cost. Use 6 to 8 inches for shallow crops and 18 to 24 inches for larger plants over hard surfaces.

    Before ordering soil, measure the bed, calculate its cubic volume, and add a small settling allowance. Your plants cannot admire a tall garden frame, but their roots will notice every usable inch.

  • Top Low Maintenance Edible Garden Ideas for Easy Harvests

    Top Low Maintenance Edible Garden Ideas for Easy Harvests

    A small edible garden once turned into a daily round of watering, weeding, tying stems, and checking leaves for pests. That experience taught me that planning matters more than garden size. These low maintenance edible garden ideas use perennial crops, hardy herbs, efficient layouts, and simple watering systems to produce useful harvests without constant attention.

    A low-effort garden is carefully designed so plants suit the climate, water reaches roots efficiently, weeds remain covered, and every crop earns its place.

    Key Takeaways

    • Start with a growing area that matches your available time.
    • Choose perennial crops and repeat-harvest vegetables.
    • Use raised beds, mulch, and drip irrigation.
    • Group plants with similar growing needs.
    • Grow foods you regularly cook and enjoy.

    Plant Once And Harvest For Years

    Perennial edibles return for several seasons, reducing yearly planting and soil preparation. They need patience while establishing, but mature plants often produce reliably with basic seasonal care.

    Rhubarb For Long Harvests

    Rhubarb develops decorative leaves and colorful edible stalks. A healthy crown can remain productive for years in a cool climate with fertile, well-drained soil for indoor herb garden. Give each plant enough room because mature clumps spread widely.

    Harvest only the stalks because the leaves are not edible. Avoid heavy harvesting during the first year, then add compost each spring to support growth.

    Blueberries As Edible Hedges

    Blueberries combine ornamental value with dependable fruit. Their flowers, berries, and fall color allow them to replace ordinary shrubs along sunny boundaries.

    They need acidic soil, steady moisture, and varieties suited to local winters. Two compatible cultivars may improve pollination. Mulch protects their shallow roots and helps maintain moisture.

    Asparagus For Spring Picking

    Asparagus returns each spring from established crowns. It prefers full sun and well-drained soil, so choose a permanent bed carefully.

    Limit harvesting during the first two seasons. Later, pick spears for several weeks, then let the remaining growth develop into ferns that recharge the roots.

    Tough Herbs With Little Fuss

    Woody culinary herbs provide flavor, fragrance, flowers, and structure. Most prefer strong sun and fast-draining soil rather than frequent watering or rich fertilizer.

    Tough Herbs With Little Fuss

    Rosemary And Thyme

    Rosemary and thyme tolerate dry periods once established. Grow them in raised beds, gravelly borders, or containers with drainage holes. In cold regions, keep rosemary in a movable pot and protect it during freezing weather.

    Sage And Oregano

    Sage forms a rounded plant, while oregano spreads along sunny bed edges. Both tolerate occasional neglect after their roots settle.

    Trim them after flowering to encourage compact growth. Divide oregano when it begins crowding nearby crops.

    Chives For Neat Clumps

    Chives form tidy clumps and produce edible shoots followed by purple flowers. They fit beside paths, around raised beds, or in containers near the kitchen.

    Cut leaves near the base and let fresh shoots return. Divide crowded clumps every few years to maintain growth.

    Clever Layouts That Save Work

    A practical layout reduces walking, reaching, and mismatched care. Keep frequently harvested herbs near the house and leave enough space between plants for airflow.

    Clever Layouts That Save Work

    Edible Hedges Along Boundaries

    Rows of blueberries, currants, rosemary, or compact fruit bushes can define paths and property edges while producing food.

    Choose plants for the local climate and mature size. Run drip tubing beneath mulch to water the entire row efficiently.

    Creeping Thyme Ground Cover

    Creeping thyme grows between stepping stones and along sunny paths. Its low growth shades bare soil, discourages some weeds, and softens hard surfaces. Use it where foot traffic is light and drainage is good.

    Raised Beds For Easy Reach

    Raised beds create defined growing zones, improve access, and allow control over soil quality. Narrow beds keep plants within easy reach, while taller beds reduce bending.

    Add compost, mulch, and drip tubing before plants become large. Check moisture regularly because raised soil can dry faster than ground-level beds.

    Easy Watering And Soil Care

    A simple watering system and covered soil can save more time than choosing an easy crop. They prevent repeated hand watering and support steadier growth.

    Use Self-Watering Containers

    Self-watering containers hold a reservoir below the potting mix. Roots draw moisture upward, reducing rapid drying during warm weather.

    They suit basil, parsley, peppers, lettuce, and compact tomatoes. Check reservoirs during hot weather and refresh old potting mix between seasons.

    Add Mulch Around Plants

    Spread two to three inches of straw, shredded leaves, or untreated wood chips around established plants. Keep mulch away from stems.

    Mulch slows evaporation, blocks many weeds, reduces temperature swings, and protects the soil surface.

    How To Use Low Maintenance Edible Garden Ideas

    How To Use Low Maintenance Edible Garden Ideas

    Applying low maintenance edible garden ideas starts with a small sunny location near water. Measure the space, note the hours of direct light, and choose containers, a raised bed, or an edible border.

    List the foods your household uses, then select three to six dependable plants with similar needs. Combine perennial herbs with repeat-harvest greens and install drip irrigation or self-watering containers before planting.

    Cover open soil with mulch, label perennial crops, and inspect the garden briefly each week. Harvest regularly, remove damaged leaves, and expand only when the first area remains manageable.

    Common Problems To Avoid

    Low-effort gardens become demanding when too many crops share a small area. Crowding restricts airflow, increases competition, and makes pest inspection harder.

    Avoid large vining crops unless there is enough room and support. Indeterminate tomatoes, melons, and sprawling squash usually require more tying, feeding, training, and harvesting.

    Read plant labels and plan for mature size. Compact, bush, patio, and dwarf varieties are usually easier in small beds and containers.

    Frequently Asked Questions

    1. What Are The Best Low Maintenance Edible Garden Ideas For Beginners?

    The best low maintenance edible garden ideas include a three-pot herb garden, one mulched raised bed, self-watering containers, and perennial herbs planted near the kitchen.

    2. Which Edible Plants Return Every Year?

    Asparagus, rhubarb, blueberries, strawberries, chives, oregano, thyme, sage, sorrel, and suitable fruit bushes return for years when matched to local soil and climate.

    3. Are Raised Beds Easier To Maintain?

    Raised beds can reduce bending, improve drainage, control soil quality, and limit spreading weeds, especially when combined with mulch and timer-controlled drip irrigation.

    4. How Much Weekly Care Does A Small Garden Need?

    A small mulched garden with automated watering may need fifteen to thirty minutes of weekly care, although harvesting, weather, pests, and plant choice affect the total.

    Grow More And Fuss Less

    The best low maintenance edible garden ideas depend on thoughtful choices rather than neglect. Perennial crops, hardy herbs, edible hedges, raised beds, mulch, and efficient watering reduce repetitive work while keeping harvests useful. Start with one manageable space, match plants to your climate, and grow foods you enjoy. A simple garden should make fresh eating easier, more rewarding, and much less stressful.

  • How Low-Maintenance Outdoor Spaces Are Changing Modern Backyards

    How Low-Maintenance Outdoor Spaces Are Changing Modern Backyards

    I’ve always admired beautiful backyards, but I used to think they came with an endless list of chores. Every weekend seemed to involve mowing the lawn, pulling weeds, trimming plants, or cleaning up after the weather. It didn’t take long to realize that spending more time maintaining an outdoor space meant spending less time actually enjoying it.

    That changed once I started noticing how many homeowners were simplifying their yards instead of adding more work to them. The best outdoor spaces weren’t necessarily the biggest or the most expensive. They were thoughtfully designed, easy to care for, and inviting enough to enjoy throughout the year. That’s exactly why low-maintenance outdoor spaces have become one of the biggest trends in modern backyard design.

    Why Simplicity Is Shaping Today’s Outdoor Spaces

    People are rethinking what they want from their backyards. Instead of creating landscapes that causes constant attention, they’re looking for spaces that fit naturally into busy lifestyles. A backyard should be somewhere to relax after work, gather with friends, or enjoy a quiet morning, not another item on the weekend to-do list.

    This shift has encouraged homeowners to focus on designs that reduce upkeep without sacrificing comfort or style. Smarter layouts, durable materials, and carefully chosen plants all contribute to outdoor spaces that stay attractive with much less effort.

    Less Lawn, More Living Space

    Large lawns have long been considered the centerpiece of a backyard, but they also require the most maintenance. Regular mowing, watering, fertilizing, and repairing worn patches quickly add up throughout the year.

    Many homeowners are now reducing grass coverage and replacing it with patios, seating areas, or decorative landscaping. Rather than one large open lawn, outdoor spaces are divided into practical zones for dining, relaxing, entertaining, or gardening.

    This approach makes the backyard feel more purposeful while significantly reducing routine maintenance.

    Hardscaping Does More of the Heavy Lifting

    Hardscaping Does More of the Heavy Lifting

    Hardscaping has become one of the biggest reasons modern backyards are easier to maintain.

    Natural stone, concrete pavers, gravel pathways, and composite decking create durable surfaces that hold up well in changing weather. Unlike poured concrete, modular pavers offer another advantage. If one section becomes damaged, individual pieces can often be replaced without disturbing the entire patio.

    Hard surfaces also reduce muddy areas, limit weed growth, and create cleaner transitions between different parts of the yard.

    Plants That Practically Take Care of Themselves

    One of the smartest landscaping decisions starts with choosing the right plants rather than simply choosing attractive ones.

    Native plants naturally adapt to local soil and climate conditions, making them easier to maintain than wide ornamental varieties. Drought-tolerant grasses, lavender, succulents, evergreen shrubs, and other regional species typically require less watering while continuing to look healthy throughout the seasons.

    Adding mulch around planting beds makes the job even easier. Organic bark or decorative gravel helps retain soil moisture, reduces weed growth, and protects plant roots during temperature changes. It also creates a cleaner, more finished appearance with very little ongoing effort.

    Smarter Watering Saves Time and Resources

    Watering doesn’t have to become part of every daily routine.

    Many homeowners now install drip irrigation systems that deliver water directly to plant roots instead of spraying large areas unnecessarily. Timers allow watering to happen automatically during cooler parts of the day, reducing evaporation and helping plants stay healthy without constant attention.

    These systems also support water conservation, making them a practical long-term investment for both the landscape and household utility costs.

    Outdoor Furniture Is Built to Last

    Outdoor Furniture Is Built to Last

    Furniture has improved just as much as landscaping materials.

    Weather-resistant aluminum, powder-coated steel, composite materials, and high-performance outdoor fabrics require very little maintenance compared to older wood furniture that demanded frequent sanding, staining, or sealing.

    Choosing durable furniture means spending more time enjoying the patio instead of preparing it for every season.

    If you’re also interested in designing an outdoor lifestyle on a budget, investing in long-lasting furniture and durable landscaping materials often provides better value than replacing inexpensive pieces every few years.

    Artificial Turf Is Becoming a Practical Alternative

    For homeowners who love the appearance of green grass but not the maintenance, artificial turf has become an increasingly popular option.

    Modern synthetic grass looks far more natural than earlier versions while eliminating mowing, watering, fertilizing, and seasonal reseeding. It works especially well in smaller backyards, play areas, and spaces where maintaining natural grass has become difficult.

    Although installation costs can be higher initially, many homeowners appreciate the long-term reduction in maintenance and water use.

    Small Design Choices Make the Biggest Difference

    Small Design Choices Make the Biggest Difference

    Creating a low-maintenance backyard isn’t always about a complete renovation. Often, it’s the smaller decisions that have the greatest impact.

    • Replace high-maintenance flower beds with native plants.
    • Add mulch to reduce weeds and watering.
    • Create defined pathways to protect planted areas.
    • Choose storage benches that reduce outdoor clutter.
    • Group plants with similar watering needs together.

    These simple upgrades help the entire backyard stay organized, healthier, and easier to care for throughout the year.

    FAQs: How Low-Maintenance Outdoor Spaces Are Changing Modern Backyards

    What makes an outdoor space low maintenance?
    A low-maintenance outdoor space uses durable materials, easy-care plants, efficient watering systems, and practical layouts that reduce mowing, pruning, and frequent upkeep.

    Are native plants better for low-maintenance landscaping?
    In many cases, yes. Native plants adapt well to local conditions, usually need less water, and often require fewer fertilizers or pesticides than non-native species.

    Is artificial turf worth considering?
    Artificial turf can be a good choice for homeowners who want a consistently green lawn without mowing or watering, especially in smaller spaces.

    Do low-maintenance backyards still look attractive?
    Absolutely. Thoughtful design, quality materials, layered planting, and functional outdoor spaces often create landscapes that are both beautiful and easy to maintain.

    The Best Outdoor Spaces Aren’t the Ones That Need the Most Work

    A beautiful backyard doesn’t have to demand every free weekend. The growing popularity of low-maintenance outdoor spaces proves that thoughtful design often delivers better results than constant upkeep. By choosing durable materials, reducing unnecessary lawn space, and selecting plants that naturally thrive, homeowners can create outdoor areas that feel welcoming in every season without becoming another household chore.

    The less time spent maintaining your backyard, the more time you’ll have to enjoy everything it was designed for.

  • Designing an Outdoor Lifestyle on a Budget Without Sacrificing Comfort

    Designing an Outdoor Lifestyle on a Budget Without Sacrificing Comfort

    I used to think creating an outdoor space worth spending time in meant saving for expensive patio furniture, custom landscaping, and all the picture-perfect setups I kept seeing online. Every time I compared my backyard with those polished spaces, it felt like I needed a much bigger budget before I could enjoy it. Then I stopped looking at price tags and started paying attention to how people actually used their outdoor spaces. That completely changed my approach.

    What surprised me most was how little money it took to make the space feel inviting. A comfortable chair, a few plants, better lighting, and a place to gather in the evening made a bigger difference than expensive upgrades ever could. Designing an outdoor lifestyle on a budget became less about decorating and more about creating a place I genuinely wanted to use every day.

    Start With How You Want to Live Outdoors

    Start With How You Want to Live Outdoors

    One of the biggest mistakes people make is buying outdoor furniture before deciding how they’ll actually use the space. A backyard that hosts weekend barbecues needs a different layout than one meant for quiet mornings with coffee or an evening reading spot.

    Think about the activities you enjoy most. Maybe it’s gardening, dining outside, entertaining friends, or simply relaxing after work. Once you know the purpose, every purchase becomes easier because you’re building around your lifestyle instead of chasing trends.

    If you’re looking for more inspiration beyond budgeting, exploring outdoor living ideas for modern homes can help you find layouts and design concepts that match the way you spend time outside.

    Spend More Where It Matters

    A limited budget doesn’t mean every purchase should be the cheapest option available.

    Choose durable, weather-resistant furniture for the pieces you’ll use every day. Spending a little more on comfortable seating often provides better value than replacing inexpensive chairs every season.

    For decorative items, however, there are plenty of affordable alternatives. Outdoor cushions, lanterns, rugs, and planters are easy to update over time without stretching your budget.

    Creating balance between investment pieces and budget-friendly accessories usually produces better results than trying to replace everything at once.

    Give Old Furniture a New Purpose

    Some of the most interesting outdoor spaces aren’t filled with brand-new furniture. They’re built from creative ideas and a little patience.

    A second-hand metal chair can look completely different after a fresh coat of weather-resistant spray paint. Wooden pallets can become comfortable outdoor seating when paired with quality cushions, while unused crates or reclaimed timber can be transformed into side tables or plant stands.

    Repurposing materials doesn’t just save money. It creates a space that feels personal instead of looking like every other patio in the neighborhood.

    Use Lighting to Change the Mood

    Use Lighting to Change the Mood

    Lighting often has the biggest impact after sunset, yet it’s one of the easiest upgrades to make on a budget.

    Solar-powered string lights create a warm atmosphere without increasing electricity costs. Battery-operated lanterns add soft lighting around seating areas, while solar stake lights improve visibility along garden paths.

    Instead of relying on one bright light, layering several smaller light sources creates a much more welcoming outdoor environment.

    Plants Make Every Space Feel More Complete

    You don’t need professional landscaping to enjoy a greener backyard.

    Grouping potted plants at different heights creates depth while making smaller patios feel fuller. Herbs like rosemary, mint, thyme, and basil are inexpensive to grow and provide practical benefits in the kitchen as well.

    Vertical planters and hanging baskets also help maximize space, especially on patios, balconies, or compact yards where every square foot matters.

    Choosing native or low-maintenance plants reduces watering and upkeep while keeping your outdoor space looking healthy throughout the seasons.

    Comfort Is More Than Just Furniture

    Comfort Is More Than Just Furniture

    Comfort comes from the details people often overlook.

    An outdoor rug softens concrete or decking underfoot while helping define seating areas. Fade-resistant throw pillows make chairs more inviting, and lightweight blankets extend the time you can comfortably spend outdoors during cooler evenings.

    Simple bamboo shades or outdoor curtains also provide privacy while reducing harsh afternoon sunlight, making the space more enjoyable throughout the day.

    These small additions often strengthen your daily routine more than expensive decorative features.

    Build Your Space One Step at a Time

    One reason outdoor projects become overwhelming is the pressure to finish everything at once.

    Instead of buying every item in a single weekend, focus on one improvement each month. Start with seating, then add lighting, plants, storage, or decorative accessories as your budget allows.

    This gradual approach gives you time to discover what the space actually needs instead of filling it with items that rarely get used. It also spreads costs over time, making the project feel much more manageable.

    FAQs: Designing an Outdoor Lifestyle on a Budget Without Sacrificing Comfort

    What is the most affordable way to improve an outdoor space?
    Start with comfortable seating, good lighting, and a few potted plants. These simple upgrades create a noticeable difference without requiring a large investment.

    Can I create an outdoor living area without buying new furniture?
    Yes. Many people repaint second-hand furniture, build pallet seating, or reuse existing pieces with new cushions and outdoor fabrics for a fresh look.

    Which plants work well for a budget-friendly outdoor space?
    Low-maintenance herbs, native plants, and hardy perennials provide lasting greenery while keeping watering, replacement, and maintenance costs low.

    Should I decorate everything at once?
    No. Improving one section at a time helps you stay within budget, avoid unnecessary purchases, and create a space that grows naturally with your needs.

    The Best Outdoor Spaces Are the Ones You Actually Use

    Designing an outdoor lifestyle on a budget isn’t about proving how little you spent. It’s about creating a space that invites you outside more often. Whether that’s enjoying breakfast in the fresh air, hosting friends on a summer evening, growing herbs for dinner, or simply taking a break after a long day, those everyday moments matter far more than expensive furniture or elaborate landscaping. A thoughtful design almost always outlasts an expensive one because it’s built around the way you actually live.

    The most comfortable outdoor space isn’t the one with the biggest budget. It’s the one that keeps calling you back outside.