Author: Margaret Ellison

  • How To Prepare Compacted Soil For Planting

    How To Prepare Compacted Soil For Planting

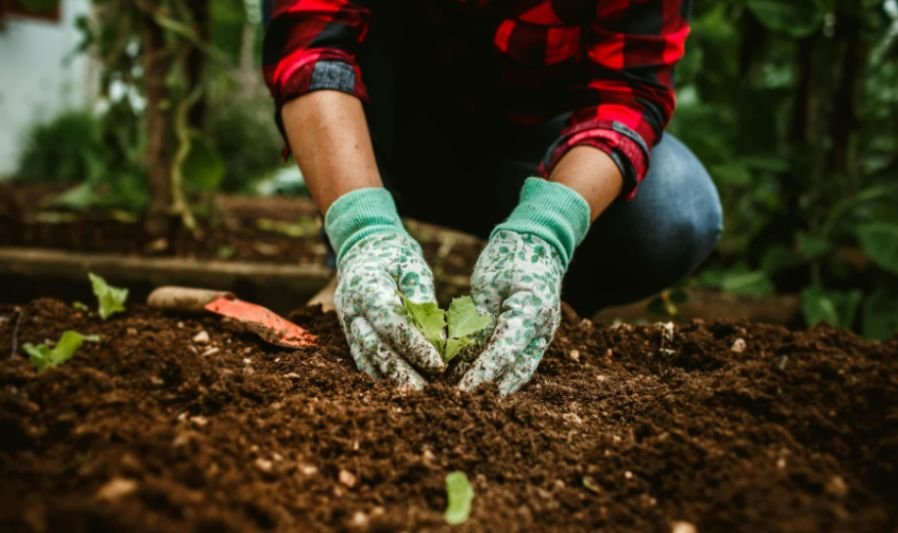
    I learned the hard way that planting into hard ground almost always leads to weak roots and disappointing harvests. 

    After improving several compacted garden beds, I discovered that How to prepare compacted soil for planting is less about digging deeper and more about restoring healthy soil structure. 

    Once I stopped treating the surface alone and focused on rebuilding the soil beneath, my vegetables and flowers established much faster.

    Why Compacted Soil Causes Plant Problems

    Why Compacted Soil Causes Plant Problems

    Healthy soil contains thousands of tiny air pockets that allow roots, water, and beneficial microbes to thrive. Compacted soil squeezes those spaces shut. Instead of spreading naturally, roots circle near the surface and struggle to absorb nutrients.

    Poor drainage often follows. Heavy rain sits on the surface, while dry periods leave the ground almost impossible to wet.

    Learning how to fix poor drainage in a garden bed can help gardeners address standing water, improve soil aeration, and create better conditions for deeper root growth before planting.

    According to USDA Natural Resources Conservation Service, healthy soil structure directly affects water movement, oxygen availability, and root development.

    Signs Your Soil Is Compacted

    Several warning signs usually appear before plants begin failing:

    • Water puddles after rain.
    • Garden tools struggle to penetrate the soil.
    • Roots grow sideways instead of downward.
    • Grass or vegetables remain stunted.
    • Soil dries into hard crusts after watering.

    If you notice multiple symptoms, improving soil structure should come before planting.

    Test Your Soil Before You Start

    Test Your Soil Before You Start

    Digging at the wrong time can actually make compaction worse.

    The Simple Crumb Test

    I always squeeze a handful of soil before grabbing my garden fork. If it forms a sticky ball that refuses to crumble, it is too wet. If it falls apart like dust, it is too dry.

    The ideal soil holds together briefly before breaking apart with gentle pressure. This simple test prevents unnecessary damage to soil structure.

    Identify Your Soil Type

    Different soils benefit from different amendments.

    Clay soils improve with chunky compost or pine bark soil conditioner because they create larger air spaces.

    Loamy soils usually need standard compost to replace lost organic matter.

    Sandy soils benefit from finished compost, which increases moisture retention while feeding beneficial microorganisms.

    Step-by-Step: How To Prepare Compacted Soil For Planting

    Step-by-Step: How To Prepare Compacted Soil For Planting

    Clear the Planting Area

    Remove weeds completely, including their roots. Pull away rocks, old mulch, and plant debris that could interfere with loosening the soil.

    A clean workspace allows amendments to mix evenly into the existing ground.

    Loosen the Soil Properly

    Instead of aggressively tilling, I insert a sturdy garden fork about 6 to 12 inches into the soil. I gently rock it backward without turning over the entire soil profile.

    This fractures the compacted layer while preserving earthworms and naturally formed soil aggregates.

    Research from several university extension programs shows that excessive tilling often destroys soil structure and leads to faster recompaction.

    Add Organic Matter the Right Way

    Spread two to three inches of organic matter across the loosened area.

    Compost improves fertility while increasing microbial activity. Pine bark soil conditioner works especially well in dense clay because larger particles help maintain long-term pore spaces.

    Organic matter gradually transforms hard soil into a softer growing environment.

    Mix Without Creating Layers

    One mistake I made years ago was spreading topsoil over hard ground without blending it.

    The result looked beautiful until water pooled between the two layers.

    Now I thoroughly mix compost into the loosened native soil at approximately a 50:50 ratio. This creates consistent drainage and encourages roots to grow deeper instead of stopping at an artificial barrier.

    If you’re also building raised beds, understanding How deep should soil be in a raised garden bed helps create the ideal rooting environment from the beginning.

    Water Before Planting

    After mixing everything together, I water the bed deeply.

    Moisture settles the soil naturally while activating beneficial bacteria and fungi that begin breaking down organic material.

    Allow the bed to rest overnight before planting if possible.

    Finish with Mulch

    Once plants are in place, cover the surface with about two inches of mulch.

    Shredded leaves, straw, or wood chips help regulate soil temperature, reduce evaporation, and prevent the surface from hardening after rain.

    Mulch also protects the improvements you just made beneath the surface.

    Common Mistakes That Make Compaction Worse

    Many gardeners accidentally recreate compaction within weeks.

    Walking directly across planting beds compresses the soil again. I always use stepping stones or designated pathways to spread weight.

    Overusing rototillers also causes problems. While freshly tilled soil appears loose, repeated mechanical tilling destroys natural aggregates and often creates an even harder layer below the tilling depth.

    Adding fine sand to heavy clay is another mistake. Fine sand combines with clay particles and forms a dense mixture similar to brick.

    My Tested Soil Recovery Timeline

    One practice that consistently improved my results was allowing the soil a short recovery period.

    After incorporating compost and watering thoroughly, I wait about 24 to 48 hours before planting seedlings. During this time, moisture redistributes evenly, soil microbes become active, and the surface settles naturally.

    Although this brief pause seems minor, I consistently notice faster root establishment compared with planting immediately after digging.

    Keep Soil Loose for Years

    Long-term success depends more on prevention than repeated repair.

    Add fresh compost each season instead of relying on chemical fertilizers alone.

    Leave roots in place after harvest whenever practical because decaying roots naturally create channels for water and air.

    Avoid working soil during extremely wet conditions, since heavy pressure permanently collapses soil pores.

    Finally, maintain mulch year-round. Healthy soil stays covered in nature, and garden beds benefit from the same protection.

    Frequently Asked Questions

    1. How to prepare compacted soil for planting vegetables?

    Loosen the soil 6 to 12 inches deep, mix compost into the native soil, water thoroughly, and mulch after planting.

    2. Can I plant immediately after loosening compacted soil?

    Waiting about one day allows moisture to settle evenly and improves early root establishment.

    3. Is compost better than topsoil for compacted ground?

    Yes. Compost improves soil structure and microbial activity, while topsoil alone may create drainage problems if layered.

    4. Can earthworms naturally reduce soil compaction?

    Yes. Healthy worm populations gradually improve aeration and create natural channels that help roots grow deeper.

    From Hard Ground to Happy Roots

    Every successful garden starts below the surface. Once I stopped fighting compacted soil and started rebuilding it, healthier plants became much easier to grow. Small improvements, such as using compost correctly, avoiding unnecessary tilling, and protecting the soil with mulch, produced lasting results season after season. Treat your soil as a living ecosystem, and it will reward you with stronger roots, healthier plants, and a far more productive garden.

  • Outdoor Living Ideas for Modern Homes That Work in Every Season

    Outdoor Living Ideas for Modern Homes That Work in Every Season

    I used to think an outdoor space was something you enjoyed only when the weather was perfect. A sunny afternoon meant sitting outside with a coffee, while the rest of the year the patio stayed empty. After spending more time improving my own outdoor setup, I realized the biggest difference wasn’t buying expensive furniture. It was making the space comfortable enough that I actually wanted to use it throughout the year.

    That experience changed how I look at outdoor design. The best outdoor spaces don’t wait for a special occasion. They become part of everyday life, whether it’s reading before work, sharing dinner with family, or relaxing after a long day. That’s exactly why outdoor living ideas for modern homes are becoming less about decoration and more about creating spaces people naturally use every season.

    Why Outdoor Spaces Are Becoming Everyday Living Areas

    Why Outdoor Spaces Are Becoming Everyday Living Areas

    Modern homes are no longer defined by what happens inside four walls. Patios, decks, balconies, and backyards have become extensions of kitchens, living rooms, and dining areas. Instead of treating these spaces as occasional gathering spots, homeowners are designing them to support everyday routines.

    The biggest shift isn’t style. It’s functionality. A well-planned outdoor space feels comfortable on a cool evening, remains practical during warmer months, and requires less maintenance throughout the year. That balance makes the investment worthwhile long after the latest design trend disappears.

    Create Shelter That Adapts to Changing Weather

    One of the smartest improvements is adding flexible overhead coverage instead of relying on permanent shade alone.

    Retractable awnings and louvered roof systems allow you to enjoy sunshine when you want it while providing protection from rain or intense afternoon heat. Pergolas paired with adjustable shade panels create a similar effect without making the space feel enclosed.

    Large sliding glass doors also help connect indoor and outdoor areas. When opened, they create a seamless transition that makes both spaces feel larger and more inviting.

    Using the same stone, porcelain tile, or concrete flooring inside and outside further strengthens that connection. Continuous flooring creates visual flow while making movement between spaces feel effortless.

    Design Separate Areas for Different Activities

    Design Separate Areas for Different Activities

    Outdoor spaces work better when every section has a purpose.

    Rather than placing furniture randomly across a patio, divide the area into practical zones. A dining area near the grill, a comfortable seating space for conversation, and a quiet corner for reading or morning coffee all encourage people to use the space more often.

    This approach also makes smaller yards feel organized instead of crowded. Even compact patios benefit from thoughtful layouts that improve movement and reduce clutter.

    Choose Materials Built for Every Season

    Beautiful furniture doesn’t stay beautiful if it can’t handle changing weather.

    Powder-coated aluminum frames resist rust while remaining lightweight enough to rearrange when needed. Teak continues to be a favorite because it naturally handles moisture, sunlight, and temperature changes without losing its character.

    Performance fabrics have also improved dramatically. Quick-drying foam cushions wrapped in UV-resistant, water-resistant covers stay comfortable while requiring far less maintenance than traditional outdoor cushions.

    When selecting outdoor furniture, think about long-term value rather than short-term appearance. Durable materials often deliver a better cost-per-wear over many years of daily use.

    Make Comfort a Priority All Year

    Make Comfort a Priority All Year

    A comfortable outdoor space isn’t reserved for summer.

    Built-in fire tables provide both warmth and a natural gathering point during cooler evenings. Infrared patio heaters are another practical option because they warm people directly instead of heating the surrounding air, making them effective even when there’s a light breeze.

    Layered outdoor lighting also extends the usability of a space. Soft pathway lighting improves safety, overhead fixtures brighten dining areas, and accent lighting highlights landscaping without creating harsh glare.

    Small additions like outdoor rugs, weather-resistant throws, and side tables make the space feel as welcoming as an indoor living room.

    Bring Nature Into the Design

    Plants often determine whether an outdoor space feels complete. Thoughtfully chosen greenery helps create outdoor spaces that improve wellbeing through nature, light, and simple design, making gardens and patios more inviting, calming, and enjoyable year-round

    Instead of relying only on seasonal flowers, include evergreen shrubs, ornamental grasses, and container plants that provide structure throughout the year. They maintain color and texture while requiring relatively little maintenance.

    Native plants are another smart choice because they’re naturally adapted to local growing conditions. They generally require less water, support local pollinators, and reduce the amount of ongoing care needed.

    Combining greenery with natural materials such as wood, stone, and gravel creates a balanced landscape that remains attractive regardless of the season.

    Think Beyond Entertaining

    Think Beyond Entertaining

    Many outdoor spaces are designed around hosting guests a few times each year. In reality, they’re far more valuable when they support everyday life.

    A comfortable chair for reading, a small table for working outdoors, or a quiet place to enjoy breakfast often brings more value than oversized seating arrangements that rarely get used.

    The most successful outdoor living ideas for modern homes focus on daily habits instead of occasional events. When a space fits naturally into your routine, it becomes one of the most enjoyable parts of the home.

    FAQs: Outdoor Living Ideas for Modern Homes That Work in Every Season

    How can I make an outdoor space comfortable year-round?
    Use adjustable shade, weather-resistant furniture, outdoor heating, layered lighting, and durable materials that perform well through changing seasons.

    What furniture lasts longest outdoors?
    Powder-coated aluminum, teak, and high-quality synthetic wicker paired with UV-resistant performance fabrics are among the most durable choices.

    Do small outdoor spaces benefit from zoning?
    Yes. Creating separate areas for dining, relaxing, or gardening improves functionality without making the space feel crowded.

    Which plants work well throughout the year?
    Evergreen shrubs, ornamental grasses, native plants, and container gardens provide lasting structure, require less maintenance, and keep outdoor spaces looking attractive across multiple seasons.

    A Backyard That Grows With Everyday Life

    The best outdoor spaces aren’t the ones with the biggest budgets or the newest furniture. They’re the ones people actually use. A few thoughtful improvements, durable materials, comfortable seating, and practical layouts often make a bigger difference than a complete renovation. As lifestyles continue to evolve, outdoor areas are becoming places where everyday moments happen instead of spaces reserved for weekends or special occasions.

    When an outdoor space feels inviting in every season, it naturally becomes another room you’ll never want to leave.

  • How to Harvest Basil for Continuous Growth in Your Garden

    How to Harvest Basil for Continuous Growth in Your Garden

    Walking into thie garden with snips brings pure joy, especially when learning how to harvest basil for continuous growth turns a single small pot into a massive leafy jungle. Fresh homemade pesto is the ultimate summer reward, and tweaking simple pruning cuts makes an incredible difference in leaf yields.

    Understanding Basil Plant Growth Dynamics

    Every thriving herb patch relies on basic botanical secrets to maximize leaf output.

    The Magic of Leaf Nodes and Side Shoots

    Pinpointing the exact spot where leaves attach to stems unlocks rapid branching potential. Every stem features joints called leaf nodes, which are the spots where main leaves connect to the central stalk. Inside the junction of these leaves sit two tiny, dormant new leaves sprouting from the side. When you cut the main stem, you send plant signals that force those two tiny side shoots to explode into two full new branches.

    This natural doubling effect turns a single slender stem into a thick, bushy powerhouse over a short timeframe. Instead of growing straight up like a sparse stick, the plant spends energy building wide horizontal coverage. Understanding this anatomical trick helps you trim with complete confidence every single week.

    Lower Leaves Serve as Photosynthetic Powerhouses

    Lower Leaves Serve as Photosynthetic Powerhouses

    Protecting the large foliage near the soil surface keeps your plant energized for quick recovery. Beginner gardeners frequently strip the large bottom leaves because they are easy to reach. However, those wide base leaves act as primary solar panels, absorbing daylight to fuel deep root expansion. Removing them starves the plant, causing severe shock and slowing down overall plant production.

    Always leave lower levels completely intact so the root system stays strong and active. These mature leaves manufacture necessary sugars that feed young side shoots after heavy clipping. Keeping bottom leaves safe guarantees fast recovery between your culinary harvests.

    Soil Nutrition and Roots Fuel Bushy Stems

    Sustaining continuous leaf production requires supplying the right nutrients beneath the soil surface. Frequent clipping forces the plant to consume massive amounts of energy rebuilding leaves. Top-dressing raised beds with organic compost or applying balanced liquid seaweed fertilizer replenishes vital nitrogen reserves. Healthy root systems absorb these nutrients quickly to push out vibrant new foliage after pruning.

    Consistent hydration also plays a vital role in maintaining stem vigor during hot weather. Dry soil forces the herb into survival mode, which halts leaf splitting and triggers stress. Well-nourished soil paired with steady moisture creates the ideal environment for continuous herbal harvests.

    Step-by-Step Guide on How to Harvest Basil for Continuous Growth

    Executing exact pruning techniques guarantees your sweet basil stays bushy, healthy, and productive.

    Step-by-Step Guide on How to Harvest Basil for Continuous Growth

    Wait Until the Plant Reaches Proper Maturity

    Giving young seedlings time to establish sturdy root systems prevents premature harvesting stress. Resist the temptation to pick foliage off a tiny young seedling right after planting. Wait until your basil stands six to eight inches tall and sports at least three or four leaf sets. At this stage, the root system is established enough to handle structural cuts without suffering stunted growth.

    Starting too early causes severe stress that can stall development for several weeks. Waiting for proper height ensures the plant possesses enough reserves to rebound quickly. Patience during early growth sets the stage for massive herbal yields later in summer.

    Locate the Exact Leaf Node for Snapping

    Finding the right junction on the main stem guarantees clean splits and fast recovery. Look down the central stalk from the top set of leaves until you find a healthy leaf node. Look closely for two tiny leaves sprouting from the sides of the stem junction. Position your fingers or sharp shears roughly a quarter inch directly above this leaf pair.

    Cutting at this precise location leaves just enough stem tissue to protect the emerging shoots. If you cut too far above the node, the remaining stem dies back and rot can set in. Visualizing this spot before cutting keeps your plant clean, healthy, and ready to double.

    Cut the Main Stem Above the Node

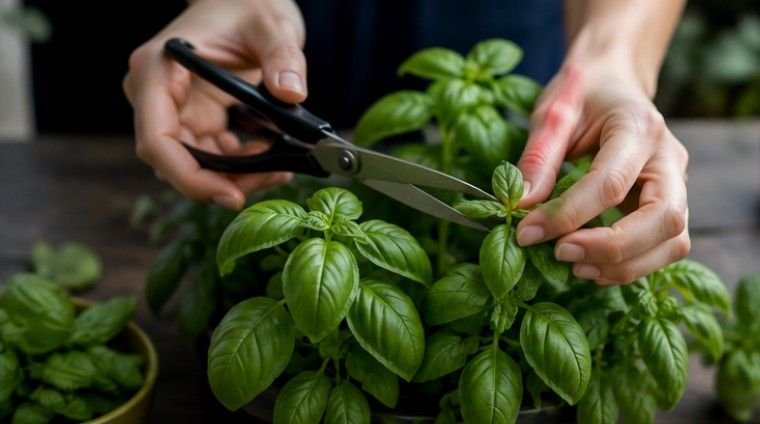
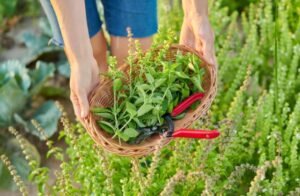
    Using clean cutting instruments protects plant tissue from crushing and prevents moisture rot. To keep your basil growing strong, never pluck just single leaves off the stem. Instead, cut the main stem right above a leaf node using clean micro-tip shears. Watching a quick tutorial video on proper cuts can help you visualize this clean snap on your own plants.

    Using dull tools or tearing stems leaves ragged edges that attract fungal pathogens and pests. Making clean cuts helps the plant heal rapidly so energy flows straight into the emerging side branches. Clean cutting habits ensure your herb stays vibrant without wasting energy recovering from tissue damage.

    Harvest From the Top to Prevent Leggy Stalks

    Clipping top stem sets encourages broad horizontal growth rather than tall, weak stalks. Always snip the uppermost sets of stems first during your regular harvesting routine. Trimming upper foliage stops vertical stretching and forces growth outward into a lush, rounded shape. Tall leggy stalks produce fewer usable leaves and easily fall over during summer windstorms.

    Harvesting top stems keeps the plant balanced, compact, and structurally sound. This top-down cutting strategy exposes middle foliage to direct sunlight, accelerating secondary shoot growth. Consistent top trimming converts one central stalk into a sprawling, productive plant canopy.

    Crucial Maintenance Rules for Unlimited Leaf Yields

    Following core garden rules protects flavor and keeps foliage production running smoothly all summer.

    Crucial Maintenance Rules for Unlimited Leaf Yields

    Pinching Off Flowers to Save Leaf Flavor

    Intercepting flowering spikes early preserves essential oils that deliver optimal culinary flavor. Hot summer weather prompts basil plants to produce white or purple flower buds at stem tips. If you see small flower buds forming at the top, cut them off immediately down to the next node. Flowers tell the plant to stop making tasty leaves and start making seeds, which alters the flavor.

    Removing flower spikes forces energy right back into vegetative leaf production. This quick maintenance step retains sweet essential oils and delays the plant natural life cycle. Inspecting shoot tips twice a week prevents flowering before it impacts your kitchen harvests.

    Following the One-Third Pruning Rule

    Balancing harvest volume with remaining plant foliage prevents severe physiological shock. Never cut away more than one-third of the plant total height at any single time. Removing too much foliage starves the root system and prevents efficient solar energy conversion. Taking light, frequent cuts is far better than performing aggressive over-harvests.

    Adhering to the one-third boundary allows your herb to recover within a few warm days. Leaving two-thirds of the foliage intact keeps the metabolic engine running at full speed. This simple rule guarantees a steady, reliable supply of fresh leaves without endangering plant survival.

    Harvesting in Early Morning to Preserve Oil

    Choosing the optimal time of day to snip foliage preserves aromatic compounds and crispness. Gather your herbal harvest during early morning hours after dew evaporates but before heavy sun hits. High afternoon temperatures cause volatile aromatic oils to evaporate, diminishing rich flavor profiles. Morning stems are fully hydrated, crisp, and packed with maximum essential oil content for your dishes.

    Plucking foliage during heat waves causes rapid wilting and reduces post-harvest shelf life. Cool morning harvests keep leaves crisp longer when stored on your kitchen counter in water. Timing your garden routine elevates culinary flavor while keeping plants refreshed. You can grow mint in containers as well just the same way.

    Frequently Asked Questions 

    1. How to pick basil so that it keeps growing?

    To keep your basil growing strong, never pluck just single leaves. Cut the main stem right above a leaf node where two tiny leaves sprout. This forces one cut stem to split into two new branches for bushy growth.

    2. How many times can you harvest from a basil plant?

    You can harvest fresh leaves from a healthy basil plant every seven to ten days throughout the summer season. Regular weekly stem pruning keeps the herb producing vibrant new growth continuously until the first autumn frost arrives.

    3. What are common basil harvesting mistakes?

    Common mistakes include plucking individual foliage, stripping bottom solar leaves, tearing stems with dull tools, cutting too far above leaf nodes, taking over one-third of total growth, and allowing flowers to bloom into bitter seed heads.

    4. How to continuously grow basil?

    Provide six to eight hours of direct sunlight daily, water consistently at soil level, feed organic nitrogen fertilizer, and cut top stems weekly above leaf nodes while pinching off emerging flower buds immediately.

    Snip Your Way to Endless Basil Happiness

    Mastering how to harvest basil for continuous growth is the ultimate secret to enjoying fresh culinary herbs all season long. By making strategic cuts right above leaf nodes, removing flower buds early, and leaving lower leaves intact, you will keep your plants thriving. Grab your shears, head out to your edible garden, and enjoy an endless harvest of homegrown sweet basil!

  • Should You Fertilize Indoor Plants in Winter? Check These Signs First

    Should You Fertilize Indoor Plants in Winter? Check These Signs First

    Winter can make indoor plants seem frozen in time. The pothos stops unfurling leaves, the monstera barely changes, and the soil stays damp far longer than it did in summer. That is usually when one question starts nagging at plant owners: should you fertilize indoor plants in winter, or should the fertilizer bottle stay tucked away until spring?

    I have learned that the calendar gives only half the answer. Some houseplants slow down because weaker winter light reduces their energy, while others keep growing near a sunny window or under grow lights. 

    The safest choice depends on what the plant is actually doing. New leaves, steady water use, healthy roots, and strong light can justify light feeding, but a resting or stressed plant usually needs less attention, not more fertilizer.

    Should You Fertilize Indoor Plants in Winter?

    In most cases, you should stop or significantly reduce fertilizing houseplants during winter. Plants use nutrients most efficiently when they are actively growing. During the colder months, reduced daylight often slows photosynthesis, root activity, and water consumption.

    When a plant is barely growing, unused fertilizer can remain in the potting mix. Over time, fertilizer salts may build up around the roots and lead to brown leaf tips, yellow leaves, wilting, or root damage.

    However, I do not automatically stop fertilizing every plant on the first day of winter. Indoor environments vary widely. A plant beside a sunny south-facing window in Arizona may receive much more winter light than a plant in a dim apartment in Michigan. Plants growing under artificial lights may also continue growing throughout the season.

    The safest approach is to fertilize according to active growth rather than the month on the calendar.

    Why Do Indoor Plants Need Less Fertilizer in Winter?

    Houseplant growth depends heavily on light. Even when indoor temperatures remain comfortable, shorter winter days can limit the amount of energy a plant produces.

    As growth slows, the plant needs less nitrogen, phosphorus, potassium, and other nutrients. Its roots also absorb water more slowly, which means fertilizer remains in the potting mix for longer periods.

    This creates two common problems. First, the plant may receive more nutrients than it can use. Second, slower-drying soil increases the risk of root stress, especially if the plant is also being overwatered.

    I often remind myself that fertilizer does not create energy for a plant. Light drives photosynthesis. Fertilizer only supplies nutrients that support growth. If the plant does not have enough light to grow, adding more fertilizer will not solve the problem.

    How Can You Tell If a Houseplant Needs Winter Fertilizer?

    How Can You Tell If a Houseplant Needs Winter Fertilizer?

    Before feeding any indoor plant in winter, I check for several signs that it is still actively growing.

    Is the Plant Producing Healthy New Growth?

    Fresh leaves, new stems, flower buds, or expanding shoots suggest that the plant is using nutrients. The growth should look compact, sturdy, and normally colored.

    Weak, pale, or stretched growth does not necessarily mean the plant needs more fertilizer. Leggy stems often indicate insufficient light. Feeding a light-starved plant may encourage even weaker growth instead of fixing the underlying issue.

    Is the Plant Receiving Enough Light?

    Plants near bright south- or west-facing windows may continue growing during winter. Supplemental grow lights can also provide enough consistent light to support year-round growth.

    A grow light should sit at an appropriate distance from the foliage and remain on long enough to provide useful light. Many indoor gardeners run grow lights for approximately 10 to 14 hours per day, although the correct duration depends on the plant and the strength of the fixture.

    If a plant sits several feet from a dim window and has stopped growing, I usually skip fertilizer until light levels improve.

    Is the Soil Drying at a Normal Rate?

    Actively growing plants continue using water. If the potting mix dries at a reasonable pace and the plant needs regular watering, it may still be growing enough to use a small amount of fertilizer.

    If the soil remains wet for much longer than usual, the roots may be less active. Adding fertilizer to persistently wet soil can increase root stress and salt accumulation.

    Is the Plant Healthy?

    I never fertilize a plant simply because it looks weak. A struggling houseplant may be dealing with pests, root rot, cold drafts, compacted soil, improper watering, or insufficient light.

    Fertilizing a stressed plant can make the problem worse. I address the underlying issue first and resume feeding only after the plant begins recovering.

    Which Indoor Plants May Need Fertilizer During Winter?

    Some houseplants are more likely than others to continue growing or flowering through winter.

    Plants Growing Under Grow Lights

    Houseplants under effective grow lights may not experience the same seasonal slowdown as plants relying entirely on natural light. If they continue producing healthy foliage, I may fertilize them at a reduced strength.

    I usually start with one-quarter to one-half of the normal label recommendation. I also increase the time between applications rather than following a full spring or summer feeding schedule.

    Winter-Blooming Houseplants

    Plants such as cyclamen, amaryllis, Christmas cactus, and certain orchids may bloom during winter. Flowering plants can use nutrients while they are actively producing buds and flowers.

    However, I still avoid overfeeding. Some flowering plants have specific fertilizer needs, so I follow plant-specific guidance instead of using one universal formula.

    Indoor Herbs

    Indoor Herbs

    Herbs growing under strong lights may need light winter feeding because frequent harvesting removes leaves and nutrients. Basil, parsley, mint, and other indoor herbs can continue growing when they receive adequate warmth and light.

    If an herb has slowed down, become leggy, or stopped producing leaves, I improve the lighting before adding fertilizer.

    Indoor Citrus Plants

    Indoor citrus trees may continue growing in bright conditions, particularly in sunrooms, heated greenhouses, or under grow lights. These plants may require a diluted citrus fertilizer if they remain active.

    Citrus plants also need specific micronutrients, so I choose a fertilizer formulated for citrus rather than relying only on a general houseplant product.

    Actively Growing Tropical Plants

    Pothos, philodendrons, monsteras, peace lilies, and other tropical houseplants may continue growing in warm, bright homes. If I see healthy new leaves, I may provide a mild feeding.

    If growth has stopped, I wait until late winter or spring before restarting a regular indoor plant fertilizing schedule.

    When Should You Avoid Fertilizing Houseplants in Winter?

    I avoid winter fertilizer when a plant has stopped growing, receives limited light, or remains in wet soil for long periods. I also skip feeding when the plant shows signs of pests, root rot, wilting, cold damage, or severe stress.

    Recently repotted plants usually do not need immediate fertilizer because many commercial potting mixes already contain nutrients. Fresh roots can also be sensitive to excess salts.

    I also avoid fertilizing plants that naturally enter a dormant or resting period. Some cacti, succulents, bulbs, and specialty plants require a seasonal break. Feeding them during dormancy can interfere with their natural cycle.

    How Should You Fertilize Indoor Plants Safely in Winter?

    When a plant clearly remains active, I use a cautious approach. I choose a balanced liquid houseplant fertilizer or a plant-specific formula and dilute it more than I would during spring or summer.

    I always apply fertilizer to slightly moist soil. Fertilizing completely dry soil can expose roots to a concentrated dose and increase the chance of fertilizer burn.

    I also reduce frequency. A plant that receives fertilizer every two weeks in summer may need feeding only once every four to eight weeks during winter, if it needs fertilizer at all.

    The product label should remain the primary guide. More fertilizer does not produce faster or healthier growth. It often creates salt buildup and damaged roots.

    What Are the Signs of Overfertilizing Indoor Plants?

    Fertilizer damage can look similar to watering or lighting problems. Common signs include brown leaf tips, dry leaf edges, yellowing leaves, wilting despite moist soil, slowed growth, and a white crust on the soil surface or pot rim. Tiny black flies in houseplant soil after watering may also appear when consistently damp soil creates favorable conditions for fungus gnats.

    If I suspect overfertilization, I stop feeding immediately. I may flush the potting mix with clean water, provided the container has good drainage. Water should pass through the soil and drain freely from the bottom.

    For severe buildup or damaged roots, repotting into fresh soil may become necessary. However, I avoid repotting a stressed plant unless the soil condition or root damage makes it unavoidable.

    When Should You Start Fertilizing Houseplants Again?

    Many houseplants begin growing more actively as daylight increases in late winter or early spring. Instead of choosing a fixed date, I wait for visible signs such as new leaves, fresh shoots, longer stems, or more frequent water use.

    Once active growth returns, I restart fertilizer gradually. I may begin at half strength before moving toward the regular label recommendation.

    This gradual approach reduces the risk of fertilizer burn and allows me to observe how the plant responds.

    Does Winter Leaf Yellowing Mean a Plant Needs Fertilizer?

    Does Winter Leaf Yellowing Mean a Plant Needs Fertilizer?

    Not always. Yellow leaves can result from overwatering, poor drainage, low light, cold drafts, natural leaf aging, pests, or root problems.

    Nutrient deficiency in plants is possible, but it should not be the first assumption. I check the soil moisture, root condition, light exposure, and pest activity before using fertilizer.

    Feeding a plant with damaged or inactive roots will not correct the problem because those roots may be unable to absorb nutrients properly.

    Frequently Asked Questions (FAQs)

    1. Can I fertilize houseplants under grow lights in winter?

    Yes, you can lightly fertilize houseplants under grow lights if they continue producing healthy new growth and using water normally. Reduce the strength and frequency compared with summer feeding.

    2. Should I fertilize pothos in winter?

    Fertilize pothos only when it continues growing in bright light. If growth has slowed or stopped, wait until brighter conditions return.

    3. Should succulents be fertilized during winter?

    Most succulents need little or no fertilizer during winter, especially when they enter a resting period. Follow the growth cycle of the specific succulent species.

    4. How often should I fertilize indoor plants in winter?

    Actively growing plants may need diluted fertilizer once every four to eight weeks. Dormant or inactive plants generally should not be fertilized.

    5. Can fertilizer help a yellowing houseplant?

    Fertilizer helps only when a genuine nutrient deficiency causes the yellowing. Check for overwatering, low light, pests, cold damage, and root problems first.

    Let the Plant Decide, Not the Calendar

    When deciding whether to feed indoor plants in winter, I pay attention to the plant rather than following a rigid seasonal rule. A healthy plant producing new growth under strong light may benefit from a small amount of diluted fertilizer. A plant resting in low light usually needs patience, careful watering, and protection from stress instead.

    The best winter houseplant care often involves doing less. By watching growth, light, soil moisture, and overall health, I can provide nutrients only when the plant is ready to use them.

  • How to Improve Clay Soil for a Vegetable Garden

    How to Improve Clay Soil for a Vegetable Garden

    The first time I pushed a garden fork into heavy clay, it stopped after two inches. Water pooled on top, young roots struggled, and the surface hardened after every sunny day.

    Learning how to improve clay soil for a vegetable garden changed my approach. I stopped trying to replace the soil and began improving its structure with compost, careful loosening, mulch, and living roots.

    Clay is not worthless soil. It often holds water and nutrients better than sandy ground. Its weakness is physical structure. Tiny particles pack closely together, leaving little room for oxygen, drainage, and root movement. Clay also compacts and crusts easily and warms slowly during spring.

    Why Clay Soil Challenges Vegetable Roots

    Healthy roots need a balance of soil particles, water, and air. Dense clay can remain saturated after rain, yet become hard and cracked during dry weather.

    Poor air movement limits root respiration. Compaction also makes it harder for carrots, onions, and seedlings to expand. The aim is not to turn clay into sand. The aim is to create stable crumbs, or aggregates, with spaces between them.

    Organic matter supports this process. Compost, decayed leaves, roots, and soil organisms help particles bind into larger units. These aggregates improve airflow, drainage, nutrient cycling, and root access. USDA guidance connects healthier soil management with reduced compaction, greater organic matter, and improved water movement.

    Test the Soil Before Adding Amendments

    Test the Soil Before Adding Amendments

    Before deciding how to improve clay soil for a vegetable garden, I check both moisture and fertility. Adding amendments without testing can waste money or create nutrient problems.

    Check the Moisture by Hand

    Never dig or till wet clay. Working saturated ground squeezes out air and forms dense clods that can remain for months.

    Take soil from about four inches below the surface and squeeze it. If it smears, bends like modeling clay, or forms a shiny ribbon, wait. If the ball breaks apart under gentle pressure, the bed is ready.

    I repeat this test in several places because one shaded corner may remain wetter than the rest. Oregon State University recommends working soil only when a squeezed sample breaks apart easily.

    Order a Laboratory Soil Test

    A soil test measures pH and plant nutrients. Many extension laboratories also report organic matter.

    Testing matters because repeated manure or compost applications can raise phosphorus, potassium, or soluble salts. Oregon State University advises reducing further compost applications when organic matter has already reached roughly 3% to 5%, depending on test results and local recommendations.

    Follow the laboratory’s sampling instructions. Combine several cores from the growing area, but exclude walkways, compost piles, and unusual patches.

    How to Improve Clay Soil for a Vegetable Garden Step by Step

    How to Improve Clay Soil for a Vegetable Garden Step by Step

    The safest method combines finished organic matter with minimal disturbance. It creates planting space without repeatedly breaking the developing soil structure.

    Apply Finished Organic Matter

    Spread one to two inches of mature compost across an established vegetable bed. Severely compacted new beds may benefit from an initial two-inch application, followed by smaller annual additions based on soil-test results.

    University of Minnesota Extension recommends incorporating one to two inches of compost about six to eight inches deep in compacted vegetable and flower beds. Organic matter improves air and water movement through dense soil.

    Use dark, crumbly compost with an earthy smell. Suitable materials include finished yard-waste compost, aged leaf mold, or properly composted manure. Avoid fresh manure near food crops because it may carry pathogens, contain excessive salts, or burn roots.

    Loosen the Clay Without Pulverizing It

    Push a garden fork or broadfork into the bed. Rock it backward to lift and crack the soil without turning every layer upside down.

    Work across the bed in rows. Allow compost to fall into the openings, but do not chase a perfectly blended texture. Worms, roots, water, and freeze-thaw cycles will continue the mixing.

    This low-disturbance method is central to how to improve clay soil for a vegetable garden because repeated aggressive tilling can leave bare soil vulnerable to crusting and recompaction.

    Protect the Surface With Mulch

    Cover the amended bed with about two inches of shredded leaves, clean straw, or another seed-free organic mulch. Keep mulch slightly away from vegetable stems.

    Mulch softens the impact of rain, reduces surface crusting, limits weeds, and slows evaporation. It can also reduce watering frequency because covered soil retains moisture longer.

    Do not bury woody mulch deeply in the root zone. Keep coarse wood chips mainly on paths or the soil surface.

    Amendments to Avoid in Heavy Clay

    Do not add a small amount of sand to clay. Sand does not automatically create loam. In the wrong proportions, the particles can produce a dense, rock-hard mixture. Penn State Extension recommends organic matter rather than sand for loosening clay soil.

    Gypsum is also not a universal clay remedy. It may help certain sodic soils, but ordinary garden clay does not automatically need it. Apply gypsum only when a soil test or local extension professional identifies a relevant sodium-related problem.

    Avoid adding fresh wood chips, uncomposted sawdust, or thick layers of fresh manure directly to planting soil. These materials can interfere with nitrogen availability, root health, or nutrient balance.

    Build Better Garden Soil Season After Season

    Build Better Garden Soil Season After Season

    Understanding how to improve clay soil for a vegetable garden means accepting that soil structure develops gradually. One large compost application cannot replace careful annual management.

    Keep Beds Permanently Planted

    Create permanent growing beds with separate paths. Dig, kneel, and walk only in the paths.

    Reduced disturbance allows fungal networks, worm channels, and root passages to remain intact. Each channel becomes a route for oxygen and water.

    Raised beds can help where drainage remains poor. They warm and drain faster than surrounding clay, although their looser soil may need more frequent moisture checks.

    Grow Cover Crops

    Plant cover crops whenever a bed would otherwise remain bare. Cereal rye produces large amounts of organic material. Clover contributes nitrogen. Daikon radish creates deep root channels and helps open compacted layers.

    A grass-and-legume mix can combine biomass production with nitrogen fixation. Choose species for your climate and termination schedule because some winter cover crops become difficult to manage if allowed to mature.

    Cut the crop near ground level before it sets seed. Leave the roots in place and use the tops as mulch or compost material.

    Keep Feet Out of Growing Areas

    Foot traffic can erase months of structural improvement. I make beds narrow enough to reach from either side without stepping into them.

    Boards placed temporarily across beds can spread weight during planting. Permanent paths covered with wood chips also make the no-step rule easier to follow.

    Vegetables That Grow Well in Improving Clay Soil

    While learning how to improve clay soil for a vegetable garden, start with crops that tolerate moisture-retentive or moderately firm ground.

    Broccoli, cabbage, Brussels sprouts, and sweet corn appreciate stable anchorage. Lettuce, Swiss chard, bush beans, and many herbs rely heavily on the improved upper layer. Pumpkins and summer squash can perform well when planted on compost-enriched mounds.

    Delay long carrots and parsnips until the bed becomes deeper and more friable. Short, round carrot varieties are more forgiving during the first seasons. Potatoes may also produce misshapen tubers in dense, clod-filled soil.

    No vegetable tolerates standing water for long. If water remains for days after moderate rain, investigate grading, runoff, compacted subsoil, or a naturally high water table.

    My Three-Season Clay Soil Progress Test

    I judge progress with three observations rather than expecting instant loam.

    After the first season, I check whether rainfall enters the surface instead of pooling. During the second, I compare how easily a fork reaches six inches. By the third, I look for crumbly aggregates, worm channels, and roots extending below the original amended layer.

    I also photograph the same soil profile each spring. A ruler placed beside the hole records depth. This simple comparison reveals progress that daily observation often misses.

    Clay-heavy soil may take several years of annual organic additions and careful management to show major improvement. Oregon State University notes that yearly organic matter additions can produce better drainage and biological activity over about five years.

    Frequently Asked Questions

    1. What is the fastest way to improve heavy clay garden soil?

    Apply mature compost when the ground is crumbly, loosen it with a fork, cover it with mulch, and prevent all unnecessary foot traffic.

    2. How much compost should I add to clay soil?

    Begin with one to two inches in most beds, then use soil-test results to prevent excessive phosphorus, potassium, salts, or organic matter.

    3. Can I plant vegetables immediately after amending clay soil?

    Yes, when you use mature compost and the bed drains properly. Avoid planting into wet, freshly worked clay or uncomposted manure.

    4. How long does it take to improve clay soil for vegetables?

    Noticeable surface changes may appear within one season, but deeper structural improvement usually requires several years of mulching, roots, compost, and limited disturbance.

    Your Clay Is Tough, but You Are Tougher

    My best lesson about how to improve clay soil for a vegetable garden was simple: steady care beats a dramatic soil overhaul. Compost feeds the system, roots open channels, mulch protects the surface, and patience allows structure to develop.

    Start with one manageable bed. Test the soil, wait for suitable moisture, add measured compost, loosen gently, and apply mulch. Repeat the process according to annual observations and soil-test results. Your next fork test should feel easier than the last.

  • Winter-Proof Your Indoor Jungle With Houseplants That Tolerate Dry Air From Heating

    Winter-Proof Your Indoor Jungle With Houseplants That Tolerate Dry Air From Heating

    Once the furnace starts running, even a healthy indoor garden can change quickly. Warm air from forced-air vents, radiators, fireplaces, and space heaters lowers indoor humidity, dries potting soil, and can leave sensitive plants with curling leaves or crispy brown tips.

    I have found that choosing houseplants that tolerate dry air from heating is much easier than trying to keep humidity-loving tropical plants comfortable all winter. The best options store moisture in thick leaves, waxy foliage, underground rhizomes, or swollen trunks. They are not completely immune to low humidity, but they handle heated American homes far better than delicate tropical species.

    What Are the Best Houseplants for Dry, Heated Air?

    The strongest tall indoor plants safe for cats and dogs combine low-humidity tolerance with manageable watering needs. However, each plant still has its own light and placement requirements.

    Snake Plant

    Snake plants rank among my favorite plants for dry indoor air because their thick, leathery leaves store moisture efficiently. They tolerate low humidity, missed waterings, and the reduced natural light common during winter.

    They grow fastest in bright, indirect light but adapt surprisingly well to darker bedrooms and offices. Let the soil dry almost completely before watering because excessive moisture can cause root rot.

    ZZ Plant

    ZZ Plant

    The ZZ plant features glossy, waxy leaves that reduce moisture loss. Its thick underground rhizomes also store water, allowing the plant to survive extended periods without irrigation.

    This low-maintenance indoor plant handles dry air and low light better than most houseplants. I recommend placing it away from hot vents and watering only after the potting mix has dried. Keep it out of reach of pets and young children because it is toxic when eaten.

    Cast Iron Plant

    The cast iron plant lives up to its tough reputation. It tolerates low light, dry household air, temperature fluctuations, drafts, and occasional neglect.

    Its slow-growing foliage works well in dim living rooms, hallways, and north-facing rooms. Avoid direct afternoon sunlight, which can scorch the leaves, and allow the upper layer of soil to dry between waterings.

    Jade Plant

    Jade plants prefer the dry air found in many centrally heated homes. Their thick, fleshy leaves store water, making them more drought tolerant than typical tropical houseplants.

    Place jade near a sunny south- or west-facing window during winter. Keep the foliage from touching cold glass, use fast-draining succulent soil, and wait until the mix dries before watering again.

    Aloe Vera

    Aloe vera thrives in warm rooms with low humidity, provided it receives strong light and excellent drainage. Its water-filled leaves allow it to withstand dry conditions and infrequent watering.

    I grow aloe in a cactus or succulent potting mix inside a container with drainage holes. Water deeply, let the extra moisture escape, and do not water again until the soil feels dry.

    Spider Plant

    Spider plants are tropical, but they adapt better to average household air than many moisture-loving species. Their arching leaves and cascading plantlets make them attractive choices for hanging baskets and high shelves.

    Extremely low humidity may still cause brown leaf tips. Keep spider plants away from direct heated airflow, give them bright indirect light, and water when the top inch of soil feels dry. They are also widely considered a practical choice for homes with cats or dogs.

    Ponytail Palm

    The ponytail palm stores water inside its enlarged, bulb-shaped trunk. This feature makes it naturally suited to dry indoor climates and homeowners who sometimes forget to water.

    Although it is not a true palm, it delivers a similar sculptural appearance. Give it bright light, use well-draining soil, and avoid frequent watering. Too much moisture presents a greater danger than low humidity.

    Wax Plant

    Wax Plant

    The wax plant, also called hoya, has thick, succulent-like leaves that retain moisture efficiently. It tolerates dry air better than many flowering tropical plants and may produce fragrant, star-shaped blooms under favorable conditions.

    Hoyas prefer bright, indirect light and a potting mixture with good drainage. Let part of the soil dry before watering, but do not leave the plant completely dry for long periods while it is actively growing.

    Which Plants Handle Both Low Humidity and Low Light?

    Many plants that prefer dry air, including cacti and succulents, also require strong sunlight. This can make plant selection difficult in apartments, offices, basements, or homes with north-facing windows.

    Snake plants, ZZ plants, and cast iron plants provide the best combination of low-light adaptability and dry-air tolerance. They may grow more slowly in darker rooms, but they usually maintain their appearance without a humidifier or sunny windowsill.

    Which Houseplants Struggle in Heated Rooms?

    Calatheas, marantas, alocasias, prayer plants, and many ferns often struggle when heating systems lower indoor humidity. Their thinner leaves lose moisture quickly, which can lead to curled foliage, dry edges, and persistent browning.

    You can grow these tropical plants with a reliable humidifier and careful monitoring. However, I would choose a tougher plant when I want low-maintenance greenery that can tolerate a long heating season.

    How Far Should Plants Be From Heating Vents?

    A plant that tolerates low humidity may still suffer beside a radiator, fireplace, or forced-air register. Concentrated heat dries leaves and soil much faster than the general warmth of a room.

    I recommend keeping plants at least three feet away from vents whenever space allows. Move them farther away when hot air blows directly toward the foliage. Do not place pots directly above radiators or between a heater and a cold window, where abrupt temperature changes can cause additional stress.

    How Should You Care for Plants During Winter Heating?

    Check the soil instead of watering according to a fixed calendar. Heating can dry the upper surface quickly while deeper soil remains wet. Push your finger one or two inches into the potting mix before adding water.

    Do not assume every plant needs more water during winter. Shorter days often slow growth, so roots may absorb moisture less quickly. Overwatering can cause yellow leaves and root rot even when the surrounding air feels dry.

    Grouping plants together can create a slightly more humid microclimate by trapping some moisture released through their leaves. A humidifier provides a more consistent solution for sensitive tropical plants, while occasional misting raises humidity for only a short period.

    What Are the Signs of Heating Damage?

    What Are the Signs of Heating Damage?

    Crispy leaf edges, curling foliage, and rapidly drying soil may indicate low humidity or direct exposure to heated air. Brown tips can also result from inconsistent watering, mineral-heavy tap water, or fertilizer buildup.

    Yellow leaves often suggest excessive watering rather than dry air. Fine webbing, pale speckles, or dusty-looking foliage may indicate spider mites, which reproduce quickly in warm, dry conditions. I check the undersides of leaves regularly throughout winter.

    Frequently Asked Questions (FAQs)

    1. What Is the Best Plant for a Dry Heated Home?

    Snake plants and ZZ plants are two of the most dependable choices. Both store moisture, tolerate low humidity, need infrequent watering, and adapt to different indoor light levels.

    2. Can Succulents Sit Near a Heating Vent?

    Succulents tolerate dry air but should not sit directly in hot airflow. A heating vent can dehydrate roots, scorch foliage, and create stressful temperature fluctuations.

    3. Should I Mist Indoor Plants During Winter?

    Misting provides only a temporary increase in moisture. Use a room humidifier when a plant requires consistently higher humidity, and maintain airflow to reduce fungal problems.

    4. Why Do Spider Plants Develop Brown Tips?

    Dry air can contribute to brown tips, but mineral buildup, fluoride in tap water, inconsistent watering, and excessive fertilizer may also cause the problem.

    5. Which Plants Are Best for Dry Air and Dark Rooms?

    Snake plants, ZZ plants, and cast iron plants offer the strongest combination of dry-air tolerance and low-light adaptability. They still benefit from indirect natural light whenever available.

    Keep Your Home Green Through Heating Season

    I believe successful winter plant care starts with choosing species suited to the conditions already present in your home. Snake plants, ZZ plants, cast iron plants, jade, aloe, spider plants, ponytail palms, and wax plants all offer practical options for dry rooms.

    Even the toughest houseplants that tolerate dry air from heating need proper drainage, appropriate light, and protection from direct hot airflow. Check the soil before watering, move pots away from radiators, and watch for pests or crispy foliage. With the right plants and a few seasonal adjustments, your indoor garden can remain healthy until spring.

  • No Sun, No Problem: Best Houseplants for Apartments With North-Facing Windows

    No Sun, No Problem: Best Houseplants for Apartments With North-Facing Windows

    A north-facing apartment can feel like a difficult place to grow anything green. The light is soft, direct sun is almost nonexistent, and many popular indoor plants quickly become weak or leggy. I used to think that meant settling for artificial plants, but the right varieties can make even a shaded room feel fresh and alive.

    The best houseplants for apartments with north-facing windows do not need intense sunlight to stay attractive. They thrive in gentle indirect light, adapt well to smaller spaces, and fit easily on shelves, windowsills, or in narrow corners. With the right plant and a few simple care adjustments, a dim apartment can still become a healthy, stylish indoor garden.

    What Light Do North-Facing Apartment Windows Receive?

    In the Northern Hemisphere, north-facing windows generally receive the least intense natural daylight. They provide soft, indirect light throughout much of the day without exposing leaves to harsh afternoon sun.

    However, window direction tells only part of the story. A large window in an upper-floor Chicago apartment may receive more usable light than a small window blocked by neighboring buildings in New York City. Trees, balconies, window screens, tinted glass, and seasonal changes can also reduce light levels. Indoor conditions matter too, especially when choosing houseplants that tolerate dry air from heating during colder months.

    I recommend observing the room at midday. If you can read comfortably without switching on a lamp, you probably have enough natural light for several shade-tolerant houseplants. If the room remains gloomy, position plants directly beside the glass or use a compact LED grow light.

    Which Low-Maintenance Plants Handle North-Facing Windows?

    ZZ Plant for Dark Apartment Corners

    The ZZ plant, or Zamioculcas zamiifolia, is one of the most dependable low-light apartment plants. Its waxy, deep green leaves store moisture efficiently, allowing it to tolerate occasional missed waterings.

    Place it near the window, but let the potting mix dry substantially before watering again. Growth may slow in dim conditions, yet the plant can retain its attractive structure for years. Because ZZ plants can irritate pets when chewed, keep them away from curious cats and dogs.

    Snake Plant for Narrow Spaces

    Snake Plant for Narrow Spaces

    The snake plant has tall, architectural leaves that grow upward instead of spreading across valuable floor space. This makes it especially useful beside a couch, desk, dresser, or apartment entryway.

    Its thick leaves store water, so the soil should dry completely or almost completely between waterings. Snake plants tolerate low light, although brighter indirect light encourages faster growth and stronger leaf patterns. Green varieties usually perform better in dim rooms than heavily variegated ones.

    Cast Iron Plant for Deep Shade

    The cast iron plant lives up to its durable name. It handles fluctuating indoor temperatures, inconsistent care, and deep shade better than many decorative plants.

    Its broad, dark green leaves create a fuller appearance than the upright leaves of a snake plant. It also grows slowly, so it will not quickly overwhelm a small living room. Keep the soil lightly moist but never soggy, and avoid exposing the plant to strong direct sunlight.

    Which Trailing Plants Work Near a North Window?

    Pothos for Bookshelves and Hanging Baskets

    Pothos works beautifully in apartments because its vines can cascade from shelves, cabinets, or hanging baskets. Positioning it near the window lets the leaves capture more of the available sky exposure without using floor space.

    Golden pothos and Jade pothos usually adapt better to low light than highly variegated varieties. In a dim room, pale patterns may fade because the plant produces more green tissue to absorb light. Growth may also slow, so trim long, sparse vines to encourage a fuller appearance.

    Pothos can irritate the mouth and digestive system if a pet chews it. Use a secure hanging planter rather than assuming a high shelf will remain inaccessible.

    Heartleaf Philodendron for Easy Climbing Growth

    Heartleaf philodendron produces elegant, heart-shaped leaves and reliably handles lower light. You can let it trail from a shelf or guide the vines up a small trellis or moss pole.

    Place it reasonably close to the window. Long gaps between leaves or vines stretching toward the glass often indicate that the plant needs more light. Water only after the upper layer of potting mix begins to dry.

    Which Pet-Friendly Plants Suit North-Facing Apartments?

    Parlor Palm for a Soft Tropical Look

    The parlor palm is a practical pet-friendly floor plant for low to moderate indirect light. Its feathery fronds create height and movement without requiring direct sun.

    It grows slowly indoors and usually maintains a manageable apartment size. Protect it from heating vents and cold air-conditioning drafts. Brown leaf tips may indicate dry air, irregular watering, or mineral buildup from tap water.

    Spider Plant for Hanging Displays

    Spider plants adapt well to gentle indirect light and produce arching leaves that look attractive in hanging baskets. Mature plants may also develop small plantlets that you can propagate.

    They are generally considered safe around cats and dogs, although pets may still damage the foliage. Keep the soil lightly moist during active growth, but avoid leaving the roots waterlogged.

    Peperomia for Small Windowsills

    Peperomia for Small Windowsills

    Peperomia varieties stay compact, making them useful for desks, kitchen counters, and narrow windowsills. Many have thick leaves that store moisture, so they need less frequent watering than delicate tropical plants.

    Darker green peperomias tend to tolerate lower light better than heavily patterned varieties. Use a fast-draining potting mix and let the soil partially dry before watering.

    Can Colorful Plants Grow in a North-Facing Room?

    Chinese evergreen and prayer plants can bring patterned foliage into a shaded apartment, but they need slightly more attentive care.

    Green and silver Chinese evergreen varieties usually adapt better to lower light than pink or red cultivars. Prayer plants appreciate soft daylight but require consistent moisture and humidity. I often recommend placing them in a north-facing bathroom or kitchen where the air does not become excessively dry.

    Remember that low-light tolerance does not mean no-light tolerance. Even adaptable plants need usable daylight or supplemental lighting to photosynthesize.

    How Should You Care for North-Window Houseplants?

    Avoid Overwatering in Low Light

    Soil dries more slowly in a north-facing room because plants grow and use water at a reduced rate. Watering on a rigid weekly schedule can leave the roots constantly wet and eventually cause root rot.

    Check the soil before watering. ZZ plants and snake plants should dry substantially, while prayer plants and ferns need more consistent moisture. Always use pots with drainage holes and empty any water that collects in saucers.

    Keep Leaves and Windows Clean

    Dust on foliage reduces the amount of light reaching the leaf surface. I gently wipe broad leaves with a damp cloth every few weeks and remove damaged growth promptly.

    Clean window glass also helps plants receive as much daylight as possible. This small step matters when natural light is already limited.

    Place Plants Close to the Glass

    Light intensity drops as you move farther into a room. Position small plants on the sill or a nearby stand, and place taller varieties beside the window.

    Rotate containers every few weeks so all sides receive similar exposure. Pale leaves, leaning stems, stretched vines, and disappearing variegation may signal that a plant needs a brighter position.

    Which Plants Should You Avoid?

    Most cacti, citrus trees, sun-loving herbs, and high-light succulents struggle near a typical north-facing window. Without supplemental lighting, they may stretch, weaken, or stop producing healthy new growth.

    Highly variegated plants can also lose their patterns in dim conditions. Flowering plants such as orchids and peace lilies may survive, but they often produce fewer blooms than they would in brighter indirect light.

    Do North-Facing Apartments Need Grow Lights?

    Do North-Facing Apartments Need Grow Lights?

    A grow light is optional when plants sit beside a clear, unobstructed window. It becomes more useful when nearby buildings block the sky, winter daylight becomes limited, or plants must sit several feet inside the room.

    A small full-spectrum LED fixture can supplement natural light without occupying much space. Follow the manufacturer’s distance recommendations and provide a regular nighttime dark period rather than leaving the light on continuously.

    Frequently Asked Questions (FAQs)

    1. What is the easiest plant for a north-facing apartment?

    ZZ plants, snake plants, and cast iron plants are among the easiest options because they tolerate gentle light, slow growth, and occasional missed waterings.

    2. How close should plants sit to a north-facing window?

    Most low-light plants perform best directly on the sill or within a few feet of the glass. Exterior obstructions and window size can affect the ideal distance.

    3. Can succulents survive in a north-facing apartment?

    Most succulents need brighter light. They may stretch or lose their compact shape unless the window is unusually bright or you provide supplemental lighting.

    4. Which north-window plants are safest for pets?

    Parlor palms, spider plants, Boston ferns, and many peperomia varieties are commonly considered pet-friendly. Confirm the exact species before purchasing any plant.

    Bring Your Shaded Apartment to Life

    I have found that successful indoor gardening starts with choosing plants for the light you actually have rather than the light you wish you had. Structural plants bring height to tight corners, while climbing and trailing vines add greenery without using valuable floor space.

    The best houseplants for apartments with north-facing windows can remain healthy when you place them close to the glass, keep their leaves clean, and adjust watering to match slower growth. Start with one hardy variety, watch how it responds through the seasons, and build your collection around the conditions inside your apartment.

  • 10 Tall Indoor Plants Safe for Cats and Dogs That Look Expensive

    10 Tall Indoor Plants Safe for Cats and Dogs That Look Expensive

     bare corner can make an otherwise beautiful room feel unfinished, but filling it with the wrong plant can create a real problem in a pet-friendly home. Many dramatic floor plants are toxic, which makes choosing safely feel unnecessarily difficult. 

    Thankfully, tall indoor plants safe for cats and dogs can bring the same height, texture, and upscale look without putting curious pets at unnecessary risk.

    Which Tall Pet-Safe Indoor Plants Are Best for Your Home?

    The best choice among the best houseplants for apartments with north-facing windows depends on your room’s light, available floor space, humidity, and the amount of care you can provide. I also recommend checking the botanical name on the nursery label because common names can refer to several unrelated plants.

    1. Money Tree

    The Money Tree, or Pachira aquatica, features a distinctive braided trunk and a leafy canopy that gives it the appearance of a miniature indoor tree. It can grow approximately 6 to 8 feet tall indoors when it receives enough room and consistent care.

    Money Trees perform best in bright, indirect sunlight. I let the top few inches of soil dry before watering again because constantly wet soil can lead to root problems. Rotating the pot every few weeks also prevents the canopy from leaning heavily toward the nearest window.

    The ASPCA classifies the Money Tree as non-toxic to both cats and dogs, although eating a large amount of any plant material can still cause nausea, vomiting, or loose stool.

    2. Parlor Palm

    Parlor Palm

    The Parlor Palm, botanically known as Chamaedorea elegans, adds a soft, feathery texture without taking over the room. Although it grows slowly, a mature plant can reach approximately 4 to 6 feet indoors.

    This classic palm adapts remarkably well to low or medium indirect light and average household humidity. I recommend it for apartments, offices, bedrooms, and north-facing rooms where sun-loving plants may struggle. Water it when the upper layer of soil begins to feel dry, and avoid leaving the pot in standing water.

    The ASPCA lists Chamaedorea elegans as non-toxic to cats and dogs.

    3. Areca Palm

    The Areca Palm, also called the Butterfly Palm or Golden Butterfly Palm, produces tall stems covered with arching, vibrant fronds. It can reach approximately 6 to 10 feet indoors and spread widely, so it works best in an open living room, sunroom, or spacious home office.

    This palm thrives in bright, indirect light and prefers evenly moist soil. Dry air, underwatering, or mineral-heavy tap water may cause brown frond tips. Its dense foliage also releases moisture through transpiration, which can contribute modestly to humidity immediately around the plant, though it should not replace a humidifier.

    The ASPCA identifies Dypsis lutescens as non-toxic to cats and dogs.

    4. Cast Iron Plant

    The Cast Iron Plant, or Aspidistra elatior, may only reach about 2 to 3 feet, but its upright, dark green leaves create enough volume to function as a substantial floor plant. It is one of my favorite options for low-light corners where tropical palms may grow poorly.

    As its name suggests, this plant tolerates inconsistent watering, temperature fluctuations, dry indoor air, and limited sunlight. Allow part of the soil to dry between waterings and keep it away from intense direct sun, which may scorch its leaves.

    The ASPCA classifies the Cast Iron Plant as non-toxic to cats and dogs.

    5. Kentia Palm

    A Kentia Palm brings a refined, upscale look to a room with long, gently arching fronds. It grows slowly but can eventually reach 8 feet or more indoors.

    It prefers medium to bright indirect light but generally handles lower light better than many large palms. I recommend it for anyone who wants an elegant pet-friendly statement plant without the faster growth or wider spread of an Areca Palm.

    6. Bamboo Palm

     Bamboo Palm

    The Bamboo Palm develops clustered, cane-like stems and dense foliage that can reach approximately 4 to 8 feet indoors. Its full growth habit makes it useful as a natural-looking room divider or privacy screen.

    It performs best in filtered light with lightly moist soil and moderate humidity. Keep it away from heating vents, which can dry the fronds quickly.

    7. Lady Palm

    The Lady Palm has upright stems and broad, fan-shaped leaves that create a more architectural appearance than feathery palms. Mature indoor plants can reach approximately 6 feet or taller.

    It tolerates medium light and adapts well to typical household temperatures. Its dense growth works particularly well in entryways and empty living-room corners.

    8. Ponytail Palm

    The Ponytail Palm is not a true palm, but its swollen trunk and long, curling leaves make it an eye-catching pet-friendly floor plant. It can eventually reach 4 to 6 feet indoors, although it grows slowly.

    Because the trunk stores water, this plant handles dry soil better than tropical palms. Place it in a bright room and allow the soil to dry substantially before watering. Cats may bat at its narrow leaves, so thoughtful placement can help prevent repeated damage.

    9. Banana Plant

    Certain banana plants, including Musa acuminata, are listed as non-toxic by the ASPCA and can create an impressive tropical focal point.

    A banana plant may reach 6 to 10 feet indoors, depending on the cultivar and growing conditions. It needs bright light, warmth, regular moisture, and more humidity than the average houseplant. Always verify the exact botanical name before purchasing because stores may sell several large tropical species under broad or confusing labels.

    10. Boston Fern

    A mature Boston Fern can form a large, cascading display with fronds that spread several feet. It does not grow upright like a tree, but placing it on a sturdy pedestal or plant stand creates valuable height.

    Boston Ferns prefer bright, indirect light, consistently moist soil, and humid air. They are best suited to bathrooms with windows, bright kitchens, or homes where indoor humidity does not remain extremely low.

    What Is the Best Tall Pet-Safe Plant for Low Light?

    The Parlor Palm and Cast Iron Plant are the most dependable choices for lower-light rooms. Kentia and Lady Palms can also tolerate moderate or reduced light, though their growth may slow.

    Low light does not mean complete darkness. If a room receives almost no natural daylight, I would add a full-spectrum grow light rather than expecting a plant to survive indefinitely.

    How Can You Keep Cats and Dogs Away From Large Pots?

    How Can You Keep Cats and Dogs Away From Large Pots?

    Tall plants can become top-heavy, so I place them in wide ceramic or terracotta pots that pets cannot easily knock over. A heavy planter also reduces the risk of spilled soil and broken containers when an energetic dog brushes past the plant.

    Cats sometimes treat large pots like litter boxes. Covering exposed soil with a breathable mesh barrier or large, smooth river stones can discourage digging. Make sure the stones are too large to swallow and do not create a sealed surface that traps excess moisture.

    If a pet repeatedly chews dangling fronds, I gently prune the lowest foliage or move the plant behind a decorative barrier. Providing cat grass, climbing furniture, chew toys, and regular play may also redirect attention away from houseplants.

    Which Popular Tall Houseplants Are Toxic to Pets?

    Monstera, Fiddle Leaf Fig, Snake Plant, ZZ Plant, Dracaena, Bird of Paradise, and Sago Palm should not be treated as pet-safe substitutes. Snake Plants can cause vomiting, diarrhea, drooling, and lethargy after ingestion, while Sago Palms are especially dangerous.

    Scientific names matter because safe true palms and toxic cycads can look similar to an inexperienced shopper. I always verify the label before purchasing rather than relying solely on a common name.

    Frequently Asked Questions (FAQs)

    1. What is the tallest indoor plant that is safe for cats and dogs?

    Kentia Palms, Areca Palms, Bamboo Palms, and suitable banana plants may reach 8 feet or more indoors under favorable conditions.

    2. Are all indoor palms safe for pets?

    No. Many popular palms are non-toxic, but the Sago Palm is not a true palm and is highly toxic. Always verify the scientific name.

    3. Is a Money Tree safe for cats and dogs?

    Yes. The ASPCA lists Pachira aquatica as non-toxic to both cats and dogs, although consuming too much plant material may still cause digestive upset.

    4. Can a non-toxic plant still make a pet sick?

    Yes. Even non-toxic plant material may cause vomiting, nausea, or gastrointestinal irritation when a pet consumes a large amount. Contact your veterinarian if symptoms appear.

    Bring Home Height Without Bringing Home Risk

    I do not think pet owners need to sacrifice style to create a safer indoor garden. Money Trees, Parlor Palms, Areca Palms, and Cast Iron Plants can all add meaningful height, texture, and greenery when matched with the right light conditions.

    The best tall indoor plants safe for cats and dogs combine verified botanical identities with stable pots, sensible placement, and realistic care. Once you secure the container, protect the soil, and keep tempting foliage out of reach, you can enjoy a dramatic indoor plant display without compromising your pets’ well-being.

  • Why Are Pothos Leaves Turning Yellow After Repotting? The Root Shock Nobody Warns You About

    Why Are Pothos Leaves Turning Yellow After Repotting? The Root Shock Nobody Warns You About

    Repotting is supposed to refresh a pothos, not leave it covered in yellow leaves. I know how discouraging it feels to move a healthy plant into a beautiful new container only to see its foliage fade a few days later. Fortunately, this reaction does not automatically mean your plant is dying.

    When people ask why pothos leaves are turning yellow after repotting, the answer usually involves transplant shock, excess moisture, damaged roots, dense potting soil, or an oversized container. 

    Repotting suddenly changes the environment around the roots, temporarily disrupting their ability to absorb water, oxygen, and nutrients. With the right response, most pothos plants can stabilize and begin producing healthy growth again.

    Is It Normal for Pothos Leaves to Yellow After Repotting?

    A pothos may lose one or two older lower leaves while adjusting to its new container. Repotting disturbs the microscopic root hairs that absorb water and nutrients. While those delicate structures recover, the plant may conserve energy by sacrificing older foliage and directing its resources toward root repair.

    Mild transplant shock typically causes limited yellowing, slight drooping, and a temporary pause in growth. The plant may need one to three weeks to acclimate to its fresh soil. However, rapidly spreading yellow leaves, soft stems, waterlogged soil, or a sour smell indicate a more serious problem.

    What Causes Yellow Pothos Leaves After Repotting?

    Transplant Shock Disrupts Water Absorption

    Even careful repotting disturbs a pothos root system. Pulling the root ball from its container, loosening compacted soil, or repositioning roots can damage tiny feeding structures.

    With fewer functioning root hairs, the plant cannot absorb enough moisture to support all its foliage. It may shed its oldest leaves while rebuilding below the soil. I recommend keeping the plant in one stable location with bright, indirect light while it recovers.

    A Larger Pot Holds Too Much Moisture

    Transplant Shock Disrupts Water Absorption

    Choosing a dramatically larger pot may seem generous, but it often creates a moisture imbalance. More soil holds more water and takes longer to dry. A small root ball cannot use that extra moisture quickly enough.

    Constantly saturated soil pushes oxygen out of the spaces around the roots. Oxygen-starved roots weaken, stop absorbing nutrients efficiently, and may begin to decay. Choose a container only one or two inches wider than the previous pot instead of jumping to a much larger size.

    The New Potting Mix Drains Too Slowly

    Fresh potting soil may behave differently from the old mix. A peat-heavy or tightly compressed medium can stay wet long after the surface appears dry. Continuing the old watering schedule can therefore overwater the plant without the owner realizing it.

    Pothos grows best in a loose, well-draining mix. Combining indoor potting soil with perlite and orchid bark can improve aeration. Always use a container with functional drainage holes and empty any standing water from the saucer or decorative cachepot.

    Physical Root Damage Reduces Plant Support

    Aggressively shaking off old soil, pulling apart tangled roots, or cutting healthy roots can damage the plant’s feeding system. Torn roots reduce its ability to support its existing foliage and can create entry points for soil-borne pathogens.

    Minor damage often heals on its own. Severe damage, especially when combined with soggy soil, increases the risk of root rot. Handle the root ball gently and loosen only tightly circling roots during future repotting.

    Immediate Fertilization Burns New Root Growth

    Fertilizing immediately after repotting can compound existing stress. Fresh or damaged root tips are sensitive to concentrated fertilizer salts, and many commercial potting mixes already contain added nutrients.

    Excess salts can interfere with normal hydration and burn vulnerable roots. Fertilizer also encourages a shocked plant to produce new growth when it should focus on repairing its root system. I wait four to six weeks, or until healthy new growth appears, before resuming feeding.

    Light and Temperature Changed Suddenly

    Light and Temperature Changed Suddenly

    Repotting may not be the only change your pothos experiences. Moving it to a sunny windowsill, placing it beside an air conditioner, or exposing it to a heating vent can intensify plant stress.

    Pothos prefers bright to medium indirect light. Direct afternoon sun can scorch weakened foliage, while very low light slows soil drying and increases overwatering risk. Keep the plant away from drafts and maintain normal indoor temperatures during recovery. 

    Pothos is widely grown as an adaptable North American houseplant, but it still performs best when moisture, light, and temperature remain consistent.

    How Can I Tell Transplant Shock From Root Rot?

    Transplant shock usually affects only a few older leaves. The roots remain firm and cream, white, or light tan, and the soil drains normally. The plant may droop temporarily, but the yellowing should not spread rapidly.

    Root rot produces more serious symptoms. Several leaves may yellow at once, stems can become soft, and the soil may remain wet for a week or longer. Rotten roots often look dark brown or black and feel mushy, slimy, or hollow. Standing water and prolonged soil saturation prevent roots from receiving enough oxygen, which can eventually kill the plant.

    How Do You Save a Yellowing Pothos After Repotting?

    First, press a finger about two inches into the soil. Do not water again until this upper layer feels dry. When the plant needs water, soak the soil thoroughly and allow all excess moisture to escape through the drainage holes.

    Place the pothos in bright, indirect light and avoid moving it repeatedly. Remove leaves that have turned completely yellow because they will not become green again. However, avoid heavy pruning while the plant is already stressed.

    Do not fertilize for at least four to six weeks. If the pot is only slightly larger, the roots look healthy, and the soil drains properly, give the plant time to recover rather than repotting it again.

    A second repotting becomes necessary when the container is far too large, the soil remains waterlogged, or the roots show obvious decay. Trim rotten roots with sterilized scissors, discard contaminated soil, and move the plant into a clean container with fresh, airy potting mix.

    How Long Does Pothos Transplant Shock Last?

    Most mild cases improve within one to three weeks. Stable leaves, firmer stems, drying soil, and emerging growth all indicate recovery.

    Continued yellowing after two weeks deserves closer attention, particularly when the soil remains wet. Do not assume the plant needs more water simply because it looks droopy. Both dehydrated roots and waterlogged roots can cause wilting, so always inspect the soil first.

    How Can You Prevent Yellow Leaves During Future Repotting?

    How Can You Prevent Yellow Leaves During Future Repotting?

    Repot your pothos only when roots circle the container, emerge from the drainage holes, or leave little usable soil behind. Select a pot one size larger, prepare a breathable potting mix, and handle the roots gently.

    Keep the plant in roughly the same light and temperature after the move. Avoid changing its soil, pot, watering frequency, lighting, and feeding routine all at once. Reducing simultaneous changes gives the roots a much easier adjustment period.

    Frequently Asked Questions (FAQs)

    1. Why are pothos leaves turning yellow after repotting even with fresh soil?

    Fresh soil can retain more water than the old medium, especially when it contains dense peat or has been packed firmly. Root disturbance, excess moisture, or a pot that is too large may also cause yellowing.

    2. Should I water pothos immediately after repotting?

    You can water after repotting when the fresh mix is dry, but allow the excess to drain completely. Do not water again until the upper two inches begin to dry.

    3. Should I remove yellow pothos leaves?

    Remove leaves after they turn fully yellow because they cannot restore their chlorophyll. Use clean scissors, but avoid removing large amounts of healthy foliage from a stressed plant.

    4. Can pothos recover from damaged roots?

    Yes. A pothos can recover from minor root damage when it receives indirect light, controlled moisture, and time. Severe damage or active root rot may require pruning and another careful repotting.

    • When can I fertilize a recently repotted pothos?

    Wait at least four to six weeks or until you see healthy new growth. Feeding too early can burn damaged root tips and add unnecessary stress.

    Help Your Pothos Settle Into Its New Home

    I always investigate moisture, drainage, pot size, and root condition before making another change. Adding water, fertilizer, or another repotting without identifying the problem can make the yellowing worse. This same careful approach also helps when caring for houseplants that tolerate dry air from heating, since unnecessary adjustments can create additional stress.

    Understanding why pothos leaves are turning yellow after repotting allows you to respond calmly instead of overcorrecting. Give the plant stable indirect light, breathable soil, careful watering, and several weeks to rebuild its roots. In most cases, a resilient pothos will settle into its new container and return to vigorous green growth.

  • Tiny Black Flies in Houseplant Soil After Watering: What They Are and How to Stop Them

    Tiny Black Flies in Houseplant Soil After Watering: What They Are and How to Stop Them

    The first time I noticed tiny black flies in houseplant soil after watering, I assumed a few insects had entered through an open window. Then I watered another plant and watched several more flies rise from the potting mix. That was when I realized the problem was coming from the soil itself.

    In most cases, these small flying insects are fungus gnats. They thrive in moist potting soil, especially when indoor plants stay wet for too long. Although the adult gnats are mostly annoying, their larvae live beneath the soil surface and may feed on organic matter, fungi, and delicate plant roots.

    The good news is that fungus gnats are manageable. The most effective approach is not simply to kill the visible adults. You need to reduce soil moisture, target the larvae, improve drainage, and prevent the next generation from developing.

    Why Do Tiny Black Flies Appear After Watering Houseplants?

    Watering does not suddenly create the flies. Instead, the water disturbs adult fungus gnats that are resting on the soil surface, around the rim of the pot, or inside drainage areas. As the soil becomes saturated, the insects may crawl upward or fly away from the pot.

    Moisture also creates the breeding conditions fungus gnats need. Adult females lay eggs in damp potting mix, where the larvae can feed on fungi, decaying plant material, and fine roots. Learning how to get rid of fungus gnats without harming pets starts with reducing excess moisture and using non-chemical control methods whenever possible.

    If small flies consistently rise from the soil whenever you water, the potting mix is probably staying moist for longer than the plant requires.

    Several conditions can make the problem worse:

    • Watering on a fixed schedule instead of checking the soil
    • Using pots without adequate drainage holes
    • Allowing water to remain in saucers or decorative planters
    • Growing plants in dense, moisture-retaining potting mix
    • Bringing home an infested plant or bag of potting soil
    • Leaving fallen leaves and organic debris on the soil

    Fungus gnats often indicate a moisture-management problem, even when the plant still appears healthy.

    How Can I Tell If the Flies Are Fungus Gnats?

    Adult fungus gnats are usually about one-eighth of an inch long. They have thin bodies, long legs, dark coloring, and clear or grayish wings. They often resemble tiny mosquitoes, but they are weaker flyers and usually remain close to houseplants.

    I usually confirm an infestation by gently tapping the pot or watering the soil. Fungus gnats often run across the potting mix before taking flight. Placing a yellow sticky trap near the soil can also help confirm their presence.

    The larvae are more difficult to see. They are small, translucent or whitish, and have dark black heads. They usually live within the top inch or two of moist soil.

    Fungus Gnats vs. Fruit Flies: What Is the Difference?

    Fungus gnats and fruit flies are easy to confuse, but their behavior differs.

    Fungus gnats stay close to plant pots, moist soil, propagation trays, and drainage areas. Fruit flies are more likely to gather around ripe fruit, garbage disposals, recycling bins, and food residue.

    Fruit flies also tend to have rounder bodies, while fungus gnats look slender and mosquito-like.

    A vinegar trap may catch fruit flies effectively, but it often performs poorly against fungus gnats. Yellow sticky traps placed directly above the potting soil usually work better for monitoring adult fungus gnats.

    Are Drain Flies the Same as Fungus Gnats?

    Are Drain Flies the Same as Fungus Gnats?

    Drain flies are not the same insect. They usually have fuzzy, moth-like wings and remain near sinks, floor drains, or plumbing fixtures.

    If the flies appear mainly when you disturb houseplant soil, fungus gnats are the more likely explanation.

    Are Fungus Gnats Harmful to Indoor Plants?

    Adult fungus gnats usually do not damage plants. Their primary role is reproduction, which is why killing adults alone rarely solves the entire problem.

    The larvae can create more trouble. They feed mainly on fungi and decaying organic material, but they may also chew on tender roots. Healthy, established houseplants often tolerate a small population without noticeable damage.

    Seedlings, cuttings, young plants, and plants with weakened root systems face a greater risk. Heavy infestations may contribute to:

    • Slow or stunted growth
    • Yellowing leaves
    • Wilting despite moist soil
    • Weak root development
    • Seedling collapse
    • Increased vulnerability to root diseases

    Even when the larvae cause limited direct harm, constantly damp soil can lead to root rot and poor oxygen flow around the roots. In many cases, the growing conditions that attract fungus gnats are more dangerous than the adult insects themselves.

    How Do I Get Rid of Fungus Gnats in Houseplant Soil?

    I have found that the fastest results come from combining several methods. Each treatment targets a different part of the fungus gnat lifecycle.

    Let the Top Layer of Soil Dry Between Waterings

    Fungus gnats need moisture to reproduce. Allowing the upper one or two inches of soil to dry can make the pot less suitable for eggs and larvae.

    Before watering, I push my finger into the soil or use a wooden skewer to check the moisture level. If the soil still feels damp, I wait.

    However, not every plant tolerates the same level of dryness. Succulents, cacti, snake plants, and ZZ plants can usually dry more thoroughly. Ferns, calatheas, and other moisture-loving plants may need a more cautious approach.

    The goal is not to dehydrate the plant. It is to stop keeping the surface continuously wet.

    Use Yellow Sticky Traps to Catch Adult Gnats

    Yellow sticky traps attract and capture adult fungus gnats before they can lay more eggs. I place the traps horizontally or at a slight angle close to the soil rather than high above the plant.

    Sticky traps provide two benefits. They reduce the adult population and help me monitor whether the treatment is working.

    However, traps cannot kill the larvae already living in the potting mix. For that reason, they should support a broader treatment plan rather than serve as the only solution.

    Treat Fungus Gnat Larvae With BTI

    Treat Fungus Gnat Larvae With BTI

    Bacillus thuringiensis israelensis, commonly called BTI, is a naturally occurring bacterium used to control certain fly and mosquito larvae. In the US, it is commonly available in products such as Mosquito Bits and Mosquito Dunks.

    When applied according to the product label, BTI can target fungus gnat larvae in the soil without spraying the plant with a broad-spectrum insecticide.

    Some growers soak the granules in water and use the strained liquid when watering. Others apply products specifically labeled for soil-dwelling larvae. Because formulations and instructions vary, I always follow the manufacturer’s directions.

    Repeated applications may be necessary because BTI targets larvae rather than unhatched eggs or adult flies.

    Consider Beneficial Nematodes for Persistent Infestations

    Beneficial nematodes, particularly Steinernema feltiae, are microscopic organisms that attack fungus gnat larvae in moist soil.

    They can work well in larger indoor plant collections, greenhouses, propagation areas, and infestations that continue despite moisture correction and sticky traps.

    The soil must remain within the moisture range recommended for the nematodes to remain active. This treatment may be more expensive than sticky traps or BTI, but it can provide effective biological control.

    Improve Pot Drainage and Airflow

    Poor drainage allows potting soil to remain wet long after watering. I check that every container has open drainage holes and that excess water can leave freely.

    I also empty saucers and cachepots after watering. A plant should not remain submerged in collected water unless it is a species specifically suited to those conditions.

    If the potting mix has become compacted, I may replace it with a better-aerated blend containing ingredients such as perlite, bark, or pumice. Gentle airflow around plants can also help the soil surface dry more evenly.

    Does Bottom Watering Prevent Fungus Gnats?

    Bottom watering can reduce moisture on the soil surface, where adult fungus gnats often lay eggs. To bottom-water, place the pot in a shallow container of water and allow moisture to move upward through the drainage holes.

    Remove the pot once the root zone has absorbed enough water, and allow it to drain fully.

    Bottom watering can help, but it is not a complete cure. If the entire pot remains constantly saturated, larvae may still survive deeper in the soil. It works best when combined with proper watering intervals and larval treatment.

    Should I Repot a Plant With Fungus Gnats?

    Repotting is usually unnecessary for a mild or moderate infestation. Changing the soil can stress the plant, and the new potting mix may become reinfested if watering habits remain unchanged.

    I consider repotting when:

    • The soil smells sour or rotten
    • The roots show signs of decay
    • The potting mix remains wet for an unusually long time
    • The infestation is severe and other treatments have failed
    • The plant is already due for repotting

    When repotting, I remove as much old soil as practical, inspect damaged roots, clean the container, and use fresh, well-draining potting mix. I also isolate the plant until I am confident the infestation is under control.

    Which Fungus Gnat Remedies Often Fail?

    Many popular home remedies may catch a few insects or create temporary improvement, but they often fail when used alone.

    Apple cider vinegar traps are generally more effective for fruit flies than fungus gnats. Cinnamon may have some antifungal properties, but sprinkling it on the soil rarely eliminates an established infestation. Coffee grounds can retain moisture and may make the potting environment more attractive to gnats.

    Hydrogen peroxide drenches are also widely recommended online. Although a diluted solution may kill some larvae on contact, repeated or overly concentrated applications can irritate roots and disrupt soil biology. I prefer moisture control, BTI (Bacillus thuringiensis Israelensis), sticky traps, and improved drainage because they offer a more sustainable strategy.

    How Long Does It Take to Eliminate Fungus Gnats?

    Most infestations do not disappear overnight. Adult fungus gnats may continue emerging after treatment because eggs, larvae, and pupae are already present in the soil.

    I usually expect noticeable improvement within one to two weeks when I consistently combine sticky traps, proper watering, and larval control. A stubborn infestation may require several weeks of treatment.

    Continue the routine even after adult numbers decline. Stopping too early can allow the remaining larvae to mature and restart the infestation.

    How Can I Prevent Fungus Gnats From Returning?

    How Can I Prevent Fungus Gnats From Returning?

    Prevention starts with better moisture management. I check the soil before watering instead of relying on a calendar. I also remove dead leaves, empty drainage trays, and avoid storing open bags of damp potting mix indoors.

    New plants should remain separate from the main collection for at least a short observation period. During that time, check the soil, use a sticky trap, and watch for insects after watering.

    Clean pots, good drainage, appropriate potting mix, and careful watering provide the strongest long-term defense against black gnats in indoor plants.

    Frequently Asked Questions About Tiny Flies in Plant Soil

    1. Why do small flies come out of my plant when I water it?

    Water disturbs adult fungus gnats resting near the soil and pushes them out of protected spaces. The newly moistened soil also restores the damp conditions they prefer for breeding.

    2. Will fungus gnats go away if I stop watering?

    Drying the soil can reduce their population, but you should not stop watering long enough to damage the plant. Combine safer watering intervals with traps and larval treatment.

    3. Can fungus gnats kill a houseplant?

    A small infestation rarely kills a mature plant. Heavy larval populations can damage seedlings, cuttings, and weakened roots, especially when the soil remains waterlogged.

    4. Are fungus gnats dangerous to people or pets?

    Fungus gnats do not bite people or pets and generally pose little direct health risk. However, always follow product labels when using any pest-control treatment around children and animals.

    5. Why do fungus gnats keep coming back?

    They often return because the soil remains consistently moist, larvae were not treated, or a nearby plant still contains eggs and larvae. Treat all affected pots and correct the underlying watering conditions.

    The Real Fix Starts Beneath the Soil

    When I see tiny black flies in houseplant soil after watering, I no longer focus only on the insects flying around the room. I check the soil moisture, drainage, potting mix, and watering routine.

    Sticky traps can reduce the adults, but lasting control comes from disrupting the lifecycle below the surface. By allowing the soil to dry appropriately, treating the larvae, improving drainage, and monitoring nearby plants, you can stop fungus gnats without putting unnecessary stress on your houseplants.