Category: Herbs and Edible Gardens

  • Top Low Maintenance Edible Garden Ideas for Easy Harvests

    Top Low Maintenance Edible Garden Ideas for Easy Harvests

    A small edible garden once turned into a daily round of watering, weeding, tying stems, and checking leaves for pests. That experience taught me that planning matters more than garden size. These low maintenance edible garden ideas use perennial crops, hardy herbs, efficient layouts, and simple watering systems to produce useful harvests without constant attention.

    A low-effort garden is carefully designed so plants suit the climate, water reaches roots efficiently, weeds remain covered, and every crop earns its place.

    Key Takeaways

    • Start with a growing area that matches your available time.
    • Choose perennial crops and repeat-harvest vegetables.
    • Use raised beds, mulch, and drip irrigation.
    • Group plants with similar growing needs.
    • Grow foods you regularly cook and enjoy.

    Plant Once And Harvest For Years

    Perennial edibles return for several seasons, reducing yearly planting and soil preparation. They need patience while establishing, but mature plants often produce reliably with basic seasonal care.

    Rhubarb For Long Harvests

    Rhubarb develops decorative leaves and colorful edible stalks. A healthy crown can remain productive for years in a cool climate with fertile, well-drained soil for indoor herb garden. Give each plant enough room because mature clumps spread widely.

    Harvest only the stalks because the leaves are not edible. Avoid heavy harvesting during the first year, then add compost each spring to support growth.

    Blueberries As Edible Hedges

    Blueberries combine ornamental value with dependable fruit. Their flowers, berries, and fall color allow them to replace ordinary shrubs along sunny boundaries.

    They need acidic soil, steady moisture, and varieties suited to local winters. Two compatible cultivars may improve pollination. Mulch protects their shallow roots and helps maintain moisture.

    Asparagus For Spring Picking

    Asparagus returns each spring from established crowns. It prefers full sun and well-drained soil, so choose a permanent bed carefully.

    Limit harvesting during the first two seasons. Later, pick spears for several weeks, then let the remaining growth develop into ferns that recharge the roots.

    Tough Herbs With Little Fuss

    Woody culinary herbs provide flavor, fragrance, flowers, and structure. Most prefer strong sun and fast-draining soil rather than frequent watering or rich fertilizer.

    Tough Herbs With Little Fuss

    Rosemary And Thyme

    Rosemary and thyme tolerate dry periods once established. Grow them in raised beds, gravelly borders, or containers with drainage holes. In cold regions, keep rosemary in a movable pot and protect it during freezing weather.

    Sage And Oregano

    Sage forms a rounded plant, while oregano spreads along sunny bed edges. Both tolerate occasional neglect after their roots settle.

    Trim them after flowering to encourage compact growth. Divide oregano when it begins crowding nearby crops.

    Chives For Neat Clumps

    Chives form tidy clumps and produce edible shoots followed by purple flowers. They fit beside paths, around raised beds, or in containers near the kitchen.

    Cut leaves near the base and let fresh shoots return. Divide crowded clumps every few years to maintain growth.

    Clever Layouts That Save Work

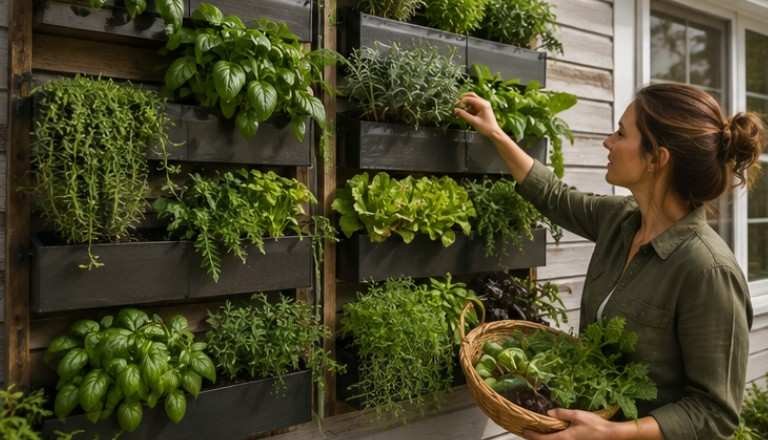
    A practical layout reduces walking, reaching, and mismatched care. Keep frequently harvested herbs near the house and leave enough space between plants for airflow.

    Clever Layouts That Save Work

    Edible Hedges Along Boundaries

    Rows of blueberries, currants, rosemary, or compact fruit bushes can define paths and property edges while producing food.

    Choose plants for the local climate and mature size. Run drip tubing beneath mulch to water the entire row efficiently.

    Creeping Thyme Ground Cover

    Creeping thyme grows between stepping stones and along sunny paths. Its low growth shades bare soil, discourages some weeds, and softens hard surfaces. Use it where foot traffic is light and drainage is good.

    Raised Beds For Easy Reach

    Raised beds create defined growing zones, improve access, and allow control over soil quality. Narrow beds keep plants within easy reach, while taller beds reduce bending.

    Add compost, mulch, and drip tubing before plants become large. Check moisture regularly because raised soil can dry faster than ground-level beds.

    Easy Watering And Soil Care

    A simple watering system and covered soil can save more time than choosing an easy crop. They prevent repeated hand watering and support steadier growth.

    Use Self-Watering Containers

    Self-watering containers hold a reservoir below the potting mix. Roots draw moisture upward, reducing rapid drying during warm weather.

    They suit basil, parsley, peppers, lettuce, and compact tomatoes. Check reservoirs during hot weather and refresh old potting mix between seasons.

    Add Mulch Around Plants

    Spread two to three inches of straw, shredded leaves, or untreated wood chips around established plants. Keep mulch away from stems.

    Mulch slows evaporation, blocks many weeds, reduces temperature swings, and protects the soil surface.

    How To Use Low Maintenance Edible Garden Ideas

    How To Use Low Maintenance Edible Garden Ideas

    Applying low maintenance edible garden ideas starts with a small sunny location near water. Measure the space, note the hours of direct light, and choose containers, a raised bed, or an edible border.

    List the foods your household uses, then select three to six dependable plants with similar needs. Combine perennial herbs with repeat-harvest greens and install drip irrigation or self-watering containers before planting.

    Cover open soil with mulch, label perennial crops, and inspect the garden briefly each week. Harvest regularly, remove damaged leaves, and expand only when the first area remains manageable.

    Common Problems To Avoid

    Low-effort gardens become demanding when too many crops share a small area. Crowding restricts airflow, increases competition, and makes pest inspection harder.

    Avoid large vining crops unless there is enough room and support. Indeterminate tomatoes, melons, and sprawling squash usually require more tying, feeding, training, and harvesting.

    Read plant labels and plan for mature size. Compact, bush, patio, and dwarf varieties are usually easier in small beds and containers.

    Frequently Asked Questions

    1. What Are The Best Low Maintenance Edible Garden Ideas For Beginners?

    The best low maintenance edible garden ideas include a three-pot herb garden, one mulched raised bed, self-watering containers, and perennial herbs planted near the kitchen.

    2. Which Edible Plants Return Every Year?

    Asparagus, rhubarb, blueberries, strawberries, chives, oregano, thyme, sage, sorrel, and suitable fruit bushes return for years when matched to local soil and climate.

    3. Are Raised Beds Easier To Maintain?

    Raised beds can reduce bending, improve drainage, control soil quality, and limit spreading weeds, especially when combined with mulch and timer-controlled drip irrigation.

    4. How Much Weekly Care Does A Small Garden Need?

    A small mulched garden with automated watering may need fifteen to thirty minutes of weekly care, although harvesting, weather, pests, and plant choice affect the total.

    Grow More And Fuss Less

    The best low maintenance edible garden ideas depend on thoughtful choices rather than neglect. Perennial crops, hardy herbs, edible hedges, raised beds, mulch, and efficient watering reduce repetitive work while keeping harvests useful. Start with one manageable space, match plants to your climate, and grow foods you enjoy. A simple garden should make fresh eating easier, more rewarding, and much less stressful.

  • Save Your Plants: How to Keep Bugs Off Indoor Herbs

    Save Your Plants: How to Keep Bugs Off Indoor Herbs

    Bringing fresh basil to the dinner table feels like absolute magic until unwanted pests invade the kitchen counter. Learning how to keep bugs off indoor herbs rescued my personal windowsill garden from an embarrassing spider mite catastrophe. 

    Growing culinary greens inside your home should bring vibrant flavor to your daily cooking without an unexpected swarm of bugs. Simple routine checks and organic care habits turn your windowsill into a thriving, green sanctuary for delicious home cooking.

    Key Takeaways

    1. Provide bright light daily.
    2. Dry topsoil between waterings.
    3. Inspect all new plants.
    4. Rinse foliage with water.
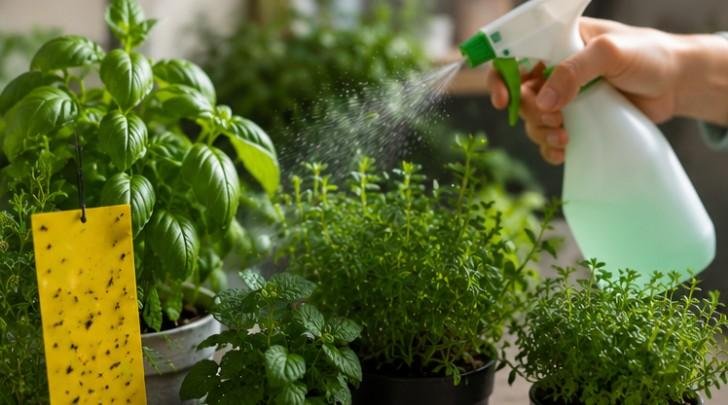
    5. Spray diluted Castile soap.

    Keep Bugs Off Indoor Herbs Easy Way

    Nobody likes seasoning their homemade pasta sauce with unexpected leafy critters or sticky insect webs. Discovering how to keep bugs off indoor herbs preserves your hard work and keeps your culinary dishes completely appetite friendly. 

    Fresh indoor herbs bring lively aromas and bright colors into your kitchen, so keeping pests away ensures every single leaf remains appetizing, clean, and delicious whenever hunger strikes.

    Essential Prevention Practices for Pests

    Building a solid defensive routine keeps your potted greens growing strong while shutting down bug infestations before they start.

    Providing Bright Light for Stronger Foliage

    Herbs growing on indoor windowsills need plenty of direct sunlight or artificial illumination to maintain strong plant walls. Weak, leggy plants growing in dark corners become stressed quickly, making them super attractive targets for hungry insects. Placing your herb pots near a bright south-facing window or setting up simple LED grow lights builds tough plant tissues that resist damage.

    Healthy plants withstand minor bug attacks much better than shaded, struggling greenery. When herbs receive six to eight hours of bright light each day, their natural defense systems stay strong. Strong foliage creates a sturdy natural barrier that deters soft-bodied insects from settling down and laying eggs on your precious kitchen crops.

    Managing Soil Moisture to Prevent Gnats

    Managing Soil Moisture to Prevent Gnats

    Overwatering your potted greens creates the ultimate wet breeding ground for soil pests like tiny fungus gnats. Allowing the top layer of potting soil to dry out completely between waterings starves developing larvae and breaks their life cycle effectively. Checking soil moisture with your finger before grabbing the watering can prevents soggy conditions that attract unwanted bugs.

    Bottom watering by letting pots sit in a shallow tray of water for twenty minutes supplies deep moisture directly to roots. This clever technique keeps the topsoil surface bone dry while satisfying your plant’s hydration needs. Uninviting dry topsoil ensures flying pests look elsewhere to lay their eggs, keeping your kitchen counter clean and pest free.

    Inspecting and Isolating New Kitchen Plants

    Bringing home fresh potted parsley or mint from the local grocery store often invites sneaky hitchhikers right onto your counter. Always perform a thorough visual inspection under leaves and along stems before placing new pots next to existing greens. A quick inspection catches tiny aphids or webbed mites before they spread throughout your entire indoor container collection.

    Keeping fresh plants separated in a different room for two weeks isolates hidden pests so your main herb garden stays entirely protected. During this quarantine window, monitor leaf undersides and soil surfaces for any signs of movement. Catching hitchhikers early saves you from battling a widespread houseplant invasion down the road.

    Practical Methods on How to Keep Bugs Off Indoor Herbs

    Applying safe organic fungicides directly eliminates active pests without placing dangerous chemical residues on your culinary leaves.

    Practical Methods on How to Keep Bugs Off Indoor Herbs

    Rinsing Foliage with Tepid Water

    A gentle shower at your kitchen sink works wonders for removing soft-bodied insects from delicate herb leaves instantly. Adjust your faucet to produce a lukewarm, soft spray and carefully wash both upper and lower leaf surfaces. Knocking off aphids and whiteflies physically reduces pest populations without needing any fancy chemicals or complex equipment.

    Placing a small plastic bag over the potting soil during this shower prevents loose bugs from falling into the dirt. Protecting the soil ensures washed-off pests swirl right down the drain instead of crawling back up the stems later. Repeating this simple water rinse every few days keeps pest numbers ridiculously low.

    Spraying Natural Insecticidal Soap

    Mixing pure liquid Castile soap with warm water creates an effective pest solution that disrupts soft insect coats on contact. Combine one tablespoon of mild soap per quart of water inside a clean spray bottle and shake the contents thoroughly. Mild soap sprays break down the protective coating of aphids and spider mites without harming fragile plant tissues.

    Lightly misting affected leaves every few days breaks down persistent pest populations while leaving your culinary greens completely food safe. Make sure to spray the undersides of leaves where insects love to hide from view. A quick rinse under tap water before cooking easily removes any soapy residue.

    Applying Organic Neem Oil and Rubbing Alcohol

    Pure organic neem oil acts as a fantastic natural treatment that smothers persistent pests and disrupts their reproductive development. Spraying a light neem mixture during evening hours protects tender leaves from potential light burn under strong sun or grow lights. Neem oil provides long-lasting protection by preventing young insects from maturing into egg-laying adults.

    For stubborn individual bugs like mealybugs or scale, dab a cotton swab dipped in standard rubbing alcohol directly onto the insect. The alcohol dissolves their protective waxy coating instantly, neutralizing the pest on contact without harming surrounding foliage. This targeted spot treatment works exceptionally well for small, localized insect clusters.

    Food Safety and Harvest Guidelines After Spraying

    Protecting your plants requires sensible post-treatment care so your harvested herbs remain delicious and clean for cooking.

    Food Safety and Harvest Guidelines After Spraying

    Observing Proper Post-Treatment Wait Times

    Even organic remedies like Castile soap and neem oil need a brief window of time to dissipate off plant tissue safely. Waiting twenty-four to forty-eight hours after applying any natural treatment prevents lingering bitter or soapy flavors from soaking into your dinner. Giving remedies time to dry ensures your herbs taste exactly as nature intended.

    This brief waiting period gives natural active ingredients time to defeat pests while protecting the aromatic essential oils packed inside your leaves. Rushing to harvest immediately after spraying can ruin delicate leaf flavors. Patience guarantees your home-cooked dishes stay rich and flavorful.

    Washing Harvested Leaves Before Cooking

    Cleaning your freshly picked herb sprigs right before meal prep ensures all organic residues and loose dust disappear completely. Submerge your harvested basil, cilantro, or thyme in a deep bowl of cold water and swish them gently for thirty seconds. Floating away debris leaves your fresh pickings looking crisp and appetizing.

    Patting leaves dry with clean paper towels leaves you with pristine greens ready to elevate your favorite culinary creations. Taking a few extra seconds to rinse and dry your harvest ensures ultimate peace of mind. Your food stays safe, clean, and delicious every single time.

    Frequently Asked Questions 

    1. How to keep bugs out of an indoor herb garden?

    Provide bright light, avoid overwatering topsoil, quarantine new plants, and spray leaves regularly with a mild liquid Castile soap solution to control soft-bodied pests naturally without using harmful chemical sprays around your kitchen.

    2. What can I use on my herbs to keep bugs away?

    Apply food-safe insecticidal sprays made from pure Castile soap, organic neem oil, or diluted rubbing alcohol directly onto stems and leaves to deter common houseplant insects safely without ruining edible foliage.

    3. What smell do most bugs hate?

    Most indoor pests dislike strong aromatic scents like peppermint, lavender, rosemary, citrus, and garlic, which naturally mask target plants and confuse searching insects while keeping your kitchen smelling fresh and clean.

    4. What can I put in my indoor plants to keep bugs away?

    Set yellow sticky traps near containers, sprinkle food-grade diatomaceous earth onto dry topsoil, or add ground cinnamon powder to deter fungus gnats and crawling insects from taking over indoor pots.

    Creative Ways to Enjoy Bug-Free Indoor Herbs

    Mastering how to keep bugs off indoor herbs gives you the freedom to pick fresh, aromatic leaves directly from your windowsill whenever hunger strikes. With good light, proper watering, and simple natural sprays, your indoor garden will thrive without pests. Enjoy growing clean, tasty greens and elevate every meal with healthy, homegrown flavor all year long!

  • Pest Control Using Neem Oil on Edible Herbs

    Pest Control Using Neem Oil on Edible Herbs

    Fresh herbs make meals special, so pest damage feels personal. My first concern with using neem oil on edible herbs was not only whether it would remove aphids, but whether the leaves would stay healthy, flavorful, and suitable for the kitchen.

    Neem oil can help with selected pests, but formulas and harvest rules vary. Safe use depends on label directions, correct dilution, patch testing, careful timing, and thorough washing.

    Key Takeaways

    • Read the label first. 
    • Dilute accurately. 
    • Patch-test one leaf. 
    • Avoid heat and flowers. 
    • Wash harvested herbs before eating.

    Benefits of Neem Oil on Herbs

    Using neem oil on edible herbs is worth understanding because nobody wants aphids as a surprise garnish. Herb leaves are often eaten raw, so careless spraying can affect foliage, flavor, pollinators, and harvest timing. A treatment that suits a rose may scorch cilantro or leave basil unpleasantly oily.

    Good pest control means identifying the pest, choosing a suitable product, and treating only affected areas. This protects useful insects, reduces waste, and keeps the garden productive.

    Understanding Neem Oil

    Neem products do not all work the same way. Clarified hydrophobic neem oil mainly coats soft-bodied pests, while products containing azadirachtin may disrupt feeding, growth, and reproduction. Common targets include aphids, whiteflies, spider mites, thrips, mealybugs, and some young caterpillars.

    Some products are also labeled for powdery mildew, rust, and leaf spots. Neem will not repair damaged foliage or cure every disease, so inspect plants before reapplying.

    Check The Product Type

    Ready-to-use sprays, concentrates, cold-pressed oils, and azadirachtin products are not interchangeable. Their approved crops, mixing rates, application limits, and pre-harvest intervals may differ, so a universal online recipe can be unsafe or ineffective.

    The product label controls safe use. The National Pesticide Information Center and EPA pesticide label database provide dependable guidance on registered directions.

    Identify The Problem

    Inspect leaf undersides, tender stems, and new growth. Aphids gather in clusters, whiteflies rise when disturbed, and spider mites may leave pale speckles or fine webbing. Old holes do not prove that a pest is still present.

    Wind, sunscald, drought, overwatering, and nutrient stress can resemble insect injury. Correct identification prevents needless spraying and further plant stress.

    Identify The Problem

    Start Gently

    Water, hand removal, pruning, insect netting, sticky traps, and better airflow may solve a small infestation without leaving residue.

    Neem makes more sense when pests return, damage is increasing, and the label lists both the herb and target pest. Routine preventive spraying is rarely needed in a healthy kitchen garden.

    Protect Sensitive Herbs

    Basil, cilantro, dill, parsley, chervil, fennel foliage, and young chives can develop pale patches, brown edges, curling, or leaf drop after a strong or badly timed oil spray.

    Rosemary, sage, bay, oregano, mint, and thyme may be tougher, but heat, drought, intense sun, excessive concentration, or repeated spraying can still burn mature foliage.

    Handle Seedlings Carefully

    Seedlings have thin leaves and limited energy. Avoid neem unless the label permits that growth stage; rinsing, isolation, or labeled insecticidal soap may be safer.

    Cultivars may react differently within the same herb species. Success on one basil plant does not guarantee the same response from another, which makes patch testing important every time.

    Using Neem Oil On Edible Herbs Correctly

    Using neem oil on edible herbs starts with the label, not the sprayer. Confirm the crop and pest, note the pre-harvest interval, wear required protection, and measure concentrate exactly. Add water and mild soap only when the label directs you to use an emulsifier.

    Mix only what you need. Excess oil can leave residue and raise burn risk, so keep the mixture evenly combined as directed.

    Using Neem Oil On Edible Herbs Correctly

    Run A Patch Test

    Treat one small leaf or stem and wait at least twenty-four hours, or longer when directed. Check for spotting, curling, discoloration, or wilting before treating more of the plant.

    Testing is vital for delicate herbs, seedlings, transplants, and plants recovering from heat or water stress.

    Spray At The Right Time

    Apply during the cool evening or early morning, following the label. Avoid midday sun, extreme heat, wind, rain, drought stress, and recently saturated foliage.

    Lightly coat affected stems and leaf surfaces without dripping. Target pest locations and reapply only at the permitted interval.

    Protect Flowers And Pollinators

    Flowering basil, mint, oregano, thyme, rosemary, sage, cilantro, dill, fennel, and chives attract bees. Do not spray open flowers or apply neem while pollinators are visiting.

    Evening treatment reduces direct exposure, but residue may remain. Target nonflowering foliage or use pruning where bees visit heavily.

    Control Spray Drift

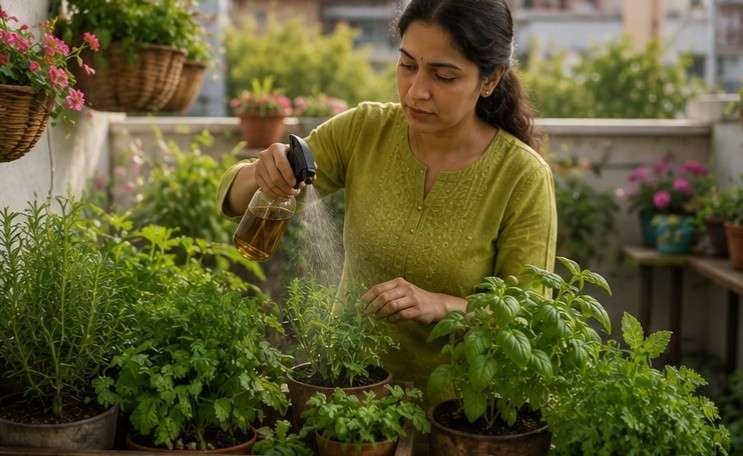
    Use a controlled nozzle on a calm day and shield nearby flowers with cardboard. Keep neem, spills, and rinse water away from ponds, drains, and streams because some formulations can harm aquatic organisms.

    Spot treatment protects helpful lady beetles and lacewings better than spraying healthy plants.

    Harvest And Wash Safely

    Pre-harvest intervals differ, so never replace the bottle’s direction with a general online claim. Harvest mature leaves before treatment when practical to reduce residue and waste.

    Harvest And Wash Safely

    Clean Leaves Well

    Rinse sturdy herbs under cool running water while gently rubbing the surfaces. Swish delicate herbs in a clean bowl, drain, repeat with fresh water, and dry with a clean towel or salad spinner.

    Washing does not replace the harvest interval. Discard greasy, unusual-smelling, or badly damaged leaves.

    Repair Leaf Burn

    Neem injury may appear as pale patches, dark speckles, crisp edges, curling, wilting, or sudden leaf drop. Symptoms often become noticeable after treated foliage receives strong sunlight.

    Stop spraying, move container herbs away from harsh afternoon sun, maintain even soil moisture, and remove only badly damaged or rotting leaves. Partly green foliage can still help the plant recover.

    Change The Treatment

    Wait for healthy growth before applying another pesticide. Use water, pruning, hand removal, netting, or labeled insecticidal soap instead. Combining treatments can add stress. Correct watering, spacing, clean tools, harvesting, and airflow reduce future problems.

    Frequently Asked Questions

    1. Which Plants Should You Not Use Neem Oil On?

    Avoid crops absent from the label, severely stressed plants, tiny seedlings, and delicate herbs unless a patch test shows no injury after at least twenty-four hours.

    2. Is Neem Oil Safe To Spray On Basil?

    It may be safe when the label permits basil. Patch-test first, avoid hot sunlight, follow harvest directions, and wash treated leaves thoroughly before use.

    3. Can You Use Neem Oil On Edibles?

    Yes, using neem oil on edible herbs and vegetables can be acceptable when the product lists those crops and all dilution, timing, application, and harvest instructions are followed.

    4. Can You Eat Veggies That Have Been Sprayed With Neem Oil?

    Yes, after observing the labeled pre-harvest interval. Rinse produce thoroughly under clean running water and discard vegetables with stubborn oily residue or obvious spray damage.

    Keep Bugs Out And Flavor In

    Simillarly, you can harvest basil for continuous growth. And using neem oil on edible herbs protects flavor, pollinators, plant health, and harvest quality. Identify the pest, follow the label, dilute accurately, patch-test, spray in cooler hours, and wash every harvest. Used with restraint, neem can support an edible garden without becoming the automatic answer to every spotted leaf or visiting insect.

  • How to Grow Herbs Indoors Year Round for Fresh Flavor 

    How to Grow Herbs Indoors Year Round for Fresh Flavor 

    Fresh basil beside the stove and mint ready for evening tea can make an ordinary kitchen feel more alive. Learning how to grow herbs indoors year round helped me stop buying oversized herb bundles that wilted before I could use them. With suitable light, drainage, and regular harvesting, an indoor edible garden can remain productive in every season.

    Key Takeaways

    • Start small: Choose three easy herbs.
    • Add light: Winter windows may be insufficient.
    • Drain well: Never leave roots sitting in water.
    • Harvest often: Regular trimming encourages fresh growth.
    • Replant wisely: Short-lived herbs need repeat sowing.

    Pick Herbs That Suit Your Home

    The best indoor herb garden begins with plants that match your available light, room temperature, cooking habits, and experience.

    Begin With Reliable Herbs

    Mint, chives, parsley, thyme, oregano, and rosemary are dependable choices for beginners. Mint tolerates slightly lower light and enjoys evenly moist soil, while thyme and oregano prefer brighter conditions and drier roots.

    Basil is productive and useful, but it needs warmth and strong light. Rosemary also needs excellent drainage and good air circulation. Growing each herb in a separate pot makes care easier because their moisture needs differ.

    Understand Short-Lived Herbs

    Cilantro and dill grow quickly, but one plant will not produce leaves forever. Both naturally mature, flower, and set seed. Once this happens, their leaf quality and flavor decline.

    For a steady supply, sow a small batch of cilantro or dill every three to four weeks. This method, known as succession sowing, keeps younger plants developing as older ones finish.

    Match Herbs to Your Cooking

    Grow plants you regularly use rather than choosing herbs only because they look attractive. Basil suits pesto and pasta, cilantro works well in salsa, parsley freshens soups and salads, and rosemary adds flavor to roasted vegetables.

    Starting with three or four favorites keeps the garden manageable. Once those plants are healthy, you can add less familiar options such as sage, chervil, marjoram, or lemon balm.

    Build the Right Indoor Setup

    Build the Right Indoor Setup

    Your growing area does not need to be expensive, but it must provide light, drainage, airflow, and enough room for each plant.

    Choose Pots With Good Drainage

    Always use containers with drainage holes to prevent water from collecting around the roots, which can lead to root rot. Small 4- to 6-inch pots are suitable for young herbs, while larger varieties like rosemary, basil, and mint will eventually need bigger containers. Terra-cotta pots are ideal for drought-tolerant herbs, whereas plastic or glazed ceramic pots retain moisture better for herbs that prefer consistently damp soil.

    Use Quality Potting Mix

    Avoid using garden soil indoors, as it compacts easily and may introduce pests or diseases. Instead, choose a lightweight potting mix designed for containers. Mixing in perlite improves drainage, especially for herbs like rosemary, thyme, oregano, and sage.

    Choosing the best soil for indoor herb garden growth helps roots stay aerated, hold balanced moisture, and avoid the compaction that often weakens indoor herbs.

    Grow Herbs in Separate Pots

    Planting herbs individually makes watering, repotting, and disease management much easier since different herbs have different moisture needs.

    Give Herbs Enough Light

    Light is the factor most likely to determine whether indoor herbs grow thick and flavorful or become pale and weak.

    Test Your Window First

    Watch your chosen windowsill for a full day before placing plants there. Most culinary herbs perform best with at least six hours of strong light, and a south-facing window generally provides the best winter exposure.

    A west-facing window may work for mint, parsley, and chives. However, window direction alone does not guarantee enough light. Nearby buildings, trees, screens, and cloudy winter weather can reduce its intensity.

    Penn State Extension recommends about six hours of direct sunlight for most herbs and suggests using a sunny southern exposure where possible. Read its indoor herb guidance.

    Add a Grow Light

    A full-spectrum LED grow light offers the most dependable way to maintain a year-round kitchen garden. Position it above the plants rather than beside them so stems grow upright.

    Run the light on a timer for roughly 12 to 14 hours daily, then give plants a dark resting period. The University of Minnesota Extension notes that around 12 hours of artificial light can support many indoor herbs. Explore its herb-growing recommendations.

    Follow the manufacturer’s recommended hanging height because light strength varies by fixture. Raise the lamp as the plants grow to prevent scorched leaves.

    Read the Plant’s Signals

    Long stems, wide gaps between leaves, pale color, and plants leaning toward a window commonly indicate insufficient light. Move the herbs closer to the light source or extend the lighting period gradually.

    Brown, bleached patches may indicate that a powerful lamp is too close. Raise it slightly and observe new growth rather than expecting damaged leaves to recover.

    Keep the Harvest Coming

    Keep the Harvest Coming

    Continuous production depends on careful feeding, timely pruning, and replacing plants that naturally reach the end of their cycle.

    Feed Lightly

    Indoor herbs generally grow more slowly than outdoor plants, so heavy feeding is unnecessary. Too much fertilizer can produce weak growth and may reduce the concentrated flavor gardeners want from culinary herbs.

    During active growth, apply a balanced liquid fertilizer at half the label strength every four to six weeks. Reduce feeding when growth slows in winter unless the plants are under strong grow lights and remain actively productive.

    Harvest for Regrowth

    Never remove most of a young plant at once. Begin with small harvests after the herb has developed enough healthy growth to recover.

    Pinch basil just above a pair of leaves to encourage two new branches. Cut chives near the base while leaving some growth behind. Harvest parsley from the outer stems first, and trim thyme, mint, oregano, and rosemary from healthy stem tips.

    Remove basil flower buds early if you want continued leaf production. Regular trimming keeps many herbs compact and prevents them from becoming woody or top-heavy.

    Replant on Schedule

    Perennial herbs such as rosemary, thyme, oregano, mint, and chives may remain productive for a long time with proper care. Basil can also live indoors for months, although older plants often become woody.

    Cilantro, dill, and chervil are better managed as repeating crops. Sow new containers regularly instead of trying to keep one aging plant alive indefinitely.

    Adjust Care Through the Seasons

    Adjust Care Through the Seasons

    Indoor conditions still change throughout the year, even though the herbs remain protected from outdoor frost and extreme heat.

    Manage Winter Conditions

    Short winter days usually require supplemental lighting. Keep tender herbs away from cold window glass, exterior doors, and chilly drafts. Basil is especially sensitive to low temperatures.

    Heating systems can dry the air and soil. Grouping plants can slightly increase local humidity, but keep enough space between them for airflow. A small humidifier may help in very dry homes.

    Avoid compensating for dry air by keeping the soil constantly wet. Root health depends on correct soil moisture, while leaf humidity is a separate issue.

    Handle Summer Heat

    Strong summer sunlight passing through glass can overheat leaves and containers. Move herbs a few inches back from the window or use a sheer curtain during the hottest part of the day.

    Plants may need more frequent watering in July because warmer conditions increase moisture loss. Check the potting mix more often rather than following a fixed calendar.

    Rotate and Inspect Weekly

    Turn containers one-quarter rotation each week so every side receives light. While rotating them, inspect the tops and undersides of leaves for pests.

    Indoor containers avoid many outdoor weed problems, but learning how to keep weeds out of a garden without chemicals can help when moving herbs between indoor and outdoor growing spaces.

    Also look for roots emerging through drainage holes, compacted soil, salt buildup, and stems leaning toward the light. Early correction is easier than rescuing a severely stressed plant.

    Frequently Asked Questions

    1. What Herbs Can I Grow Indoors All Year-Round?

    Mint, chives, parsley, thyme, oregano, rosemary, sage, and basil can grow indoors throughout the year. Cilantro and dill also work, but need regular reseeding.

    2. Can You Grow Herbs in the House All Year Long?

    Yes. Provide bright natural light or an LED grow light, suitable containers, well-draining potting mix, proper watering, airflow, and occasional feeding.

    3. What Are Common Mistakes Growing Indoor Herbs?

    The most common mistakes are overwatering, weak lighting, pots without drainage, crowding incompatible herbs together, excessive fertilizer, and harvesting too much growth at once.

    4. Is July Too Late to Grow Herbs?

    No. July is suitable for starting indoor herbs because household conditions can be controlled. Fast-growing basil, cilantro, dill, mint, parsley, and chives can all be planted during summer.

    Fresh Herbs, One Simple System

    Knowing how to grow herbs indoors year round is less about having a perfect green thumb and more about creating repeatable habits. Give each herb its own draining pot, provide reliable light, water according to the soil, and harvest little and often. Start with a few forgiving plants, learn their signals, and expand your edible windowsill as your confidence grows.

  • How To Grow Mint In Containers At Home In Easy Steps

    How To Grow Mint In Containers At Home In Easy Steps

    Growing mint in pots is an easy and effective way to enjoy fresh herbs while stopping the plant from spreading aggressively in your garden. To succeed, use a large pot at least ten to twelve inches wide with drainage holes, standard all-purpose potting mix, and keep the soil consistently moist. This simple practice ensures you get an endless supply of vibrant leaves for your morning teas and weekend cooking experiments.

    Mint has a wild reputation for trying to take over every single inch of garden space it touches. Understanding how to grow mint in containers solves this dilemma by locking those adventurous underground roots securely behind plastic or glazed walls. You get to enjoy all the fragrant benefits without turning your entire backyard into a massive jungle of mint.

    Key Takeaways

    • Plant mint in containers to prevent aggressive roots from taking over your garden space.
    • Choose a 10 to 12-inch wide pot with adequate drainage holes for optimal root health.
    • Keep soil consistently moist using an organic potting mix amended with quality compost.
    • Harvest stems frequently to encourage bushier growth and prevent early flowering.
    • Provide at least six hours of sunlight daily for vibrant flavor and strong stems.

    Container Gardening Saves Your Yard

    Planting herbs in confined vessels protects your favorite landscape features from aggressive botanical takeover attempts. Mint sends out underground runners that easily choke out neighboring plants if given open ground. Keeping your herbs neatly isolated gives you total control over your garden layout and overall yard health.

    Confined planting also makes it remarkably easy to chase the best sunlight angles across your property. You can shift your pots instantly when seasonal weather shifts or when scorching summer afternoon rays threaten tender leaves. This mobility ensures your green investments always stay comfortable and productive.

    Container Control Secrets

    Managing aggressive root systems is the primary reason why container planting is essential for success with this herb. Mint sends out underground runners called rhizomes that will quickly colonize nearby flower beds if given the chance. Restricting your plants to individual pots blocks these escape routes entirely.

    Preventing Soil Nutrient Theft

    Crowded garden beds often lead to aggressive root competition where vigorous herbs starve neighboring vegetables of vital nutrients. Setting your pots directly on patios or hardscaping ensures your mint stays isolated. This smart layout protects your delicate crops like lettuce and tomatoes from aggressive botanical bullies.

    Mobility And Microclimates

    Portable containers allow you to shift your herbs effortlessly as seasonal sunlight patterns change across your yard or balcony. You can easily chase the warm rays in spring or slide pots into protective shade during scorching summer afternoons. This flexibility ensures your plants stay comfortable year-round without stress.

    Selecting The Ideal Pot And Soil

    Selecting The Ideal Pot And Soil

    Choosing a container at least ten to twelve inches wide gives the rapid roots enough room to expand comfortably. Plastic or glazed pots work best because they hold moisture well and reduce daily watering chores. 

    Avoid unlined terracotta, as it dries out the soil too quickly under intense summer heat. Always make sure the bottom has clear holes so the roots do not rot in standing water. Use a rich, well-draining potting mix blended with a little organic compost to kickstart healthy leaf development.

    While containers use potting mix instead of garden soil, understanding how to improve clay soil for a vegetable garden is helpful if you later decide to transplant mint into outdoor beds.

    Proper vessel selection acts as the solid foundation for all your future culinary harvests and plant vitality. When roots have enough space and clean drainage, they absorb nutrients efficiently without stress. Taking your time during this initial setup phase saves you from messy transplanting jobs later in the season.

    Mastering Sunlight And Perfect Placement

    Mastering Sunlight And Perfect Placement

    Place the pot in an area with four to six hours of direct sun daily to maximize flavorful essential oils. Morning sun and afternoon shade work best if you live in a very hot region during peak summer months. Keeping the pot outdoors is ideal, as mint struggles with low light inside standard homes unless placed under a strong grow light.

    Keeping one pot near a bright window also makes it easier to learn how to grow herbs indoors year round when outdoor conditions become too cold or harsh.

    Positioning your herbs near a kitchen door or patio seating area encourages frequent daily harvesting and enjoyment. The brilliant green foliage also adds instant visual charm to dull balconies or empty porch corners. Strategic placement guarantees your plants receive the exact environmental cues they need to thrive.

    Watering And Regular Maintenance Secrets

    Watering And Regular Maintenance Secrets

    Check the top inch of soil weekly or daily during hot spells, and water deeply whenever it feels dry. Potted mint needs more water than mint planted straight in the ground because containers dry out much faster. 

    Harvest and trim the stems often to encourage a thick, bushy shape and to prevent the plant from flowering prematurely. Refresh the soil or divide the crowded roots into new pots every couple of years to maintain strong growth.

    Consistent pruning tricks the plant into branching outward rather than stretching up toward the sky in a leggy mess. Pair your trimming routine with a light organic fertilizer once a month during spring for massive harvests. Staying proactive with hydration keeps the leaves crisp and bursting with flavor.

    Frequently Asked Questions

    1. Does Mint Grow Well In A Container?

    Yes, mint grows exceptionally well in containers because pots successfully restrict its aggressive underground runners, keeping the plant tidy, manageable, and highly productive for everyday kitchen use right outside your door.

    2. Does Mint Grow Back Every Year In Pots?

    Mint is a remarkably resilient perennial plant that usually dies back during freezing winter weather before sending up fresh green shoots from its surviving underground root system every single spring.

    3. Does Mint Grow Better In Plastic Or Terracotta Pots?

    Plastic pots are generally superior because they retain essential moisture much longer than unlined terracotta, which tends to dry out the surrounding potting soil way too fast during warm summer days.

    4. Do Coffee Grounds Help Mint Plants?

    Used coffee grounds can provide mild organic matter and slight acidity to the soil when mixed in moderation with compost, helping your container mint plants stay nourished without compacting the potting mix.

    Fresh Mint Magic Awaits You

    Embracing how to grow mint in containers turns any sunny patio or small balcony into an abundant herb paradise. With a roomy pot, rich soil, and regular watering, you unlock endless flavor for your kitchen adventures. Start planting today and enjoy homegrown freshness right at your fingertips.

  • Learn How To Revive a Dying Herb Plant Before It’s Too Late

    Learn How To Revive a Dying Herb Plant Before It’s Too Late

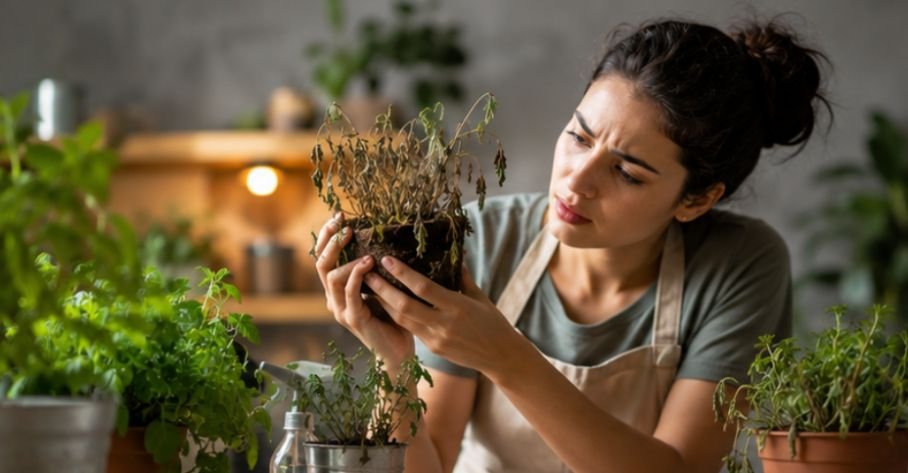
    A drooping basil pot once turned my kitchen into a tiny plant emergency room. Learning how to revive dying herb plant helped me read the signs instead of guessing. With the right fix and patience, many culinary herbs can recover.

    Knowing how to revive dying herb plant can save dinner, money, and gardening pride. That sad parsley pot may still have healthy roots, while dramatic basil may simply be thirsty. A quick check often reveals whether the plant needs water, drainage, pruning, or time.

    It also prevents panic care. Flooding, fertilizing, and moving the pot into harsh sun together can create more stress.

    Key Takeaways

    • Check soil moisture before watering. 
    • Trim only dead growth. 
    • Remove rotten roots before repotting. 
    • Use bright indirect light during recovery. 
    • Wait three to four weeks before fertilizing.

    Fix The Water Balance

    Wilting can signal either too much or too little water.

    Rescue Dry Soil

    Push a finger one to two inches into the potting mix. If it feels dusty and has pulled from the pot’s sides, water may be running past the root ball instead of soaking it.

    Place the pot in a bowl of room-temperature water for 20 minutes. Remove it and let it drain fully. Basil, parsley, mint, and cilantro may begin lifting their leaves within hours.

    Stop Soggy Soil Damage

    Wet soil, yellow leaves, soft stems, and a sour smell often indicate overwatering. Stop watering, empty the saucer, and move the herb to a bright area with gentle airflow.

    Avoid intense midday sun because damaged roots cannot replace moisture quickly. Wait until the upper soil begins drying before checking again.

    Inspect And Clean The Roots

    Inspect And Clean The Roots

    Root health determines whether recovery is possible.

    Unpot The Herb

    Support the base, slide out the root ball, and brush away loose soil gently. Healthy roots feel firm and are often white, cream, or tan. Judge darker roots by texture and smell.

    Trim Root Rot

    Cut away roots that are black, mushy, hollow, or foul-smelling. Use clean scissors and sanitize them before and after trimming. Keep every firm root section that appears healthy. If many roots are damaged, remove a little top growth, but keep enough green foliage for energy.

    Repot In Fresh Mix

    Choose a clean pot with drainage holes and fresh, well-draining mix. Avoid compacted garden soil. Set the herb at its previous depth and water lightly to settle the mix. Let excess moisture drain and never leave the pot standing in water.

    Outdoor herbs can face similar drainage and soil-structure problems, and learning how to start a no-dig garden bed over grass offers a low-disturbance way to create a healthier growing area.

    Prune And Adjust The Setting

    Next, remove damage and create a stable recovery space.

    Remove Dead Parts

    Cut off fully brown, black, slimy, or brittle leaves and stems. Make each cut above healthy green tissue or a living node.

    Avoid heavy pruning unless disease is spreading. Slightly damaged green leaves can still produce energy, so remove no more than one-third of living growth at once.

    Provide Gentle Light

    Give the herb bright, indirect light and keep it away from heaters, cold windows, and hot appliances.

    After new shoots appear, gradually return sun-loving herbs to stronger light. Sudden exposure can scorch tender leaves.

    Skip Fertilizer

    Do not feed a rescued herb for three to four weeks. Weak roots cannot process fertilizer well, and mineral salts may cause additional damage.

    Wait for healthy new leaves, then use a mild fertilizer labeled for edible plants. Excess feeding may create weak growth and reduce flavor.

    Match Care To The Herb

    Match Care To The Herb

    Different herbs need different moisture levels.

    Help Leafy Herbs

    Basil, parsley, cilantro, chives, and mint prefer more consistent moisture. Their soil should drain well but should not stay completely dry for long.

    Cilantro may decline naturally in hot weather or after flowering. Basil dislikes cold drafts, while crowded mint often benefits from division or a larger pot.

    Crowded roots are a common reason mint declines, so learning how to grow mint in containers can help you choose the right pot size, drainage, and maintenance routine.

    Protect Mediterranean Herbs

    Rosemary, thyme, sage, oregano, and lavender prefer fast drainage and longer drying periods. Constantly wet soil is especially risky for their roots.

    Allow the mix to dry more deeply between waterings. A drooping rosemary plant in wet soil needs better drainage, not another drink.

    Watch For Hidden Pests

    Pests can cause decline after watering improves.

    Inspect The Leaves

    Look beneath leaves and around new growth for aphids, spider mites, whiteflies, scale, or thrips. Fine webbing, sticky residue, curled leaves, and pale speckles are common warning signs.

    Isolate the pot and rinse a light infestation with a gentle stream of water. Protect the soil so it does not wash away.

    Choose Safe Treatments

    Use products labeled for edible herbs and follow dilution and harvest directions. Fungus gnats often appear when soil remains wet. Letting the surface dry and improving drainage usually makes the pot less attractive to them.

    How To Revive Dying Herb Plant Step By Step

    How To Revive Dying Herb Plant Step By Step

    Start by checking whether the soil is dry or soggy. Soak bone-dry soil from the bottom for 20 minutes, or stop watering if the mix is wet. Next, inspect the roots and remove black, mushy, or bad-smelling sections.

    Repot in fresh, draining soil, trim dead leaves, and place the herb in bright indirect light. Keep temperatures steady and avoid fertilizer for three to four weeks. Watch for new shoots before returning to normal care.

    Make one major change at a time unless active root rot or pests require immediate action. This helps you identify what works and prevents several forms of shock.

    Track The Recovery

    Judge recovery by fresh growth, not instant perfection.

    Follow A Realistic Timeline

    An underwatered basil or mint plant may perk up within hours. A herb recovering from root rot, repotting, heat, or pests may need one to four weeks.

    Old yellow leaves usually stay damaged. Firm new growth from the center, nodes, crown, or base is the clearest sign of recovery.

    Take Backup Cuttings

    If roots are badly damaged but some stems remain healthy, take cuttings. Basil, mint, oregano, rosemary, sage, and thyme can often grow from non-flowering stems.

    Remove lower leaves and root the cutting in water or propagation mix as a backup.

    Frequently Asked Questions

    1. How To Bring Herb Plants Back To Life?

    To understand how to revive dying herb plant, check moisture, inspect roots, trim dead growth, improve drainage, provide gentle light, and wait for new shoots before fertilizing.

    2. What Can Bring A Dying Plant Back To Life?

    Correct watering, clean pruning, fresh potting mix, drainage, pest treatment, suitable light, and steady temperatures may help when living roots, stems, or buds remain.

    3. Will Dead Herbs Grow Back?

    Completely dead annual herbs will not return. Perennial herbs such as mint, thyme, oregano, and chives may regrow from living roots or crowns after top growth dies.

    4. What Are The Common Causes Of Herb Plants Dying?

    Common causes include overwatering, underwatering, root rot, poor drainage, weak light, heat, cold drafts, pests, compacted soil, crowded roots, excess fertilizer, and natural decline.

    From Droopy To Dinner-Ready

    Learning how to revive dying herb plant is about slowing down and reading the clues. Soil, roots, leaves, stems, and pests each tell part of the story. Correct the real problem, keep conditions stable, and avoid overcare. With patient attention, that tired pot may soon provide fresh leaves for sauces, salads, teas, and home-cooked meals.

  • Best Soil for Indoor Herb Garden: Grow Flavor Indoors

    Best Soil for Indoor Herb Garden: Grow Flavor Indoors

    A sunny kitchen shelf once seemed like the perfect place for my basil, parsley, and rosemary. Within weeks, however, one pot stayed swampy while another dried like dust. Choosing the best soil for indoor herb garden plants changed everything because healthy herbs depend on what surrounds their roots, not only on sunlight and watering.

    Indoor herbs need a growing medium that holds enough moisture for steady growth while allowing extra water to escape. The right mix should stay loose, feel light in the pot, and contain enough air spaces to keep roots active and healthy.

    Choose A Light Potting Mix

    The best growing medium is usually a soilless blend made specifically for pots.

    What Soilless Really Means

    A soilless potting mix may contain coconut coir, peat moss, composted bark, perlite, pumice, vermiculite, compost, or worm castings. Although the product may be sold as potting soil, it often contains little actual ground soil.

    This is beneficial for indoor herbs. These ingredients create a lighter root environment, reduce compaction, improve water movement, and make containers easier to lift and reposition.

    What To Find On The Label

    Look for packaging that says potting mix, indoor potting mix, container mix, or organic potting mix. The ingredient list should include a moisture-retaining material such as coconut coir or peat, combined with an aerating material such as perlite, pumice, or bark.

    Avoid products made mainly from topsoil. Also be cautious with very rich mixes containing large amounts of fertilizer because culinary herbs often produce better aroma and flavor when they are fed moderately.

    Why Garden Soil Fails

    Yard soil may look healthy outdoors, but it usually becomes dense inside a pot. Repeated watering causes fine particles to settle together, reducing airflow and slowing drainage.

    Garden soil behaves very differently in containers, even after learning how to improve clay soil for a vegetable garden, because indoor pots still require a lighter and more aerated growing medium.

    Outdoor soil may also introduce fungus gnats, weed seeds, insects, fungal spores, or plant diseases into the home. A clean commercial potting mix is safer and more predictable for windowsill herbs.

    Top Commercial Soil Options

    Top Commercial Soil Options

    Ready-made products are convenient when you want to start planting without measuring several separate ingredients.

    Rosy Soil Herb Mix

    Rosy Soil Herb Mix is a peat-free option designed for growing culinary herbs in containers. Its formula may include biochar, compost, and ingredients that support drainage, nutrient availability, and microbial activity.

    A four-quart bag may cost around $19.99, although prices can change by retailer. It is a useful choice for gardeners who want an organic-style mix and prefer to avoid peat-based products. Check the current label because brands sometimes update ingredients or bag sizes.

    Miracle-Gro Organic Indoor Potting Mix

    Miracle-Gro Organic Indoor Potting Mix commonly uses coconut coir to manage moisture while maintaining a light texture. This can help leafy herbs stay hydrated without placing their roots in dense, slow-drying soil.

    Product formulas vary, so read the package before planting edible herbs. Check whether fertilizer is already included because newly potted herbs may not need additional feeding for several weeks.

    Standard Organic Potting Mix

    A general organic potting mix can work well for basil, mint, parsley, cilantro, dill, and chives when it has visible perlite and drains freely. Test it by squeezing a moist handful. It should hold together gently but break apart easily when touched.

    When a commercial mix feels heavy or stays soaked for days, blend in extra perlite, pumice, or fine orchid bark before using it.

    Match Soil To The Herb

    Different herbs come from different growing conditions, so one formula cannot suit every plant perfectly.

    Leafy Herbs Like Moisture

    Basil, parsley, cilantro, mint, and chives appreciate even moisture. Their mix should drain well but retain enough water to prevent rapid wilting.

    Use a balanced indoor potting mix containing coir or peat with visible perlite. A small amount of compost or worm castings can provide gentle nutrition, but too much may keep the pot wet and encourage weak, overly soft growth.

    Mint should usually have its own container because its roots spread aggressively. Basil and parsley can share similar soil, but each plant still needs enough room to develop a healthy root system.

    Mediterranean Herbs Need Grit

    Rosemary, thyme, oregano, sage, and lavender naturally prefer drier, faster-draining conditions. Dense moisture-retaining soil often causes yellowing, leaf drop, stem decline, and root rot.

    Mix ordinary potting soil with cactus mix, perlite, or pumice. These ingredients create larger air spaces and help the root zone dry between waterings.

    Terracotta pots are useful for these herbs because their porous walls allow moisture to evaporate. However, check the soil regularly during hot weather because terracotta can dry more quickly than plastic or glazed ceramic.

    Deep Roots Need Space

    Cilantro, dill, and parsley often perform better in deeper pots. Their roots need loose soil that allows downward growth without becoming compacted.

    Sow cilantro and dill directly into their final containers when possible. Both plants may dislike repeated transplanting, particularly once their taproots have started developing.

    Mix Your Own Soil

    Mix Your Own Soil

    Making the best soil for indoor herb garden containers at home is simple when you use equal parts of three reliable ingredients.

    Step 1: Build The Base

    Measure one-third organic potting soil or mature screened compost. This portion gives the blend structure and provides a mild supply of nutrients.

    Avoid using unfinished compost because it may continue decomposing inside the pot, create unpleasant odors, generate heat, or attract small insects.

    Step 2: Add Drainage

    Mix in one-third perlite. These lightweight white particles keep the blend loose and create pathways for water and oxygen.

    Wear a mask or dampen perlite before pouring because the dry dust can irritate your nose and throat. Pumice can replace perlite when you want extra weight for tall or top-heavy herbs.

    Step 3: Control Moisture

    Add one-third coconut coir. Coir absorbs water while helping the mixture remain springy and open.

    Hydrate compressed coir before measuring it. Squeeze out excess water so the finished blend feels lightly damp rather than dripping wet.

    Step 4: Adjust For Dry-Loving Herbs

    For rosemary, thyme, oregano, sage, or lavender, add an extra handful of perlite to each medium pot. You can also replace part of the base with cactus or succulent mix.

    For basil, parsley, mint, and chives, keep the original balanced formula. These leafy herbs benefit from slightly greater moisture retention.

    Pot Herbs The Right Way

    Pot Herbs The Right Way

    Good soil still needs a suitable container and careful planting.

    Open The Drainage Route

    Use a container with at least one open hole. Cover a very large hole with mesh or a small piece of coffee filter to keep the homemade potting mix inside while allowing water to leave.

    Do not place stones at the bottom. A gravel layer does not improve drainage through the soil and reduces the space available for healthy roots.

    Fill Without Pressing

    Add damp potting mix loosely and avoid packing it down. Position the herb at the same depth it occupied in its nursery pot, then fill gently around the root ball.

    Leave about an inch of space below the rim. This makes watering easier and prevents soil from washing over the sides.

    Water By Touch

    Water thoroughly after planting until excess moisture exits the drainage hole. Empty the saucer so the pot does not sit in collected water.

    Although the best way to water raised garden beds depends on outdoor soil depth and weather, indoor herbs need smaller, more precise watering based on how quickly each potting mix dries.

    Check the surface with your finger before watering again. Basil may need water when the top inch feels dry, while rosemary and thyme usually benefit from drying a little deeper.

    Frequently Asked Questions

    1. What Type Of Potting Soil Is Best For An Indoor Herb Garden?

    The best soil for indoor herb garden plants is a loose, fast-draining potting mix containing coconut coir or peat for moisture and perlite, pumice, or bark for airflow.

    2. What Are Common Mistakes Growing Indoor Herbs?

    Common mistakes include using yard soil, overwatering, choosing containers without holes, applying too much fertilizer, crowding several herbs together, and giving rosemary the same moisture as basil.

    3. Can I Use Houseplant Potting Mix For Herbs?

    Yes, a houseplant potting mix can support culinary herbs when it drains freely and contains no systemic pesticide unsuitable for edible plants. Add perlite when the product feels heavy.

    4. Is Miracle-Gro Potting Mix Safe For Herbs?

    Many Miracle-Gro potting mixes can be used for container herbs, but formulas differ. Always check the label for edible plant use, included fertilizer, watering instructions, and current ingredients.

    Let Your Herbs Dig Their New Home

    Choosing the best soil for indoor herb garden success gives every plant a stronger start. Use a light potting mix, add perlite for oxygen, include coconut coir for balanced moisture, and adjust the recipe for each herb. Once basil, mint, rosemary, and thyme have healthy roots, they can reward you with fragrant leaves and flavorful harvests throughout the year.

  • How to Harvest Basil for Continuous Growth in Your Garden

    How to Harvest Basil for Continuous Growth in Your Garden

    Walking into thie garden with snips brings pure joy, especially when learning how to harvest basil for continuous growth turns a single small pot into a massive leafy jungle. Fresh homemade pesto is the ultimate summer reward, and tweaking simple pruning cuts makes an incredible difference in leaf yields.

    Understanding Basil Plant Growth Dynamics

    Every thriving herb patch relies on basic botanical secrets to maximize leaf output.

    The Magic of Leaf Nodes and Side Shoots

    Pinpointing the exact spot where leaves attach to stems unlocks rapid branching potential. Every stem features joints called leaf nodes, which are the spots where main leaves connect to the central stalk. Inside the junction of these leaves sit two tiny, dormant new leaves sprouting from the side. When you cut the main stem, you send plant signals that force those two tiny side shoots to explode into two full new branches.

    This natural doubling effect turns a single slender stem into a thick, bushy powerhouse over a short timeframe. Instead of growing straight up like a sparse stick, the plant spends energy building wide horizontal coverage. Understanding this anatomical trick helps you trim with complete confidence every single week.

    Lower Leaves Serve as Photosynthetic Powerhouses

    Lower Leaves Serve as Photosynthetic Powerhouses

    Protecting the large foliage near the soil surface keeps your plant energized for quick recovery. Beginner gardeners frequently strip the large bottom leaves because they are easy to reach. However, those wide base leaves act as primary solar panels, absorbing daylight to fuel deep root expansion. Removing them starves the plant, causing severe shock and slowing down overall plant production.

    Always leave lower levels completely intact so the root system stays strong and active. These mature leaves manufacture necessary sugars that feed young side shoots after heavy clipping. Keeping bottom leaves safe guarantees fast recovery between your culinary harvests.

    Soil Nutrition and Roots Fuel Bushy Stems

    Sustaining continuous leaf production requires supplying the right nutrients beneath the soil surface. Frequent clipping forces the plant to consume massive amounts of energy rebuilding leaves. Top-dressing raised beds with organic compost or applying balanced liquid seaweed fertilizer replenishes vital nitrogen reserves. Healthy root systems absorb these nutrients quickly to push out vibrant new foliage after pruning.

    Consistent hydration also plays a vital role in maintaining stem vigor during hot weather. Dry soil forces the herb into survival mode, which halts leaf splitting and triggers stress. Well-nourished soil paired with steady moisture creates the ideal environment for continuous herbal harvests.

    Step-by-Step Guide on How to Harvest Basil for Continuous Growth

    Executing exact pruning techniques guarantees your sweet basil stays bushy, healthy, and productive.

    Step-by-Step Guide on How to Harvest Basil for Continuous Growth

    Wait Until the Plant Reaches Proper Maturity

    Giving young seedlings time to establish sturdy root systems prevents premature harvesting stress. Resist the temptation to pick foliage off a tiny young seedling right after planting. Wait until your basil stands six to eight inches tall and sports at least three or four leaf sets. At this stage, the root system is established enough to handle structural cuts without suffering stunted growth.

    Starting too early causes severe stress that can stall development for several weeks. Waiting for proper height ensures the plant possesses enough reserves to rebound quickly. Patience during early growth sets the stage for massive herbal yields later in summer.

    Locate the Exact Leaf Node for Snapping

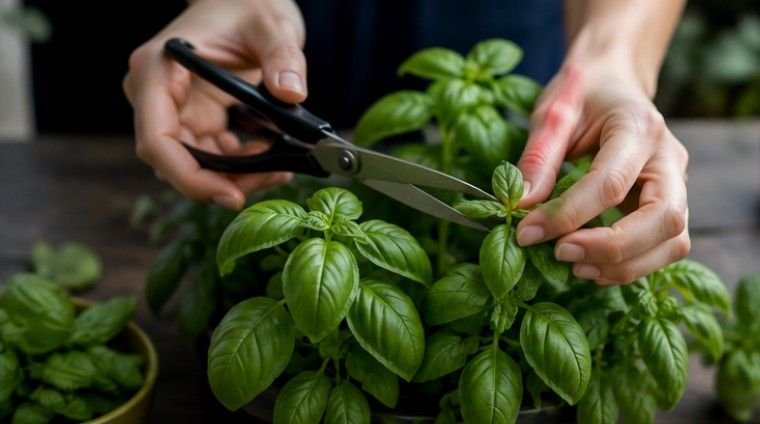
    Finding the right junction on the main stem guarantees clean splits and fast recovery. Look down the central stalk from the top set of leaves until you find a healthy leaf node. Look closely for two tiny leaves sprouting from the sides of the stem junction. Position your fingers or sharp shears roughly a quarter inch directly above this leaf pair.

    Cutting at this precise location leaves just enough stem tissue to protect the emerging shoots. If you cut too far above the node, the remaining stem dies back and rot can set in. Visualizing this spot before cutting keeps your plant clean, healthy, and ready to double.

    Cut the Main Stem Above the Node

    Using clean cutting instruments protects plant tissue from crushing and prevents moisture rot. To keep your basil growing strong, never pluck just single leaves off the stem. Instead, cut the main stem right above a leaf node using clean micro-tip shears. Watching a quick tutorial video on proper cuts can help you visualize this clean snap on your own plants.

    Using dull tools or tearing stems leaves ragged edges that attract fungal pathogens and pests. Making clean cuts helps the plant heal rapidly so energy flows straight into the emerging side branches. Clean cutting habits ensure your herb stays vibrant without wasting energy recovering from tissue damage.

    Harvest From the Top to Prevent Leggy Stalks

    Clipping top stem sets encourages broad horizontal growth rather than tall, weak stalks. Always snip the uppermost sets of stems first during your regular harvesting routine. Trimming upper foliage stops vertical stretching and forces growth outward into a lush, rounded shape. Tall leggy stalks produce fewer usable leaves and easily fall over during summer windstorms.

    Harvesting top stems keeps the plant balanced, compact, and structurally sound. This top-down cutting strategy exposes middle foliage to direct sunlight, accelerating secondary shoot growth. Consistent top trimming converts one central stalk into a sprawling, productive plant canopy.

    Crucial Maintenance Rules for Unlimited Leaf Yields

    Following core garden rules protects flavor and keeps foliage production running smoothly all summer.

    Crucial Maintenance Rules for Unlimited Leaf Yields

    Pinching Off Flowers to Save Leaf Flavor

    Intercepting flowering spikes early preserves essential oils that deliver optimal culinary flavor. Hot summer weather prompts basil plants to produce white or purple flower buds at stem tips. If you see small flower buds forming at the top, cut them off immediately down to the next node. Flowers tell the plant to stop making tasty leaves and start making seeds, which alters the flavor.

    Removing flower spikes forces energy right back into vegetative leaf production. This quick maintenance step retains sweet essential oils and delays the plant natural life cycle. Inspecting shoot tips twice a week prevents flowering before it impacts your kitchen harvests.

    Following the One-Third Pruning Rule

    Balancing harvest volume with remaining plant foliage prevents severe physiological shock. Never cut away more than one-third of the plant total height at any single time. Removing too much foliage starves the root system and prevents efficient solar energy conversion. Taking light, frequent cuts is far better than performing aggressive over-harvests.

    Adhering to the one-third boundary allows your herb to recover within a few warm days. Leaving two-thirds of the foliage intact keeps the metabolic engine running at full speed. This simple rule guarantees a steady, reliable supply of fresh leaves without endangering plant survival.

    Harvesting in Early Morning to Preserve Oil

    Choosing the optimal time of day to snip foliage preserves aromatic compounds and crispness. Gather your herbal harvest during early morning hours after dew evaporates but before heavy sun hits. High afternoon temperatures cause volatile aromatic oils to evaporate, diminishing rich flavor profiles. Morning stems are fully hydrated, crisp, and packed with maximum essential oil content for your dishes.

    Plucking foliage during heat waves causes rapid wilting and reduces post-harvest shelf life. Cool morning harvests keep leaves crisp longer when stored on your kitchen counter in water. Timing your garden routine elevates culinary flavor while keeping plants refreshed. You can grow mint in containers as well just the same way.

    Frequently Asked Questions 

    1. How to pick basil so that it keeps growing?

    To keep your basil growing strong, never pluck just single leaves. Cut the main stem right above a leaf node where two tiny leaves sprout. This forces one cut stem to split into two new branches for bushy growth.

    2. How many times can you harvest from a basil plant?

    You can harvest fresh leaves from a healthy basil plant every seven to ten days throughout the summer season. Regular weekly stem pruning keeps the herb producing vibrant new growth continuously until the first autumn frost arrives.

    3. What are common basil harvesting mistakes?

    Common mistakes include plucking individual foliage, stripping bottom solar leaves, tearing stems with dull tools, cutting too far above leaf nodes, taking over one-third of total growth, and allowing flowers to bloom into bitter seed heads.

    4. How to continuously grow basil?

    Provide six to eight hours of direct sunlight daily, water consistently at soil level, feed organic nitrogen fertilizer, and cut top stems weekly above leaf nodes while pinching off emerging flower buds immediately.

    Snip Your Way to Endless Basil Happiness

    Mastering how to harvest basil for continuous growth is the ultimate secret to enjoying fresh culinary herbs all season long. By making strategic cuts right above leaf nodes, removing flower buds early, and leaving lower leaves intact, you will keep your plants thriving. Grab your shears, head out to your edible garden, and enjoy an endless harvest of homegrown sweet basil!