Author: Margaret Ellison

  • How to Fix Poor Drainage in a Garden Bed Properly

    How to Fix Poor Drainage in a Garden Bed Properly

    Water standing around vegetables or flowers is more than an untidy nuisance. It pushes air from the soil and leaves roots struggling to function.

    When I need to determine how to fix poor drainage in a garden bed, I never begin by adding random bags of soil. I first identify why the water cannot escape. The right repair depends on whether the problem is compaction, clay, elevation, irrigation, or runoff.

    Confirm That the Garden Bed Drains Poorly

    A wet bed after a heavy storm is not automatically defective. Even healthy soil may remain damp for a short period.

    I become concerned when puddles remain for more than a day, soil smells sour, or plants develop yellow leaves despite regular feeding. Other warning signs include algae, moss, fungus gnats, weak growth, and roots that appear brown or soft.

    Clay soil naturally drains more slowly than sandy soil. It also compacts and crusts more easily, especially when worked while wet.

    Run a Simple Drainage Test

    I dig a hole about 12 inches deep and 6 inches wide in an empty part of the bed. I fill it with water and allow it to drain completely.

    I then refill the hole and observe the water level. Water that barely moves over several hours signals restricted drainage. This test also shows whether the problem affects the full soil profile or only the surface.

    Do not perform the test immediately after several days of rain. Saturated ground can make an otherwise acceptable bed appear worse than it is.

    Find Where the Water Comes From

    Before changing the soil, I inspect the bed during rain or irrigation. This often reveals the real problem faster than digging.

    I check for:

    • Downspouts emptying near the bed
    • Sprinklers applying water too quickly
    • Runoff flowing from patios or slopes
    • A depression where water collects
    • Hard soil beneath recently added topsoil

    This step matters because compost cannot solve water pouring from a roof. Likewise, a French drain is excessive when one compacted surface layer causes the puddling.

    How to Fix Poor Drainage in a Garden Bed

    How to Fix Poor Drainage in a Garden Bed

    For mild or moderate problems, improving the soil structure is usually the least disruptive answer. The goal is to restore pore spaces that carry both water and oxygen.

    Compacted soil contains fewer large pores, reducing water infiltration and downward drainage.

    Relieve Compacted Soil

    I loosen compacted beds with a broadfork or garden fork when the ground is moist but not sticky. I insert the tines deeply, pull the handle backward slightly, and lift without turning the soil upside down.

    This action creates channels while preserving much of the soil structure. I avoid walking across the bed afterward. Permanent paths and narrow planting areas prevent the same problem from returning.

    Never dig or till saturated clay. Wet soil particles compress and smear together, producing a dense layer that can drain worse after cultivation.

    Add Organic Matter to Heavy Clay

    Well-finished compost, leaf mold, and aged organic matter improve aggregation in clay soil. Better aggregation creates spaces for air and water movement.

    University of Minnesota Extension notes that organic materials can improve drainage and aeration in clay soils. USDA guidance also connects stronger soil-health practices with reduced compaction and better water management.

    I usually spread 1 to 2 inches of mature compost over the bed. For a new or severely compacted bed, I gently incorporate it into the upper soil layer. In established beds, I apply it as a surface dressing and let roots, worms, and weather work it downward.

    I do not add a thin layer of sand to clay. Small quantities can create a dense, concrete-like mixture instead of open soil. Compost is usually the safer amendment.

    Protect the Surface With Mulch

    After loosening and amending the soil, I cover it with two or three inches of shredded leaves, straw, compost, or untreated wood chips.

    Mulch softens the impact of heavy rain and limits surface crusting. It also reduces foot traffic, erosion, and rapid swings between saturated and baked soil.

    I keep coarse mulch away from plant stems. Direct contact can trap moisture against crowns and encourage rot.

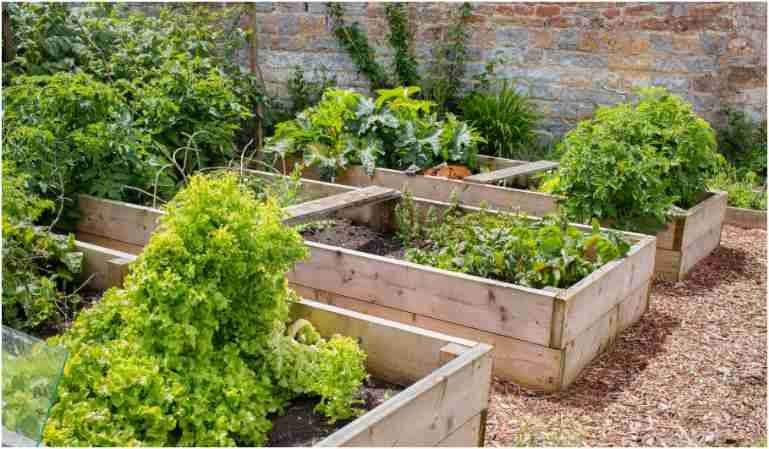
    Raise a Low-Lying Garden Bed

    Raise a Low-Lying Garden Bed

    Sometimes the soil is not the main problem. The bed simply sits lower than the surrounding yard.

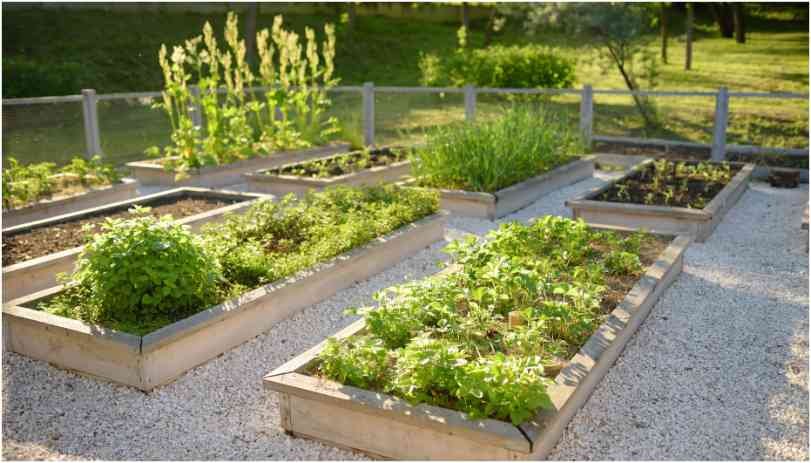
    In that situation, learning how to fix poor drainage in a garden bed means changing the root-zone elevation. Raised beds can improve drainage by moving roots above dense or waterlogged ground.

    Build Up the Existing Bed

    For a shallow depression, I mound the bed several inches above the nearby grade. Severe sites may need a framed bed raised 8 to 12 inches.

    I remove perennial weeds first, loosen the ground underneath, and avoid placing an impermeable barrier across the base. Water must still pass from the new soil into the native ground.

    Gardeners creating a no-dig garden bed over grass should use overlapping cardboard, compost, and suitable growing soil without sealing the base with plastic.

    Choose a Free-Draining Soil Mix

    A raised bed should not contain only dense native clay. I use a balanced mixture of quality topsoil and plant-based compost.

    University of Minnesota Extension suggests roughly one-half to two-thirds topsoil and one-third to one-half plant-based compost for raised beds.

    Too much compost can shrink, dry unevenly, and create nutrient imbalances. A stable mineral soil component gives the bed structure and long-term volume.

    Redirect Water From Severely Saturated Beds

    Redirect Water From Severely Saturated Beds

    Soil improvement will not overcome a constant supply of outside water. Persistent flooding requires interception or redirection.

    Move Roof and Irrigation Runoff

    I start with the easiest sources. I extend downspouts away from the garden, adjust sprinkler heads, and reduce irrigation duration.

    Water should never be redirected toward a neighbor’s property, septic system, foundation, or unstable slope. Local rules may also control where stormwater can discharge.

    When the bed receives water from a higher lawn, a shallow swale can guide runoff around the planting area. A rock-lined dry creek can perform the same function while adding visual interest.

    Install a Drainage Channel

    A French drain may help where subsurface water repeatedly enters the bed. The typical system uses a sloped trench, filter fabric, washed gravel, and perforated drainage pipe.

    Penn State Extension identifies French drains and drainage piping as possible solutions for maintaining drainage in damaged or compacted sites.

    However, I treat this as a major repair. A pipe without a safe outlet merely relocates or stores the water. Before excavating, I identify underground utilities and confirm local drainage requirements.

    Mistakes That Make Garden Drainage Worse

    Several common fixes create new problems.

    I avoid digging one small planting hole in heavy clay and filling it with fluffy amended soil. That hole can behave like a bowl, collecting water around the roots.

    I also avoid burying rubble, adding excessive gravel beneath the bed, or installing landscape fabric between soil layers. These materials can interrupt water movement and complicate future cultivation.

    Overwatering remains another frequent cause. Clay holds water longer than sand, so it normally needs less frequent irrigation.

    My Three-Level Drainage Test

    I use a simple decision system before spending money:

    Level one: Surface puddling.
    Water disappears within a day, but the surface crusts. I loosen the bed, add compost, apply mulch, and restrict foot traffic.

    Level two: Root-zone saturation.
    Water remains for several days and plants decline. I improve the full upper soil layer or raise the bed.

    Level three: Incoming water.
    Runoff visibly enters from roofs, slopes, paving, or groundwater. I redirect the source or install a properly designed drainage route.

    This method prevents me from using an expensive Level Three solution for a Level One problem.

    Frequently Asked Questions

    1. How can I improve drainage in a garden bed with clay soil?

    Loosen the soil when it is not wet, add finished compost, protect it with mulch, and keep feet and equipment off the planting area.

    2. Will adding gravel improve drainage in a garden bed?

    A buried gravel layer rarely fixes heavy soil and may disrupt water movement. Improve the complete root zone or raise the bed instead.

    3. How deep should a raised bed be for poor drainage?

    An 8-to-12-inch raised root zone works for many vegetables, although deep-rooted crops may benefit from greater soil depth.

    4. Can plants recover after sitting in waterlogged soil?

    They may recover if the roots remain firm and healthy. Stop irrigation, improve drainage, remove rotted roots, and monitor for continuing decline.

    Send Soggy Soil Packing

    Understanding how to fix poor drainage in a garden bed starts with locating the obstruction or water source. Compacted soil needs air. Heavy clay needs better structure. A depression needs elevation. Constant runoff needs redirection.

    My best next step is always the simplest diagnostic one: watch the bed during rain. Once I see where the water arrives and how long it remains, the correct repair becomes much clearer.

  • How to Start a No-Dig Garden Bed Over Grass Easily

    How to Start a No-Dig Garden Bed Over Grass Easily

    You do not need to remove an entire lawn before growing vegetables or flowers. I have found that how to start a no-dig garden bed over grass comes down to three things: blocking light, adding enough compost, and sealing every gap.

    The method replaces backbreaking sod removal with cardboard and organic matter. You can build the bed in an afternoon, often without turning the soil once.

    What Is a No-Dig Garden Bed?

    A no-dig bed is built above the existing soil rather than carved into it. Cardboard smothers the lawn, while compost creates the new planting surface.

    This approach is also called sheet mulching, sheet composting, or lasagna gardening. Oregon State University describes sheet mulching as using cardboard or paper to deny weeds the sunlight needed for growth.

    The cardboard eventually decomposes. Meanwhile, the grass beneath it dies and adds organic material to the soil.

    No-dig gardening also avoids unnecessary soil disturbance. That helps preserve soil structure while reducing the amount of physical work needed to create a bed.

    Materials Needed for a No-Dig Bed

    Materials Needed for a No-Dig Bed

    I gather every material before mowing because wet cardboard becomes difficult to reposition.

    You will need:

    • Plain brown corrugated cardboard
    • Finished compost or well-aged manure
    • A garden hose
    • A rake
    • A mower or string trimmer
    • Straw or shredded leaves
    • Bricks, logs, stones, or boards for optional edging

    Remove packing tape, plastic labels, staples, and shipping pouches from every box. Avoid glossy, waxed, or heavily coated cardboard. Iowa State University Extension also recommends avoiding waxed cardboard and glossy paper in sheet-mulched beds.

    Use mature compost with an earthy smell. Fresh manure may contain excessive salts, viable weed seeds, or enough nitrogen to damage young plants.

    How to Start a No-Dig Garden Bed Over Grass

    How to Start a No-Dig Garden Bed Over Grass

    Choose and Mark the Site

    Choose a level area that receives enough sunlight for your planned crops. Most fruiting vegetables perform best with at least six hours of direct sun.

    Mark the bed before spreading materials. I prefer beds about 3 to 4 feet wide because I can reach the center without stepping on the compost.

    Keep the bed away from tree trunks and large surface roots. Building thick layers over tree roots can reduce oxygen movement and create moisture problems.

    Mow the Grass Very Short

    Mow the lawn as low as your mower safely allows. Short grass creates a flatter surface and reduces the chance of tough blades lifting the cardboard.

    Leave the clippings in place unless they contain mature weed seeds or herbicide residue. The clippings will break down beneath the barrier.

    Water dry soil before adding cardboard. Moist soil supports decomposition better than hard, dusty ground.

    Remove Problem Weeds

    Cardboard controls ordinary lawn grass well, but it is not magic. Dig out thick crowns, woody weeds, and seed heads before covering the site.

    Pay close attention to plants that spread through underground stems. Bermudagrass, bindweed, nutsedge, quackgrass, and Canada thistle can escape through edges or planting holes.

    For aggressive weeds, extend the cardboard beyond the planned bed. Continue checking the perimeter during the first growing season.

    Lay Overlapping Cardboard

    Place one or two layers of plain cardboard directly over the cut grass. Avoid stacking many layers because excessive cardboard can restrict water and air movement into the soil.

    Overlap every seam by at least 6 inches. I use wider overlaps near lawn edges because those areas receive the strongest grass pressure.

    Cover small holes, handles, and torn corners with extra pieces. Sunlight reaching one exposed patch can keep the grass alive.

    Oregon State University recommends overlapping paper barriers so light cannot reach the vegetation below. Its guidance also says cardboard should be soaked with water.

    Soak the Cardboard

    Wet the cardboard until it becomes flexible and lies flat. A light spray is not enough.

    Soaking helps the sheets settle around minor bumps. It also stops wind from moving the cardboard while you add compost.

    Do not leave wet cardboard exposed overnight. Wind can lift the edges, while drying may cause the sheets to curl.

    Add a Deep Compost Layer

    Spread 4 to 6 inches of finished compost over the wet cardboard. Use the deeper end of that range when planting immediately or covering vigorous grass.

    Rake the surface level, but do not compact it heavily. A firm yet crumbly surface gives roots moisture and oxygen.

    The U.S. Environmental Protection Agency reports that compost can improve soil structure, water retention, infiltration, fertility, and beneficial soil-organism populations.

    A very shallow layer dries quickly and may not support deep-rooted seedlings. It also gives surviving grass less distance to travel before reaching light.

    Plant or Let the Bed Settle

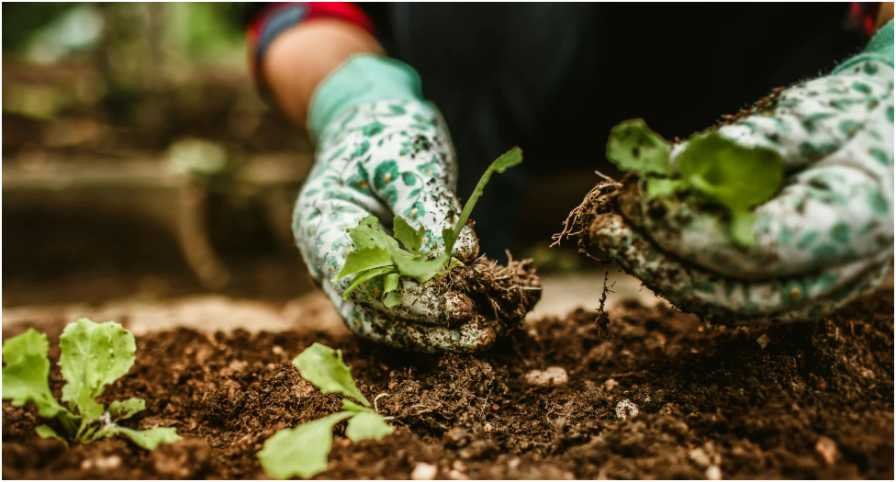
    You can plant transplants directly into a 4-to-6-inch compost layer. Make holes only in the compost rather than cutting through the cardboard unnecessarily.

    Small seeds need fine, screened compost near the surface. Remove large sticks and unfinished pieces before sowing carrots, lettuce, or radishes.

    When planting large transplants, I sometimes cut a small X in the softened cardboard. I use this only when the root ball is deeper than the compost.

    A fall-built bed can settle over winter before spring planting. A spring bed can be planted immediately when the compost is mature and deep enough.

    My Light-Gap Test for Better Weed Control

    My Light-Gap Test for Better Weed Control

    Before adding compost, I stand on one side of the bed and look across the cardboard at ground level. Any bright line, open seam, torn handle, or exposed grass receives another patch.

    This takes less than five minutes. It is easier than pulling grass from the middle of a planted bed later.

    I also inspect the outer 6 inches separately. Most failures I see start at the perimeter, not in the center. Lawn runners enter from uncovered edges where the cardboard ends too neatly.

    For a cleaner boundary, extend the cardboard past the bed frame. Trim the excess only after the compost and edging are in place.

    How Much Compost Will You Need?

    Material estimates prevent an unfinished bed and an emergency trip to the garden center.

    A 4-by-8-foot bed covers 32 square feet. At 6 inches deep, it needs about 16 cubic feet of compost. That equals roughly 0.6 cubic yard.

    Use this simple formula:

    Length × width × depth in feet = cubic feet

    For a 6-inch layer, use 0.5 feet as the depth. Divide the cubic-foot total by 27 to estimate cubic yards.

    Order slightly more than the calculation suggests. Compost settles after watering, rain, and planting.

    When Is the Best Time to Build the Bed?

    Fall is my favorite time because rain keeps the layers damp and winter gives the grass time to decompose. The bed is usually easier to plant by spring.

    Spring construction also works. Use finished compost and plant transplants rather than relying only on tiny direct-sown seeds.

    In hot, dry regions, build the bed before extreme summer heat. Cardboard and compost dry quickly when installation is delayed during hot weather.

    UF/IFAS notes that no-dig beds use layered compostable materials to smother grass and suppress weeds as the materials decompose.

    Common No-Dig Garden Mistakes

    The most common mistake is leaving gaps between cardboard sheets. Even narrow openings can become channels for grass and perennial weeds.

    Another mistake is using too little compost. Two inches may work as a landscape mulch, but it is not a generous planting layer for a new vegetable bed.

    Do not mix fresh wood chips into the compost layer. Wood chips work better on paths or as a surface mulch around established plants. Mixing them into the root zone may temporarily reduce available nitrogen as they decompose.

    Avoid walking on the finished bed. Repeated foot traffic compresses compost and reduces the loose structure that makes no-dig gardening useful.

    Finally, do not assume the cardboard provides permanent weed control. It decomposes, so long-term weed suppression depends on dense planting, regular mulching, and quick removal of new weeds.

    Maintaining a No-Dig Bed

    Add about 1 to 2 inches of finished compost to the surface each year. There is no need to mix it deeply into the bed.

    Keep the surface covered with shredded leaves, clean straw, or another suitable organic mulch. Mulch reduces evaporation and limits new weed germination.

    Water slowly so moisture reaches the full compost layer and the soil below. The Best way to water raised garden beds also applies here: water deeply at soil level rather than spraying leaves for a few minutes.

    Check the edges every week during the first season. Pull grass runners before they root inside the bed.

    Rotate crops where possible, and remove diseased plant material. Leave healthy roots in the soil after harvest unless they interfere with the next planting.

    Frequently Asked Questions

    1. Can I put a no-dig garden directly over grass?

    Yes. Mow the grass short, cover it completely with overlapping cardboard, soak it, and add 4 to 6 inches of finished compost.

    2. How long does cardboard take to kill grass?

    Grass often weakens within several weeks, but full decomposition may take months. Temperature, moisture, grass type, and cardboard thickness affect the timing.

    3. Can I plant immediately after starting a no-dig bed?

    Yes, provided the compost is mature and deep enough. Transplants establish more reliably than deep-rooted seeds in a newly constructed bed.

    4. What is the best cardboard for a no-dig garden?

    Use plain brown corrugated cardboard without glossy coatings, wax, tape, plastic labels, staples, or large areas of heavy colored printing.

    Skip the Shovel and Start Growing

    Learning how to start a no-dig garden bed over grass turns an unused patch of lawn into productive growing space without stripping away the soil.

    The method succeeds when you treat gaps as the enemy and compost depth as non-negotiable. Mow low, overlap generously, soak thoroughly, and build a deep planting surface.

    Mark out one manageable bed first. Once it is covered and planted, that untouched patch of lawn will look far less permanent.

  • Learn How To Revive a Dying Herb Plant Before It’s Too Late

    Learn How To Revive a Dying Herb Plant Before It’s Too Late

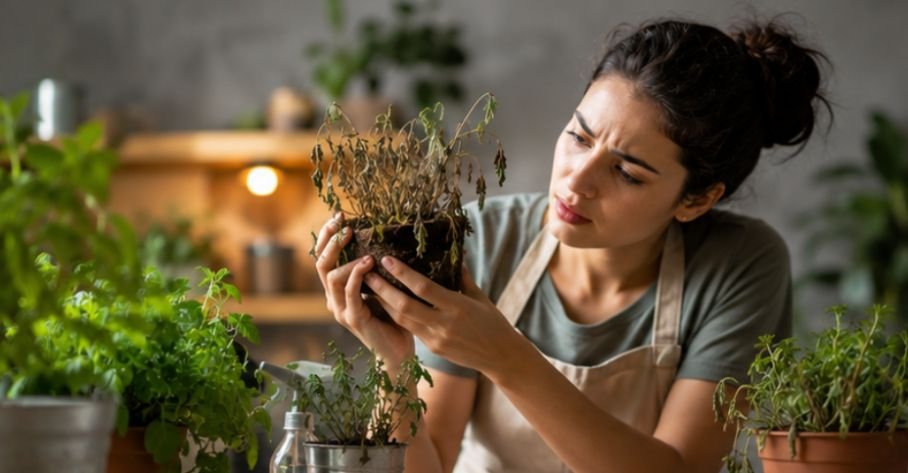
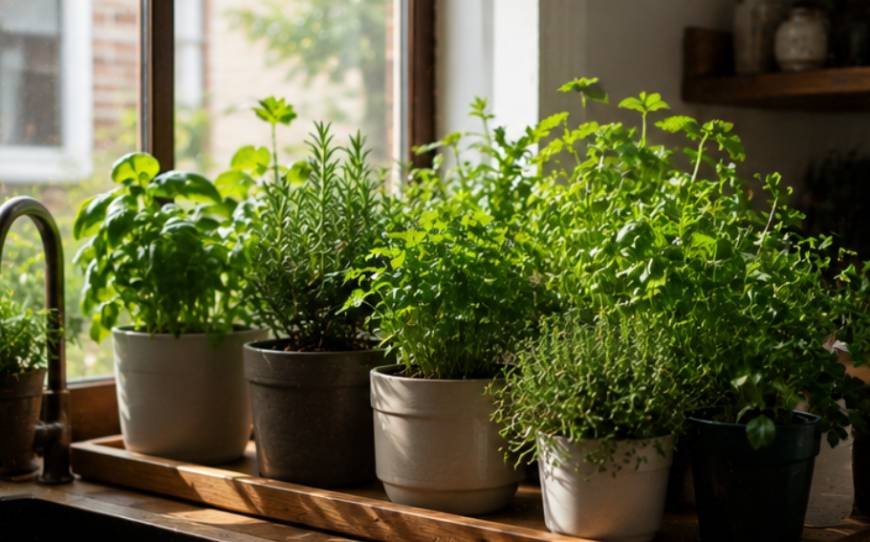
    A drooping basil pot once turned my kitchen into a tiny plant emergency room. Learning how to revive dying herb plant helped me read the signs instead of guessing. With the right fix and patience, many culinary herbs can recover.

    Knowing how to revive dying herb plant can save dinner, money, and gardening pride. That sad parsley pot may still have healthy roots, while dramatic basil may simply be thirsty. A quick check often reveals whether the plant needs water, drainage, pruning, or time.

    It also prevents panic care. Flooding, fertilizing, and moving the pot into harsh sun together can create more stress.

    Key Takeaways

    • Check soil moisture before watering. 
    • Trim only dead growth. 
    • Remove rotten roots before repotting. 
    • Use bright indirect light during recovery. 
    • Wait three to four weeks before fertilizing.

    Fix The Water Balance

    Wilting can signal either too much or too little water.

    Rescue Dry Soil

    Push a finger one to two inches into the potting mix. If it feels dusty and has pulled from the pot’s sides, water may be running past the root ball instead of soaking it.

    Place the pot in a bowl of room-temperature water for 20 minutes. Remove it and let it drain fully. Basil, parsley, mint, and cilantro may begin lifting their leaves within hours.

    Stop Soggy Soil Damage

    Wet soil, yellow leaves, soft stems, and a sour smell often indicate overwatering. Stop watering, empty the saucer, and move the herb to a bright area with gentle airflow.

    Avoid intense midday sun because damaged roots cannot replace moisture quickly. Wait until the upper soil begins drying before checking again.

    Inspect And Clean The Roots

    Inspect And Clean The Roots

    Root health determines whether recovery is possible.

    Unpot The Herb

    Support the base, slide out the root ball, and brush away loose soil gently. Healthy roots feel firm and are often white, cream, or tan. Judge darker roots by texture and smell.

    Trim Root Rot

    Cut away roots that are black, mushy, hollow, or foul-smelling. Use clean scissors and sanitize them before and after trimming. Keep every firm root section that appears healthy. If many roots are damaged, remove a little top growth, but keep enough green foliage for energy.

    Repot In Fresh Mix

    Choose a clean pot with drainage holes and fresh, well-draining mix. Avoid compacted garden soil. Set the herb at its previous depth and water lightly to settle the mix. Let excess moisture drain and never leave the pot standing in water.

    Outdoor herbs can face similar drainage and soil-structure problems, and learning how to start a no-dig garden bed over grass offers a low-disturbance way to create a healthier growing area.

    Prune And Adjust The Setting

    Next, remove damage and create a stable recovery space.

    Remove Dead Parts

    Cut off fully brown, black, slimy, or brittle leaves and stems. Make each cut above healthy green tissue or a living node.

    Avoid heavy pruning unless disease is spreading. Slightly damaged green leaves can still produce energy, so remove no more than one-third of living growth at once.

    Provide Gentle Light

    Give the herb bright, indirect light and keep it away from heaters, cold windows, and hot appliances.

    After new shoots appear, gradually return sun-loving herbs to stronger light. Sudden exposure can scorch tender leaves.

    Skip Fertilizer

    Do not feed a rescued herb for three to four weeks. Weak roots cannot process fertilizer well, and mineral salts may cause additional damage.

    Wait for healthy new leaves, then use a mild fertilizer labeled for edible plants. Excess feeding may create weak growth and reduce flavor.

    Match Care To The Herb

    Match Care To The Herb

    Different herbs need different moisture levels.

    Help Leafy Herbs

    Basil, parsley, cilantro, chives, and mint prefer more consistent moisture. Their soil should drain well but should not stay completely dry for long.

    Cilantro may decline naturally in hot weather or after flowering. Basil dislikes cold drafts, while crowded mint often benefits from division or a larger pot.

    Crowded roots are a common reason mint declines, so learning how to grow mint in containers can help you choose the right pot size, drainage, and maintenance routine.

    Protect Mediterranean Herbs

    Rosemary, thyme, sage, oregano, and lavender prefer fast drainage and longer drying periods. Constantly wet soil is especially risky for their roots.

    Allow the mix to dry more deeply between waterings. A drooping rosemary plant in wet soil needs better drainage, not another drink.

    Watch For Hidden Pests

    Pests can cause decline after watering improves.

    Inspect The Leaves

    Look beneath leaves and around new growth for aphids, spider mites, whiteflies, scale, or thrips. Fine webbing, sticky residue, curled leaves, and pale speckles are common warning signs.

    Isolate the pot and rinse a light infestation with a gentle stream of water. Protect the soil so it does not wash away.

    Choose Safe Treatments

    Use products labeled for edible herbs and follow dilution and harvest directions. Fungus gnats often appear when soil remains wet. Letting the surface dry and improving drainage usually makes the pot less attractive to them.

    How To Revive Dying Herb Plant Step By Step

    How To Revive Dying Herb Plant Step By Step

    Start by checking whether the soil is dry or soggy. Soak bone-dry soil from the bottom for 20 minutes, or stop watering if the mix is wet. Next, inspect the roots and remove black, mushy, or bad-smelling sections.

    Repot in fresh, draining soil, trim dead leaves, and place the herb in bright indirect light. Keep temperatures steady and avoid fertilizer for three to four weeks. Watch for new shoots before returning to normal care.

    Make one major change at a time unless active root rot or pests require immediate action. This helps you identify what works and prevents several forms of shock.

    Track The Recovery

    Judge recovery by fresh growth, not instant perfection.

    Follow A Realistic Timeline

    An underwatered basil or mint plant may perk up within hours. A herb recovering from root rot, repotting, heat, or pests may need one to four weeks.

    Old yellow leaves usually stay damaged. Firm new growth from the center, nodes, crown, or base is the clearest sign of recovery.

    Take Backup Cuttings

    If roots are badly damaged but some stems remain healthy, take cuttings. Basil, mint, oregano, rosemary, sage, and thyme can often grow from non-flowering stems.

    Remove lower leaves and root the cutting in water or propagation mix as a backup.

    Frequently Asked Questions

    1. How To Bring Herb Plants Back To Life?

    To understand how to revive dying herb plant, check moisture, inspect roots, trim dead growth, improve drainage, provide gentle light, and wait for new shoots before fertilizing.

    2. What Can Bring A Dying Plant Back To Life?

    Correct watering, clean pruning, fresh potting mix, drainage, pest treatment, suitable light, and steady temperatures may help when living roots, stems, or buds remain.

    3. Will Dead Herbs Grow Back?

    Completely dead annual herbs will not return. Perennial herbs such as mint, thyme, oregano, and chives may regrow from living roots or crowns after top growth dies.

    4. What Are The Common Causes Of Herb Plants Dying?

    Common causes include overwatering, underwatering, root rot, poor drainage, weak light, heat, cold drafts, pests, compacted soil, crowded roots, excess fertilizer, and natural decline.

    From Droopy To Dinner-Ready

    Learning how to revive dying herb plant is about slowing down and reading the clues. Soil, roots, leaves, stems, and pests each tell part of the story. Correct the real problem, keep conditions stable, and avoid overcare. With patient attention, that tired pot may soon provide fresh leaves for sauces, salads, teas, and home-cooked meals.

  • Best Herbs to Grow in Containers Outdoors

    Best Herbs to Grow in Containers Outdoors

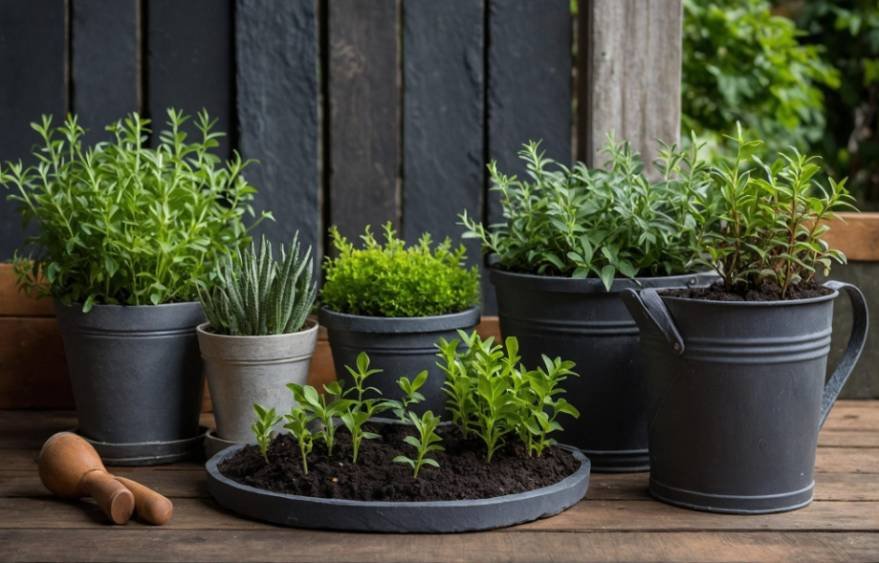
    I once assumed that growing fresh herbs required a large garden, rich soil, and plenty of spare time. Container gardening changed my mind completely. By choosing the best herbs to grow in containers outdoors, I can transform a patio, balcony, courtyard, or sunny doorstep into a productive kitchen garden without digging a traditional bed.

    Pots give me greater control over drainage, soil, sunlight, and spacing. They also help contain aggressive plants, protect delicate herbs during difficult weather, and keep fresh ingredients close to the kitchen.

    Why Grow Herbs in Outdoor Containers?

    Many culinary herbs have manageable root systems and respond well to frequent harvesting. Containers are especially useful when garden soil is compacted, poorly drained, or unavailable.

    Potted herbs can also be moved as growing conditions change. Sun-loving varieties can occupy the brightest area, while parsley, mint, chives, and cilantro can receive afternoon shade during intensely hot weather.

    A thoughtfully arranged herb garden can also become one of the outdoor spaces that improve wellbeing by adding greenery, fragrance, and a calming daily gardening routine to a balcony, patio, or courtyard.

    How to Choose Outdoor Herbs and Pots

    Consider sunlight, mature size, moisture requirements, and growth habits before planting. Most culinary herbs need around six hours of direct sunlight, although several varieties tolerate partial shade. These conditions are also worth considering when choosing vegetables to grow in partial shade for the same outdoor space.

    Small herbs such as thyme and chives can grow in pots measuring 8 to 10 inches wide. Basil, parsley, oregano, and sage usually need 10- to 12-inch containers. Rosemary, mint, dill, and bay grow better in deeper pots with more soil.

    Every container should have drainage holes. Trapped water can suffocate roots and cause rot, even when the leaves initially appear healthy.

    Top Herbs for Outdoor Containers

    Top Herbs for Outdoor Containers

    Basil

    Basil grows quickly and becomes bushier when harvested regularly. Place it in full sun, with some afternoon shade during extreme heat.

    Use a pot at least 10 inches wide, keep the soil lightly moist, and pinch off flower buds to promote continued leaf production.

    Mint

    Mint is ideal for containers because pots prevent its vigorous roots from spreading across the garden. Grow it alone in a container at least 12 inches wide.

    It prefers consistently moist soil and performs well in full sun or partial shade. Frequent trimming keeps the plant compact.

    Rosemary

    Rosemary prefers warmth, bright sunlight, and fast-draining soil. Choose a deep, heavy container that will not tip over as the plant grows.

    Allow the upper soil to dry slightly before watering. Constantly wet roots are more dangerous to rosemary than brief periods of dryness.

    Thyme

    Thyme is compact, drought-tolerant, and suitable for small patios or balconies. Give it full sun and loose, well-draining soil.

    Water only when the upper layer feels dry. Light trimming after flowering helps the plant remain dense and productive.

    Oregano

    Oregano develops strong flavor when grown in bright sunlight. Use a pot at least 10 inches wide and avoid overly rich soil, which can create soft growth with weaker flavor.

    Harvest stems before the flowers fully open. Regular trimming prevents the plant from becoming woody.

    Parsley

    Parsley has deeper roots than its compact foliage suggests. Choose a container around 10 to 12 inches deep.

    Keep the soil evenly moist and harvest the outer stems near the base. This allows new leaves to continue developing from the center.

    Chives

    Chives are dependable, space-saving herbs that perform well in smaller containers. They tolerate cooler weather and partial sunlight.

    Cut leaves near the base when harvesting. Removing fading flowers directs the plant’s energy back into fresh foliage.

    Sage

    Sage prefers full sun, moderate watering, and good air circulation. Plant it in a medium-sized container filled with free-draining potting mix.

    Avoid keeping the roots constantly wet. Prune established plants lightly in spring to control woody growth.

    Cilantro

    Cilantro grows best during cooler weather and may flower quickly in high temperatures. Give it morning sunlight and afternoon shade.

    Sow seeds directly in a deep container every few weeks. This succession planting method provides a steadier supply of leaves.

    Dill

    Dill develops a long taproot, so it needs a container at least 12 inches deep. Place it in full sun but protect its tall stems from strong winds.

    Sow dill directly in its final pot because established plants dislike root disturbance.

    Lavender

    Lavender thrives in sunny, dry spaces. Terra-cotta pots are useful because their porous sides allow moisture to evaporate.

    Use gritty, fast-draining soil and avoid frequent watering. Trim lightly after flowering to preserve a tidy shape.

    Bay Laurel

    Bay laurel is a slow-growing herb that can remain in a container for several years. Use a sturdy pot and water when the upper soil begins to dry.

    Its container can be moved into a sheltered position during frost or severe cold.

    Which Herbs Can Grow Together?

    Which Herbs Can Grow Together?

    Combine herbs that share similar sunlight and moisture needs. Rosemary, thyme, oregano, sage, and lavender enjoy bright light and relatively dry soil, making them suitable companions in a large planter.

    Basil, parsley, chives, and tarragon prefer more consistent moisture. Mint and lemon balm should usually grow alone because their spreading roots can overwhelm neighboring plants.

    Best Soil and Watering Routine

    Use fresh potting mix instead of ordinary garden soil. Garden soil may become dense inside a pot, restricting airflow and drainage. Perlite or fine grit can help excess water escape.

    Check the soil before watering. Small containers may dry quickly during hot or windy conditions, while larger pots retain moisture longer. Water deeply until liquid drains from the bottom rather than applying small amounts to the surface.

    How to Maintain a Productive Herb Garden

    Harvest herbs regularly, but avoid removing most of a young plant at once. Pinching basil, mint, oregano, and thyme encourages branching and produces fuller plants.

    Rotate pots occasionally so every side receives adequate light. Remove flowers when leaves are the main harvest, especially on basil. Apply fertilizer sparingly because excessive feeding can create weak foliage with reduced flavor.

    Arranging the containers with comfortable seating, clear pathways, and easy access can also help create an outdoor wellness garden that supports relaxation while keeping routine herb care simple.

    Frequently Asked Questions

    1. What are the best herbs to grow in containers outdoors for beginners?

    Basil, mint, chives, parsley, oregano, and thyme are reliable choices because they adapt well to pots and recover quickly after harvesting.

    2. Do outdoor container herbs need full sun?

    Most herbs prefer at least six hours of direct sunlight, although parsley, mint, chives, and cilantro can tolerate partial shade.

    3. How often should potted herbs be watered?

    Water when the upper inch of soil feels dry. Temperature, wind, rainfall, pot size, and the herb’s natural moisture preference affect frequency.

    4. Can container herbs survive cold weather?

    Hardy herbs may survive mild winters, while tender varieties often need frost protection or temporary shelter in a bright, cool location.

    Fresh Herbs, Small Space, Big Reward

    Growing herbs in containers has made fresh ingredients easier for me to manage and enjoy. I can adjust each plant’s position, control its moisture, and harvest only what I need.

    A productive herb garden does not require a large yard. With suitable pots, healthy soil, good drainage, sufficient light, and regular trimming, a small collection of herbs can provide flavor and fragrance throughout the growing season.

  • Best Soil for Indoor Herb Garden: Grow Flavor Indoors

    Best Soil for Indoor Herb Garden: Grow Flavor Indoors

    A sunny kitchen shelf once seemed like the perfect place for my basil, parsley, and rosemary. Within weeks, however, one pot stayed swampy while another dried like dust. Choosing the best soil for indoor herb garden plants changed everything because healthy herbs depend on what surrounds their roots, not only on sunlight and watering.

    Indoor herbs need a growing medium that holds enough moisture for steady growth while allowing extra water to escape. The right mix should stay loose, feel light in the pot, and contain enough air spaces to keep roots active and healthy.

    Choose A Light Potting Mix

    The best growing medium is usually a soilless blend made specifically for pots.

    What Soilless Really Means

    A soilless potting mix may contain coconut coir, peat moss, composted bark, perlite, pumice, vermiculite, compost, or worm castings. Although the product may be sold as potting soil, it often contains little actual ground soil.

    This is beneficial for indoor herbs. These ingredients create a lighter root environment, reduce compaction, improve water movement, and make containers easier to lift and reposition.

    What To Find On The Label

    Look for packaging that says potting mix, indoor potting mix, container mix, or organic potting mix. The ingredient list should include a moisture-retaining material such as coconut coir or peat, combined with an aerating material such as perlite, pumice, or bark.

    Avoid products made mainly from topsoil. Also be cautious with very rich mixes containing large amounts of fertilizer because culinary herbs often produce better aroma and flavor when they are fed moderately.

    Why Garden Soil Fails

    Yard soil may look healthy outdoors, but it usually becomes dense inside a pot. Repeated watering causes fine particles to settle together, reducing airflow and slowing drainage.

    Garden soil behaves very differently in containers, even after learning how to improve clay soil for a vegetable garden, because indoor pots still require a lighter and more aerated growing medium.

    Outdoor soil may also introduce fungus gnats, weed seeds, insects, fungal spores, or plant diseases into the home. A clean commercial potting mix is safer and more predictable for windowsill herbs.

    Top Commercial Soil Options

    Top Commercial Soil Options

    Ready-made products are convenient when you want to start planting without measuring several separate ingredients.

    Rosy Soil Herb Mix

    Rosy Soil Herb Mix is a peat-free option designed for growing culinary herbs in containers. Its formula may include biochar, compost, and ingredients that support drainage, nutrient availability, and microbial activity.

    A four-quart bag may cost around $19.99, although prices can change by retailer. It is a useful choice for gardeners who want an organic-style mix and prefer to avoid peat-based products. Check the current label because brands sometimes update ingredients or bag sizes.

    Miracle-Gro Organic Indoor Potting Mix

    Miracle-Gro Organic Indoor Potting Mix commonly uses coconut coir to manage moisture while maintaining a light texture. This can help leafy herbs stay hydrated without placing their roots in dense, slow-drying soil.

    Product formulas vary, so read the package before planting edible herbs. Check whether fertilizer is already included because newly potted herbs may not need additional feeding for several weeks.

    Standard Organic Potting Mix

    A general organic potting mix can work well for basil, mint, parsley, cilantro, dill, and chives when it has visible perlite and drains freely. Test it by squeezing a moist handful. It should hold together gently but break apart easily when touched.

    When a commercial mix feels heavy or stays soaked for days, blend in extra perlite, pumice, or fine orchid bark before using it.

    Match Soil To The Herb

    Different herbs come from different growing conditions, so one formula cannot suit every plant perfectly.

    Leafy Herbs Like Moisture

    Basil, parsley, cilantro, mint, and chives appreciate even moisture. Their mix should drain well but retain enough water to prevent rapid wilting.

    Use a balanced indoor potting mix containing coir or peat with visible perlite. A small amount of compost or worm castings can provide gentle nutrition, but too much may keep the pot wet and encourage weak, overly soft growth.

    Mint should usually have its own container because its roots spread aggressively. Basil and parsley can share similar soil, but each plant still needs enough room to develop a healthy root system.

    Mediterranean Herbs Need Grit

    Rosemary, thyme, oregano, sage, and lavender naturally prefer drier, faster-draining conditions. Dense moisture-retaining soil often causes yellowing, leaf drop, stem decline, and root rot.

    Mix ordinary potting soil with cactus mix, perlite, or pumice. These ingredients create larger air spaces and help the root zone dry between waterings.

    Terracotta pots are useful for these herbs because their porous walls allow moisture to evaporate. However, check the soil regularly during hot weather because terracotta can dry more quickly than plastic or glazed ceramic.

    Deep Roots Need Space

    Cilantro, dill, and parsley often perform better in deeper pots. Their roots need loose soil that allows downward growth without becoming compacted.

    Sow cilantro and dill directly into their final containers when possible. Both plants may dislike repeated transplanting, particularly once their taproots have started developing.

    Mix Your Own Soil

    Mix Your Own Soil

    Making the best soil for indoor herb garden containers at home is simple when you use equal parts of three reliable ingredients.

    Step 1: Build The Base

    Measure one-third organic potting soil or mature screened compost. This portion gives the blend structure and provides a mild supply of nutrients.

    Avoid using unfinished compost because it may continue decomposing inside the pot, create unpleasant odors, generate heat, or attract small insects.

    Step 2: Add Drainage

    Mix in one-third perlite. These lightweight white particles keep the blend loose and create pathways for water and oxygen.

    Wear a mask or dampen perlite before pouring because the dry dust can irritate your nose and throat. Pumice can replace perlite when you want extra weight for tall or top-heavy herbs.

    Step 3: Control Moisture

    Add one-third coconut coir. Coir absorbs water while helping the mixture remain springy and open.

    Hydrate compressed coir before measuring it. Squeeze out excess water so the finished blend feels lightly damp rather than dripping wet.

    Step 4: Adjust For Dry-Loving Herbs

    For rosemary, thyme, oregano, sage, or lavender, add an extra handful of perlite to each medium pot. You can also replace part of the base with cactus or succulent mix.

    For basil, parsley, mint, and chives, keep the original balanced formula. These leafy herbs benefit from slightly greater moisture retention.

    Pot Herbs The Right Way

    Pot Herbs The Right Way

    Good soil still needs a suitable container and careful planting.

    Open The Drainage Route

    Use a container with at least one open hole. Cover a very large hole with mesh or a small piece of coffee filter to keep the homemade potting mix inside while allowing water to leave.

    Do not place stones at the bottom. A gravel layer does not improve drainage through the soil and reduces the space available for healthy roots.

    Fill Without Pressing

    Add damp potting mix loosely and avoid packing it down. Position the herb at the same depth it occupied in its nursery pot, then fill gently around the root ball.

    Leave about an inch of space below the rim. This makes watering easier and prevents soil from washing over the sides.

    Water By Touch

    Water thoroughly after planting until excess moisture exits the drainage hole. Empty the saucer so the pot does not sit in collected water.

    Although the best way to water raised garden beds depends on outdoor soil depth and weather, indoor herbs need smaller, more precise watering based on how quickly each potting mix dries.

    Check the surface with your finger before watering again. Basil may need water when the top inch feels dry, while rosemary and thyme usually benefit from drying a little deeper.

    Frequently Asked Questions

    1. What Type Of Potting Soil Is Best For An Indoor Herb Garden?

    The best soil for indoor herb garden plants is a loose, fast-draining potting mix containing coconut coir or peat for moisture and perlite, pumice, or bark for airflow.

    2. What Are Common Mistakes Growing Indoor Herbs?

    Common mistakes include using yard soil, overwatering, choosing containers without holes, applying too much fertilizer, crowding several herbs together, and giving rosemary the same moisture as basil.

    3. Can I Use Houseplant Potting Mix For Herbs?

    Yes, a houseplant potting mix can support culinary herbs when it drains freely and contains no systemic pesticide unsuitable for edible plants. Add perlite when the product feels heavy.

    4. Is Miracle-Gro Potting Mix Safe For Herbs?

    Many Miracle-Gro potting mixes can be used for container herbs, but formulas differ. Always check the label for edible plant use, included fertilizer, watering instructions, and current ingredients.

    Let Your Herbs Dig Their New Home

    Choosing the best soil for indoor herb garden success gives every plant a stronger start. Use a light potting mix, add perlite for oxygen, include coconut coir for balanced moisture, and adjust the recipe for each herb. Once basil, mint, rosemary, and thyme have healthy roots, they can reward you with fragrant leaves and flavorful harvests throughout the year.

  • Outdoor Projects That Increase Home Appeal Without a Major Renovation

    Outdoor Projects That Increase Home Appeal Without a Major Renovation

    I used to think making a home look more attractive meant saving for a big renovation. Every home makeover I came across seemed to involve tearing something down or spending thousands on a brand-new patio or landscape design. Then I spent a weekend cleaning up my own outdoor space, and the difference surprised me. The house didn’t look different because it was bigger or newer. It simply looked cared for.

    That experience changed the way I look at home improvement. I’ve realized that the best outdoor updates are often the simplest ones. They make your home feel more welcoming, easier to enjoy, and more inviting to everyone who walks up the driveway. The good news is that many of these projects can be finished in a day or two without stretching your budget.

    Why Small Outdoor Projects Often Leave the Biggest Impression

    Why Small Outdoor Projects Often Leave the Biggest Impression

    When people talk about curb appeal, they usually focus on appearance. While that’s important, what really makes a home stand out is how everything works together. A clean walkway, healthy landscaping, updated lighting, and a welcoming front entry create a sense that the property has been well maintained.

    Small improvements also tend to age better than trendy upgrades. Instead of chasing the latest design style, homeowners are choosing practical projects that improve everyday living while keeping maintenance manageable. Those changes add value whether you’re planning to sell or simply want to enjoy your home more.

    Refresh the Front Entry Before Anything Else

    The front door naturally becomes the focal point of a home’s exterior. Giving it a fresh coat of paint is one of the easiest ways to change the overall look without replacing the door itself.

    Classic colors like deep navy, charcoal, forest green, or rich red create a welcoming entrance while complementing many exterior color palettes. Pair that with updated door hardware in matte black or bronze, modern house numbers, and a clean welcome mat, and the entire entry instantly feels more current.

    These updates don’t require major construction, yet they create one of the strongest first impressions visitors notice.

    Give Outdoor Surfaces a Fresh Start

    Give Outdoor Surfaces a Fresh Start

    Outdoor surfaces collect years of dirt, pollen, algae, and stains so gradually that many homeowners stop noticing them.

    Pressure washing the driveway, front porch, walkways, and siding often restores the original appearance in just a few hours. It’s one of the highest-impact projects because it reveals the home’s true condition instead of covering it up.

    While you’re outside, take time to remove old planters, sweep away leaves, clear cobwebs, and organize the porch. A tidy exterior immediately makes the property feel more inviting.

    Improve Landscaping Without Starting Over

    A beautiful yard doesn’t always need more plants. In many cases, it simply needs better organization.

    Fresh mulch creates contrast that makes existing flowers and shrubs stand out. Edging the lawn along sidewalks and driveways gives the landscape cleaner lines, while trimming overgrown bushes helps the home itself become more visible.

    Adding a few container gardens near the front entrance introduces seasonal color without committing to permanent planting beds. Native plants and low-maintenance landscaping also reduce watering needs while supporting a healthier outdoor environment.

    Make Outdoor Lighting Work for You

    Make Outdoor Lighting Work for You

    Lighting often becomes noticeable only after the sun goes down, but that’s exactly when it has the greatest impact.

    Replacing an outdated porch fixture with a modern design can instantly refresh the home’s appearance. Solar pathway lights improve visibility while highlighting walkways and landscaping features without increasing energy costs.

    Well-placed lighting also extends the usability of outdoor spaces. Whether you’re arriving home after work or enjoying a quiet evening outside, a thoughtfully lit exterior feels safer and more welcoming.

    Create Spaces That Invite People to Stay

    The most memorable outdoor spaces aren’t always the largest ones. They’re the ones people actually use.

    A comfortable seating area with weather-resistant furniture, a small pergola, or a simple fire pit encourages family and friends to spend more time outdoors. Even a modest patio can become one of the most-used parts of a property when it’s designed with comfort in mind.

    Many homeowners looking for ideas eventually discover that outdoor family gathering spaces aren’t about adding luxury features. They’re about creating places where conversations happen naturally, meals are shared, and everyday moments become more enjoyable.

    Choose Projects That Stay Beautiful With Less Work

    Choose Projects That Stay Beautiful With Less Work

    Some outdoor improvements look impressive at first but require constant upkeep. Others continue looking great with only seasonal maintenance.

    Weather-resistant materials, durable pavers, composite decking, and drought-tolerant plants allow homeowners to spend less time maintaining the yard and more time enjoying it. Good drainage, quality edging, and thoughtful landscape planning also prevent many common maintenance problems before they start.

    When choosing your next project, think beyond immediate appearance. Consider how it will look a year from now and how much effort it will require to keep it in good condition.

    FAQs: Outdoor Projects That Increase Home Appeal Without a Major Renovation

    1. Which outdoor project offers the fastest improvement?
    Pressure washing driveways, sidewalks, and patios usually delivers the quickest transformation by removing years of built-up dirt and stains.

    2. Do I need a large budget to improve curb appeal?
    No. Painting the front door, updating lighting, replacing house numbers, adding mulch, and planting containers are affordable projects that make a noticeable difference.

    3. What landscaping changes add the most value?
    Clean lawn edges, fresh mulch, healthy shrubs, native plants, and low-maintenance garden beds create a polished look while reducing future maintenance.

    4. Should I focus on the front yard or backyard first?
    The front yard creates the first impression, so it’s usually the best place to begin. Once that’s complete, improving outdoor living areas adds even more everyday value.

    The Homes People Remember Usually Feel Welcoming

    The outdoor projects that increase home appeal aren’t always the biggest or the most expensive. They’re the ones that make a home feel cared for from the moment someone arrives. A freshly painted front door, clean walkways, thoughtful landscaping, and comfortable outdoor spaces work together to create an inviting atmosphere that lasts long after the first impression.

    When every small improvement supports the next, your home doesn’t just look better. It becomes a place people genuinely enjoy spending time in.

  • Best Way to Water Raised Garden Beds Without Waste

    Best Way to Water Raised Garden Beds Without Waste

    The best way to water raised garden beds is to use low-pressure drip irrigation beneath a layer of organic mulch. This setup delivers moisture near plant roots, limits evaporation and removes much of the guesswork from watering.

    I learned that watering raised beds like an ordinary lawn creates several problems. The soil surface may look soaked while the deeper root zone remains dry. A properly calibrated drip system provides slower, more even moisture without spraying paths, leaves or empty spaces.

    Why Raised Beds Need a Different Watering Strategy

    Raised beds often drain and warm faster than surrounding garden soil. Their exposed sides also allow heat and wind to pull moisture from the growing mix.

    However, that does not mean every bed needs daily watering. Soil composition, bed depth, sunlight, rainfall and plant size all affect moisture loss. A shallow bed filled with a light mix may dry quickly. A deep bed rich in loam and compost may hold water much longer.

    The best way to water raised garden beds is therefore not a rigid daily schedule. It is a delivery system paired with regular soil checks.

    University of Minnesota Extension recommends checking below the surface rather than judging soil by appearance. It suggests watering when the soil feels dry about two inches down. Mulched soil retains moisture longer and may need less frequent irrigation.

    Top Raised Bed Watering Methods Ranked

    Rank Method Efficiency Setup Best use
    1 Drip lines or kits Excellent Moderate Several beds and dense planting
    2 Garden watering grid Excellent Easy Square-foot layouts and beginners
    3 Soaker hose Good Easy Established rows and small budgets
    4 Hand watering Fair High effort Seedlings and one small bed

    Drip irrigation earns first place because it applies water slowly near the root zone. The EPA reports that microirrigation can use 20% to 50% less water than conventional sprinkler systems. It reduces evaporation, runoff and accidental overwatering.

    A garden grid offers similar benefits but uses rigid, evenly spaced sections. Soaker hoses are affordable, although their output can become uneven on long runs. Hand watering provides control around seedlings but demands time and consistent technique.

    Why Drip Irrigation Works Best

    Why Drip Irrigation Works Best

    Water Reaches the Root Zone

    Drip tubing releases small amounts of water over an extended period. This slower application gives the soil time to absorb moisture rather than allowing water to pool or escape over the bed’s edge.

    The moisture then moves outward through the soil. Correct emitter spacing helps create overlapping wet zones instead of isolated damp spots.

    University of Minnesota Extension identifies drip irrigation as the most efficient way to irrigate crops because it delivers water directly to roots and reduces evaporation. Watering only planted rows may also discourage weeds between crops.

    Leaves Stay Dry

    Overhead sprinklers wet foliage and send water outside the growing area. Wet leaves do not automatically cause disease, but prolonged moisture can create favorable conditions for several fungal and bacterial problems.

    Drip irrigation keeps most foliage dry. It also reduces soil splash, which can move soil-borne pathogens onto stems and leaves. Extension guidance recommends drip irrigation or careful hand watering near plant roots for this reason.

    Automation Prevents Moisture Swings

    A hose timer makes watering more consistent during busy weeks or vacations. Stable soil moisture is especially useful while tomatoes, cucumbers, squash and peppers are flowering and developing fruit.

    A timer should control the system, not replace observation. Pause it after useful rainfall and shorten cycles during cool weather. A soil-moisture controller offers an even smarter option because it prevents watering when the bed already contains enough moisture.

    How to Install Drip Irrigation in a Raised Bed

    How to Install Drip Irrigation in a Raised Bed

    Assemble the Faucet Components

    Begin at the outdoor faucet. A typical home system uses a backflow preventer, timer, filter and pressure regulator before the main tubing.

    Follow the order required by the product manufacturer. Drip components operate under low pressure, so connecting them directly to high household pressure may damage tubing or fittings. Penn State Extension notes that excessive pressure can deform or burst drip tape, making reliable regulation essential.

    Run the Main Supply Line

    Attach 1/2-inch polyethylene tubing and route it toward the beds. Use elbows and tees to reach several beds without sharply bending the line.

    Add a shutoff valve for each bed when possible. Separate valves let me stop watering an empty bed while continuing to irrigate productive crops.

    Position the Drip Lines

    Connect 1/4-inch emitter tubing or compatible dripline to the main supply. Lay parallel runs across the bed, keeping them close enough for their moisture patterns to overlap.

    A spacing of roughly 6 to 12 inches suits many intensive vegetable beds, but the correct distance depends on soil. Sandy mixes allow water to move downward quickly and may need closer lines. Heavier mixes spread moisture farther sideways.

    Place lines beside plant rows rather than pressing emitters against stems. Secure them with landscape staples so they remain in place during planting and mulching.

    Flush, Test and Add Mulch

    Leave the ends open during the first test. Run water until debris exits, then install the end caps. Check every connector and emitter for leaks or blockages.

    Cover the tubing with about two inches of clean straw, shredded leaves or another suitable organic mulch. Mulch reduces surface evaporation, moderates soil temperature and suppresses weed growth. It also supports How to keep weeds out of a garden without chemicals by blocking light before many weed seeds germinate.

    Do not bury removable connectors so deeply that maintenance becomes difficult.

    How Long and How Often to Water

    How Long and How Often to Water

    Use Soil Depth Instead of a Fixed Schedule

    The best way to water raised garden beds changes throughout the growing season. Young transplants have small root systems and may need lighter, more frequent watering. Mature crops usually benefit from deeper watering with longer gaps between sessions.

    Check moisture two to four inches below the surface. Irrigate when that zone feels dry rather than when the mulch looks dry. Colorado State University Extension also recommends using the top two to four inches as a practical moisture checkpoint.

    Many vegetable gardens need roughly one inch of water per week from irrigation and rainfall. That equals about 20 gallons for a 4-by-8-foot bed. Extreme heat, sandy soil and fruiting crops may increase demand.

    Calibrate Your System

    My preferred test replaces vague timer advice with a measurable result:

    1. Run the drip system for 20 minutes.
    2. Wait another 20 minutes for moisture to spread.
    3. Dig a narrow inspection hole between two emitters.
    4. Measure how deeply and widely the soil is moist.
    5. Increase or reduce the next cycle based on that result.

    Suppose moisture reaches only three inches after 20 minutes. A mature tomato bed may need a longer cycle. If water reaches the bottom and drains away, shorten the run or divide it into two cycles.

    Repeat this test after changing mulch, replacing tubing or entering hot summer weather. This simple calibration makes the best way to water raised garden beds specific to the actual bed rather than a generic online schedule.

    Raised Bed Watering Mistakes to Avoid

    Brief daily sprinkling encourages shallow moisture patterns and can leave deeper roots dry. Watering at midday increases evaporative loss, while frequent evening leaf wetting may leave foliage damp overnight.

    Avoid assuming all beds need the same runtime. A sunny tomato bed and a partly shaded lettuce bed rarely lose moisture at identical rates. Separate valves or irrigation zones solve this problem.

    Do not place emitters too far apart. Dry pockets can develop between lines, especially in coarse mixes. Also inspect filters and end emitters regularly. Mineral buildup, soil particles and insect activity can reduce flow.

    Finally, do not treat mulch as permission to overwater. Mulch slows moisture loss, so previously suitable schedules may keep the soil excessively wet after mulching.

    Frequently Asked Questions

    1. What is the best irrigation system for raised vegetable beds?

    A low-pressure dripline or garden grid is usually best because it waters the root zone evenly while limiting runoff, evaporation and wet foliage.

    2. How often should raised garden beds be watered in summer?

    Check the soil every few days and water when it feels dry two to four inches deep; hot, windy conditions may require more frequent checks.

    3. Is a soaker hose or drip irrigation better for raised beds?

    Drip irrigation offers more predictable emitter placement and easier zoning, while a short soaker hose remains a practical choice for simple, budget-friendly beds.

    4. What is the best time to water raised garden beds?

    Early morning is generally ideal because temperatures are cooler, evaporation is lower and accidental moisture on foliage can dry during the day.

    Stop Spraying and Start Soaking

    The best way to water raised garden beds combines drip irrigation, mulch and hands-on moisture checks. None of these parts works as well alone.

    Install the lines, test the wetting depth and adjust the timer as plants and weather change. Your goal is not to run irrigation on schedule. Your goal is to keep the active root zone evenly moist without sending valuable water beyond it.

  • How to Get Rid of Fungus Gnats Without Harming Pets: The No-Panic Plant Rescue Plan

    How to Get Rid of Fungus Gnats Without Harming Pets: The No-Panic Plant Rescue Plan

    The moment tiny black flies started rising from my houseplants, I knew swatting the adults would not solve the problem. Fungus gnats spend most of their lifecycle inside damp potting soil, where their larvae feed on fungi, decaying organic matter, and sometimes delicate plant roots.

    Learning how to get rid of fungus gnats without harming pets means attacking the infestation from several directions. You need to reduce soil moisture, stop larvae from developing, trap flying adults, and remove the conditions that allow them to return. 

    You also need to keep cats and dogs away from exposed adhesives, concentrated oils, loose powders, treated water, and improperly used pesticides.

    The most effective approach combines cultural soil management, physical traps, and carefully selected biological controls.

    Are Fungus Gnats Dangerous to Cats and Dogs?

    Adult fungus gnats do not bite or sting pets. In most homes, they are primarily an irritating nuisance. Their larvae may damage seedlings, young plants, or weakened roots when an infestation becomes severe, but established houseplants often tolerate small populations, including many houseplants that tolerate dry air from heating.

    The treatment can create a greater risk than the insect itself. Products described as natural are not automatically harmless. Concentrated essential oils, neem products, peroxide mixtures, sticky adhesives, and loose powders may cause problems when pets lick, inhale, step in, or drink them.

    I always begin with non-chemical fungus gnat control and follow every product label before applying anything to indoor soil. The EPA recommends keeping pets away from treated areas until a product has dried or for the period specified on its label.

    How Can You Confirm You Have Fungus Gnats?

    Before starting treatment, make sure the insects are fungus gnats rather than fruit flies or drain flies.

    Fungus gnats look like miniature mosquitoes. They have dark bodies, long legs, delicate wings, and weak flight patterns. You will usually notice them crawling over potting soil, hovering around plant containers, or gathering near windows.

    Fruit flies have rounder bodies and tend to gather near overripe produce, trash cans, recycling bins, and food residue. Drain flies have fuzzy, moth-like wings and remain close to sinks or drains.

    Fungus gnats commonly develop in moist houseplant growing media. Colorado State University Extension notes that their larvae feed on algae, fungi, organic matter, and occasionally plant roots.

    Why Do Fungus Gnats Keep Coming Back?

    Why Do Fungus Gnats Keep Coming Back?

    Constantly damp potting mix creates an ideal fungus gnat nursery. Adult females lay eggs near the soil surface, and the larvae develop where moisture and decomposing material remain available.

    Overwatering is the most common trigger. Poor drainage, standing water in saucers, dense potting mix, dead leaves, organic fertilizer, and contaminated bags of soil can also support an infestation.

    Treating visible adults without correcting wet soil rarely works. Iowa State University Extension specifically identifies fungus gnats as a common symptom of overwatering.

    How to Kill Fungus Gnat Larvae in Houseplant Soil

    The larvae are the root of the infestation. Capturing adults may make the room feel cleaner, but new gnats will continue emerging until you interrupt development in the soil.

    Let the Topsoil Dry Before Watering Again

    Allow the upper one to two inches of potting mix to dry before watering, provided the plant can tolerate it. Dry soil makes the surface less suitable for egg laying and larval survival.

    Do not automatically wait until the top three inches are bone dry. Moisture needs vary widely between ferns, tropical foliage plants, succulents, and flowering houseplants. Check the care requirements for each plant and avoid stressing moisture-sensitive species.

    Colorado State and Iowa State both recommend allowing the growing medium to dry between waterings as a primary fungus gnat control method.

    Use Bottom Watering Carefully

    Bottom watering can help keep the upper soil layer drier. Place a nursery pot with drainage holes in a shallow container of water and allow it to absorb moisture for approximately 10 to 15 minutes.

    Remove the pot once the soil has taken up enough water. Never leave it sitting in a full saucer because constantly saturated soil encourages fungus gnats and root problems.

    I also keep water-filled saucers away from pets. Cats and dogs should not be allowed to drink drainage water because it may contain fertilizer residue, soil organisms, or treatment products.

    Consider a Label-Approved BTI Treatment

    Bacillus thuringiensis israelensis, commonly abbreviated as BTI, is a biological control used against certain fly and mosquito larvae. Some gardeners use appropriately labeled BTI products to target fungus gnat larvae in potting soil.

    Mosquito Bits are often soaked in water before application, but preparation instructions may vary by product and intended use. Follow the exact label rather than relying on a universal online recipe.

    BTI should not be described as offering zero risk in every situation. Keep the package, granules, prepared water, and treated soil away from pets. Repeat applications may be required over several weeks because eggs and pupae may survive the first treatment.

    Use Hydrogen Peroxide With Caution

    A diluted hydrogen peroxide drench is a popular home remedy. Many guides recommend mixing one part standard 3% hydrogen peroxide with four parts water and applying it to the soil.

    The mixture may kill some larvae it directly contacts, and hydrogen peroxide eventually breaks down into water and oxygen. However, that does not make every concentration or application harmless. Excessive use may irritate skin and eyes, damage sensitive roots, or disrupt beneficial soil organisms.

    I treat this as an optional remedy rather than the safest first choice. Keep pets away from the mixture and never allow them to drink treated drainage water.

    Treat Neem Oil as a Pesticide Product

    Treat Neem Oil as a Pesticide Product

    Neem oil may suppress some soil pests, but concentrate strengths and label directions differ. A fixed recipe such as two tablespoons per gallon may not suit every product or plant.

    Avoid mixing neem concentrate with an arbitrary amount of dish soap unless the label specifically allows it. Keep animals away during application and prevent them from licking wet leaves or digging in treated soil.

    The EPA advises consumers to read pesticide labels before buying, storing, mixing, or applying products around pets.

    How to Trap Adult Fungus Gnats Safely

    Adult trapping reduces egg laying and helps you monitor whether your treatment is working.

    Place Yellow Sticky Traps Near the Soil

    Yellow sticky cards are more dependable for monitoring fungus gnats than vinegar traps. Position small pieces close to the potting mix, where adults emerge.

    Sticky traps contain no airborne pesticide, but the adhesive can cling to paws, noses, feathers, tails, and fur. Place them inside protective holders or somewhere completely inaccessible to pets.

    Remember that traps only catch adults. Iowa State notes that yellow cards do not prevent new insects from hatching, so soil management must continue.

    Do Apple Cider Vinegar Traps Work?

    Apple cider vinegar traps are commonly made with vinegar, sugar, dish soap, plastic wrap, and small entry holes. They work well for fruit flies because those insects respond strongly to fermenting food odors.

    They may catch an occasional fungus gnat, but they are not the most reliable adult fungus gnat treatment. Yellow traps placed near the soil usually match fungus gnat behavior more closely.

    An open vinegar container can also spill or attract a curious pet. When identification is uncertain, determine whether the flies gather around produce or plant soil before choosing a trap.

    Should You Add Sand or Gravel Over the Soil?

    A dry layer of coarse sand, pea gravel, or aquarium stones may discourage adults from reaching moist soil. However, it should remain an optional supporting method rather than the main solution.

    A thick top layer can hide moisture and make it difficult to judge when the plant needs water. Fine sand may compact, while decorative stones can trap dampness underneath.

    Iowa State Extension considers sand and rock coverings unnecessary when proper drying between waterings addresses the underlying problem.

    When Should You Repot an Infested Plant?

    Repot when the soil stays waterlogged, smells sour, contains rotting roots, or remains heavily infested despite several weeks of treatment.

    Remove the plant, discard the old mix in a sealed bag, trim clearly rotten roots, and refill a clean container with fresh, well-draining indoor potting soil. Avoid using dense outdoor garden soil in houseplant pots.

    Keep pets out of the work area. Loose potting mix, fertilizers, perlite, old soil, and plant debris should not be inhaled or eaten.

    How Long Does Pet-Safe Fungus Gnat Control Take?

    How Long Does Pet-Safe Fungus Gnat Control Take?

    Expect the process to take approximately three to four weeks. Adult numbers may decline within days, but eggs, larvae, and pupae can continue developing inside the soil.

    Continue drying the soil appropriately, monitoring with sticky traps, removing dead leaves, and applying any label-approved larval treatment for the full recommended period.

    Do not stop as soon as the visible adults disappear. A consistent routine breaks the lifecycle more effectively than switching between several aggressive homemade treatments.

    Frequently Asked Questions (FAQs)

    1. What Is the Safest Fungus Gnat Treatment Around Pets?

    Start by correcting overwatering, emptying saucers, removing decaying leaves, isolating affected plants, and placing protected sticky traps beyond your pet’s reach. Use larval treatments only according to their labels.

    2. Can Essential Oils Kill Fungus Gnats Safely?

    I avoid essential-oil pest remedies in pet-accessible areas. The ASPCA warns that concentrated essential oils can harm cats and dogs through ingestion, skin contact, or exposure on their coats.

    3. Can Fungus Gnats Harm Houseplants?

    Small populations usually cause little damage, but large numbers of larvae may feed on the roots of seedlings, young plants, or weakened specimens.

    4. Should I Throw Away a Plant With Fungus Gnats?

    Usually, no. Most infestations respond to moisture correction, adult trapping, and larval control. Repotting offers a practical reset when the soil has become severely infested or waterlogged.

    Win the Battle Without Risking Your Pets

    Once I understood the lifecycle, fungus gnat control became much simpler. I stopped focusing only on the adults and began correcting moisture, targeting soil larvae, monitoring with yellow traps, and cleaning up plant debris.

    The key to how to get rid of fungus gnats without harming pets is choosing the lowest-exposure method that works, then escalating carefully. Keep treatments inaccessible, avoid absolute “natural equals safe” assumptions, and follow every label.

    With steady care for several weeks, you can eliminate fungus gnats, protect your indoor plants, and keep your home safer for cats and dogs.

  • Companion Planting Herbs With Vegetables for Better Garden

    Companion Planting Herbs With Vegetables for Better Garden

    When I first mixed herbs into my vegetable beds, I chose combinations based mainly on appearance and convenience. Some plants thrived, while others competed for water, crowded their neighbors, or spread much farther than expected. I soon learned that companion planting herbs with vegetables works best when I consider growing conditions rather than relying on simple pairing lists.

    Herbs can support a productive garden by attracting pollinators, providing shelter for beneficial insects, covering exposed soil, and adding useful diversity. However, no herb can guarantee that pests or diseases will disappear. Successful companion planting combines thoughtful plant selection with proper spacing, watering, crop rotation, and regular garden observation.

    What Is Companion Planting?

    Companion planting is the practice of growing different plants near one another because their characteristics may be complementary. A tall vegetable might provide afternoon shade for a delicate herb, while a flowering herb may attract insects that pollinate crops or feed on common garden pests.

    The most useful combinations share similar sunlight, soil, and watering requirements. They should also have compatible mature sizes and root systems. Pairing plants only because a chart recommends them can create problems when one prefers dry soil and the other needs consistent moisture.

    Benefits of Growing Herbs Near Vegetables

    Benefits of Growing Herbs Near Vegetables

    Greater Garden Diversity

    Planting several species in one bed creates a more varied environment than growing a single crop in long rows. Different leaf shapes, heights, flowering times, and scents may make the garden more attractive to pollinators and beneficial insects.

    Diversity also allows gardeners to harvest multiple foods from the same growing area. Compact herbs can fill gaps around larger vegetables without requiring a separate herb garden.

    Support for Pollinators

    Flowering herbs such as dill, cilantro, parsley, thyme, oregano, chives, and basil can attract bees, hoverflies, butterflies, and other insects. Letting a few plants flower may be especially helpful when nearby vegetables need insect pollination.

    Cucumbers, squash, melons, and many fruiting crops depend heavily on pollinator activity. Herbs planted near these vegetables can provide additional nectar and pollen throughout the growing season.

    Better Use of Space

    Low-growing herbs can occupy the soil beneath taller crops. Thyme, oregano, and chives may fit around tomatoes, peppers, eggplants, or trellised vegetables when enough room is left for air circulation.

    This layered approach can reduce exposed soil, make small gardens more productive, and create a visually appealing bed. Gardeners should still respect the mature width of every plant rather than filling every available space.

    Reliable Herb and Vegetable Pairings

    Reliable Herb and Vegetable Pairings

    Basil With Tomatoes and Peppers

    Basil, tomatoes, and peppers enjoy warm temperatures, abundant sunlight, and reasonably consistent moisture. These similar requirements make them practical neighbors in beds and large containers.

    Place basil far enough from tomato stems to prevent crowding. Frequent harvesting keeps basil compact and delays flowering, although allowing one or two plants to bloom can support pollinators.

    Dill With Cucumbers and Brassicas

    Young dill can grow near cucumbers, cabbage, broccoli, kale, and other vegetables. Its flowers attract small beneficial insects, including hoverflies and parasitic wasps.

    Dill becomes tall and airy as it matures, so it works best along the northern side of shorter crops where it will not block sunlight. Gardeners should also prevent unwanted reseeding by removing some flower heads before seeds mature.

    Chives With Carrots and Leafy Greens

    Chives form narrow clumps that fit easily along the edges of vegetable beds. They can grow near carrots, lettuce, spinach, and other compact crops without creating heavy shade.

    Their purple flowers attract pollinators, while the leaves provide repeated harvests. Dividing established clumps every few years helps prevent overcrowding.

    Thyme With Cabbage Family Crops

    Thyme prefers bright light and fast-draining soil. It can be planted near cabbage, broccoli, cauliflower, and kale when the bed is not kept constantly wet.

    Because thyme remains relatively low, it can serve as an attractive border plant. Avoid placing it where large vegetable leaves will completely cover it.

    Oregano With Peppers and Eggplants

    Oregano tolerates heat and relatively dry conditions once established. It can grow near peppers and eggplants, particularly in warm beds with good drainage.

    Regular trimming prevents oregano from spreading into nearby plants. In regions with mild winters, gardeners may prefer growing it in a buried container to control its roots.

    Parsley With Tomatoes and Asparagus

    Parsley grows well in rich soil with steady moisture. It can occupy spaces near tomatoes or established asparagus beds, provided it receives enough light.

    When parsley flowers during its second season, it becomes a useful food source for beneficial insects. Leaving one mature plant in bloom can increase insect activity without sacrificing the entire crop.

    Match Plants by Water and Soil Needs

    Match Plants by Water and Soil Needs

    Water compatibility is more important than many popular companion planting claims. Basil and parsley prefer more consistent moisture than rosemary, sage, thyme, and lavender.

    Mediterranean herbs can develop root problems in beds watered frequently for thirsty vegetables. Plant these drought-tolerant herbs along dry bed edges, in raised mounds, or in separate containers positioned near the vegetable garden.

    Soil fertility matters too. Leafy herbs often appreciate compost-rich soil, while excessive fertilizer can produce weak, overly lush growth in rosemary and thyme.

    Consider Height and Root Competition

    Tall herbs may shade young vegetables, while aggressive roots can compete for moisture and nutrients. Place dill and mature fennel where their height will not block sunlight from smaller plants.

    Root depth can also improve space use. Shallow-rooted herbs may coexist with deeper-rooted vegetables when spacing is generous. However, closely planted crops still compete during hot or dry weather, regardless of root depth.

    Herbs That Need Extra Control

    Mint

    Mint spreads rapidly through underground stems and can overtake vegetable beds. Grow it in a container rather than directly in open garden soil. The pot can sit beside cabbage, kale, broccoli, or patio vegetables without allowing the roots to escape.

    Fennel

    Fennel is usually easier to manage in its own section of the garden. It becomes large, casts shade, and may interfere with the growth of some nearby plants. Its flowers are valuable to insects, so isolating it does not mean excluding it from the garden.

    Rosemary and Sage

    These woody herbs dislike constantly wet soil. Avoid placing them beside vegetables that require frequent irrigation unless drainage is excellent and watering can be directed carefully.

    Companion Planting in Containers and Raised Beds

    Companion Planting in Containers and Raised Beds

    Containers make it easier to control aggressive herbs and separate plants with different moisture requirements. Basil can share a large pot with a compact pepper, while thyme may grow around the edge of a deep tomato container.

    Successful container pairings also depend on the growing medium beneath the plants. Using the best soil mix for growing herbs in pots helps maintain drainage, airflow, and moisture levels that support both herbs and compact vegetables sharing the same container.

    Raised beds provide good drainage, but gardeners should not overcrowd them. Leave space for mature growth, airflow, harvesting, and inspection. Closely packed leaves can trap humidity and make disease problems harder to notice.

    Common Companion Planting Mistakes

    One mistake is expecting aromatic herbs to provide complete pest protection. Their presence may influence insect activity, but regular inspection remains necessary.

    Another mistake is ignoring mature plant size. A small transplant can become a wide, woody herb or a tall flowering plant within one season.

    Gardeners also commonly combine plants with conflicting watering needs. Even traditionally recommended companions may struggle when one plant receives too much or too little water.

    Overwatering herbs in crowded beds or containers can also encourage tiny black flies in houseplant soil after watering, especially when moisture remains trapped around the roots.

    Improving drainage, allowing the soil surface to dry appropriately, and avoiding excessive irrigation can help reduce this common problem.

    Frequently Asked Questions

    1. Does companion planting herbs with vegetables prevent every pest?

    No. Herbs may support beneficial insects or make a garden more diverse, but they should be combined with inspection, sanitation, barriers, and other pest-management methods.

    2. Which herb is easiest to grow beside tomatoes?

    Basil is a practical choice because it prefers similar warmth, sunlight, soil fertility, and watering conditions.

    3. Should herbs be allowed to flower in a vegetable garden?

    Allowing some dill, parsley, cilantro, chives, oregano, or thyme to flower can provide nectar and pollen for beneficial insects.

    4. Can several herbs share one vegetable bed?

    Yes, provided they have compatible light, moisture, drainage, spacing, and mature-size requirements.

    Final Thoughts

    I now treat companion planting as a flexible garden-planning method rather than a collection of guaranteed pairings. I begin by matching sunlight, soil moisture, plant height, root behavior, and harvest needs. Then I add flowering herbs where they can support pollinators without crowding vegetables.

    The most productive combinations are often the simplest: basil beside peppers, chives around leafy greens, dill near cucumbers, and thyme along a dry bed edge. By observing how each pairing performs and adjusting it from season to season, I can create a diverse garden that is practical, attractive, and easier to manage.

  • How to Keep Weeds Out of a Garden Without Chemicals

    How to Keep Weeds Out of a Garden Without Chemicals

    Weeds do not need stronger chemicals. They need exposed soil, sunlight, moisture and enough time to establish roots. I learned that how to keep weeds out of a garden without chemicals is mostly about removing those opportunities before unwanted plants appear.

    My most successful beds are not weed-free because I pull weeds constantly. They stay manageable because mulch, close planting and targeted watering work together as a prevention system.

    Why Bare Soil Creates a Weed Problem

    Bare soil acts like an invitation. Sunlight reaches dormant seeds, rain provides moisture and disturbed soil brings buried seeds closer to the surface.

    Mulch interrupts that cycle by blocking light. It also reduces moisture loss and moderates soil temperature. University of Minnesota Extension recommends several inches of organic mulch for weed suppression and soil protection.

    The goal is not to eliminate every weed seed. That would be impossible. The practical goal is to prevent most seeds from germinating and remove survivors before they reproduce.

    Start With a Quick Bare-Soil Audit

    Before adding anything, I walk around the garden and look for visible soil. I check between vegetables, beneath shrubs, around bed edges and beside irrigation lines.

    Every exposed patch receives one of four treatments:

    • Mulch it.
    • Plant it.
    • Cover it temporarily.
    • Inspect it every week.

    This two-minute audit is my original weed-control shortcut. Instead of waiting for weeds, I identify the exact places where they are likely to appear.

    Also examine your soil before covering it. Compacted or poorly drained ground may need compost and careful loosening first. Gardeners dealing with heavy ground can improve clay soil for a vegetable garden before installing permanent mulch.

    Smother Weeds With the Right Mulch

    Smother Weeds With the Right Mulch

    Mulching is the foundation of how to keep weeds out of a garden without chemicals because it blocks the light needed by many weed seeds.

    Apply Organic Mulch at the Correct Depth

    Spread two to three inches of shredded leaves, bark, untreated wood chips or clean straw over weed-free soil. Coarse wood chips may be applied slightly deeper in paths or around established perennials.

    Avoid piling mulch against vegetable stems, tree trunks or shrub crowns. Trapped moisture can encourage decay. Excessively deep mulch may also restrict water movement and reduce oxygen around roots.

    Choose mulch for the planting area:

    • Use clean straw or shredded leaves around annual vegetables.
    • Use wood chips around shrubs and perennial beds.
    • Use compost as a thin surface layer, then cover it with coarser mulch.

    Inspect straw carefully. Material containing mature seed heads can introduce a fresh weed problem.

    Add Cardboard Below Mulch

    For a badly overgrown bed, I use sheet mulching. Cut existing weeds low, remove seed heads and soak the soil. Lay plain, tape-free cardboard over the area with overlapping edges. Wet it thoroughly and cover it with mulch.

    Cardboard temporarily blocks sunlight while decomposing below the surface. Penn State Extension describes sheet mulching as a way to smother unwanted vegetation with cardboard and organic material.

    Do not use glossy, waxed or heavily printed boxes. Avoid placing thick cardboard directly around shallow-rooted plants that need regular water and airflow.

    Reserve Landscape Fabric for Permanent Areas

    Water-permeable landscape fabric can control weeds beneath gravel paths or permanent decorative stone. It is less suitable for active vegetable beds.

    Soil and decomposed debris eventually collect above the fabric. Weeds can then root into that new surface layer. Fabric may also complicate planting, compost application and future bed changes.

    Stop Watering Weed Seeds

    Stop Watering Weed Seeds

    Changing irrigation made a noticeable difference in my garden. Overhead sprinklers wet every open space, including areas occupied only by weed seeds.

    Drip lines and soaker hoses deliver water close to crop roots. Oregon State University Extension notes that drip irrigation keeps more of the surrounding soil dry, reducing weed germination and growth.

    Place emitters near desired plants and check them for leaks. A leaking connector can create a small, perfectly watered weed nursery.

    Mulch above or around the irrigation line after testing the system. This combination conserves water while limiting light and moisture available to weeds.

    Use Dense Planting as Living Weed Control

    Another part of how to keep weeds out of a garden without chemicals is replacing empty soil with useful plants.

    Follow the recommended spacing for each crop, but avoid unnecessarily wide gaps. As vegetables mature, their leaves should form a partial canopy that shades the ground.

    Low-growing herbs, flowers and cover crops can fill spaces around taller plants. Sweet alyssum, creeping thyme and nasturtiums may work in suitable beds. Their suitability depends on climate, crop size and water needs.

    Do not crowd plants so tightly that air cannot circulate. Poor airflow can increase disease pressure. The aim is planned coverage, not an overcrowded jungle.

    Disturb the Soil as Little as Possible

    Disturb the Soil as Little as Possible

    Deep digging can bring dormant weed seeds into the germination zone. I now disturb only the planting row or individual planting hole whenever the soil structure allows.

    Use a narrow hoe to slice young weeds at the surface. Avoid repeatedly turning the entire bed. Reduced-tillage systems preserve soil structure and can limit weed problems between crop rows.

    When adding compost, spread it over the surface and cover it with mulch. Earthworms, moisture and normal soil activity will gradually incorporate the organic matter.

    Remove Existing Weeds Without Herbicides

    Remove Existing Weeds Without Herbicides

    Prevention handles future weeds, but established plants still require direct action.

    Pull Young Weeds After Rain

    Pull weeds when the soil is moist but not waterlogged. Grip the plant near the soil and remove as much root as possible.

    Annual weeds must come out before flowering or setting seed. Persistent perennials may require repeated removal. Continually cutting new growth weakens stored root reserves over time.

    Never place mature seed heads or invasive roots in a cool backyard compost pile. Bag them according to local disposal guidance.

    Solarize Empty Garden Beds

    Solarization works well for an unplanted bed during the hottest, sunniest part of summer. Water the soil, stretch clear plastic tightly over it and bury or secure the edges.

    Leave it undisturbed for roughly four to six weeks. The trapped heat can suppress existing vegetation and some weed seeds. Results depend on sunlight, climate, plastic contact and soil moisture.

    Solarization is not practical around growing vegetables because the heat can damage them.

    Use Boiling Water Only on Hard Surfaces

    Boiling water can scorch weeds growing through driveway cracks, gravel edges and patio joints. Pour it carefully over the plant’s crown.

    Keep it away from garden beds, lawns and desirable roots. Hot water does not distinguish between a weed and a valuable plant.

    Be Careful With Vinegar and Salt

    Homemade sprays containing vinegar, salt and dish soap may burn foliage, but they are not my preferred garden treatment. Household vinegar often damages only the visible leaves of established perennial weeds.

    Salt can accumulate in soil, injure nearby plants and reduce future plant growth. Dish soap may also affect plant tissues. Never spray these mixtures in vegetable beds or near desirable roots.

    For cracks and isolated hard surfaces, boiling water or physical removal usually creates fewer long-term soil problems.

    Natural Weed-Control Reference Table

    Method Best location Main benefit Important caution
    Organic mulch Vegetable and flower beds Blocks light and conserves moisture Keep it away from stems
    Cardboard and mulch New or overgrown beds Smothers existing vegetation Use plain, tape-free cardboard
    Dense planting Productive garden beds Creates living shade Maintain airflow
    Drip irrigation Vegetables and borders Waters crops instead of weeds Check lines for leaks
    Landscape fabric Gravel paths Provides longer-term separation Avoid frequent planting areas
    Solarization Empty sunny beds Uses summer heat to suppress weeds Requires several hot weeks
    Boiling water Cracks and paving Quickly burns foliage Keep away from garden soil

    Follow a Simple Weekly Maintenance Routine

    The final part of how to keep weeds out of a garden without chemicals is consistency. I spend ten minutes once a week checking bed edges, mulch gaps and irrigation points.

    I pull seedlings before their roots spread. I refill thin mulch, remove flower heads and cover new bare patches. This short routine prevents a demanding weekend cleanup later.

    The best time to remove a weed is before it flowers. The second-best time is before it produces hundreds of replacements.

    Frequently Asked Questions

    1. What is the best mulch for keeping weeds out of a vegetable garden?

    Clean straw, shredded leaves and untreated wood chips work well when applied at a suitable depth and kept away from crop stems.

    2. Can cardboard stop weeds permanently?

    No. Cardboard is a temporary biodegradable barrier, but mulch renewal and routine monitoring are still necessary after it decomposes.

    3. How do I stop weeds growing between vegetable rows naturally?

    Cover paths with cardboard and wood chips, use drip irrigation and hoe young seedlings before they develop established roots.

    4. How to keep weeds out of a garden without chemicals permanently?

    No method is permanent, but layered mulch, dense planting, minimal digging and weekly removal can keep weeds consistently manageable.

    Bare Soil Is Cancelled

    Learning how to keep weeds out of a garden without chemicals changed my focus from killing weeds to designing fewer places for them to grow.

    Start with one bed. Remove mature weeds, cover exposed soil with the right mulch and direct water toward your crops. Check the area weekly. Once bare soil disappears, most of the exhausting weed battle disappears with it.