Author: Margaret Ellison

  • Natural Ways To Control Slugs In A Vegetable Garden

    Natural Ways To Control Slugs In A Vegetable Garden

    Finding shredded lettuce at sunrise can make any gardener reach for the strongest pest treatment available. I have learned that the most effective natural ways to control slugs in a vegetable garden rarely involve one miracle product.

    Slugs return when the garden continues providing moisture, shelter, and tender plants. My best results came from changing those conditions while trapping the slugs already present.

    Start With a Quick Slug Inspection

    Slug control works better when I confirm the pest before changing my whole garden routine. Caterpillars, earwigs, beetles, and rabbits can leave similar damage.

    Confirm Slug Damage

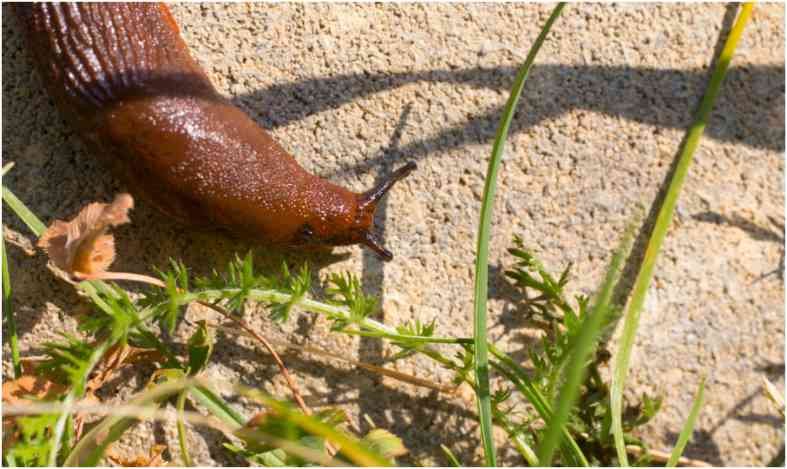
    Slugs usually create irregular holes with smooth edges. They may eat entire seedlings or scrape shallow areas from ripe tomatoes and strawberries.

    A shiny slime trail is the clearest clue. I check plants early in the morning, especially after rain or overnight irrigation.

    Find Their Hiding Places

    During daylight, slugs hide beneath boards, pots, mulch, stones, weeds, and dense ground-level foliage. They prefer places that remain cool and damp.

    I inspect these areas before setting traps. Finding several slugs beneath one pot shows me exactly where control should begin.

    Quick Guide to Natural Slug Control

    Method Best Use Maintenance Key Limitation
    Morning watering Reducing overnight activity Daily routine Does not remove existing slugs
    Board traps Finding and collecting slugs Check each morning Requires regular removal
    Yeast traps Small problem areas Refill often Attracts only nearby slugs
    Copper barriers Pots and raised beds Clean when dirty Gaps make the barrier useless
    Iron phosphate bait Heavy infestations Follow label Must be stored away from pets
    Natural predators Long-term prevention Low Results develop gradually
    Beneficial nematodes Soil-dwelling slugs Seasonal application Availability varies in the US

    The strongest approach combines at least three methods. I reduce moisture first, remove active slugs second, and protect young plants last.

    Make the Garden Less Inviting

    Make the Garden Less Inviting

    Habitat management is the foundation of most natural ways to control slugs in a vegetable garden. Traps provide temporary relief, but dry nighttime surfaces reduce the conditions slugs prefer.

    Water Early in the Day

    I water vegetables in the morning instead of the evening. Early watering gives leaves, mulch, and the soil surface time to dry before slugs become active.

    Drip irrigation also helps. It sends water toward plant roots without soaking every path and leaf.

    Remove Damp Hiding Places

    I clear fallen leaves, unused containers, thick weeds, broken boards, and decaying plant material near vegetable beds. These objects create protected daytime shelters.

    Mulch requires balance. It conserves water, but a thick, constantly wet layer can shelter slugs. I keep mulch several inches away from tender stems during serious outbreaks.

    Correct Drainage Problems

    Standing water and soggy soil can turn a vegetable bed into permanent slug habitat. Compacted soil, blocked outlets, and low spots often cause the problem.

    Before buying traps, check whether you need to fix poor drainage in a garden bed. Improving soil structure or redirecting runoff may reduce slug pressure more effectively than repeated trapping.

    Trap and Remove Active Slugs

    Trap and Remove Active Slugs

    Once I improve the habitat, I target the slugs already feeding in the bed. Mechanical removal produces fast results without spraying vegetables.

    Use Board Traps

    I place flat boards, damp cardboard, or overturned flowerpot saucers beside damaged plants in the evening. Slugs crawl underneath before daylight.

    The next morning, I lift each trap and remove the hiding slugs. Checking daily matters because an ignored trap becomes another shelter.

    Set Yeast or Beer Traps

    Fermentation odors attract slugs. Oregon State University recommends placing beer in a partly buried container while keeping its opening slightly above ground. The container should be covered when pets could reach it.

    I use several small traps near damaged crops instead of one trap for the whole garden. A yeast, flour, sugar, and water mixture can provide a similar fermented scent.

    Hand-Pick Slugs After Dark

    For small beds, hand-picking remains one of the fastest natural ways to control slugs in a vegetable garden. I search with a flashlight about two hours after sunset.

    Gloves or kitchen tongs make collection easier. Repeating this for several damp nights can noticeably reduce feeding damage.

    Protect Vulnerable Vegetable Plants

    Protect Vulnerable Vegetable Plants

    Young lettuce, cabbage, basil, beans, and newly emerged seedlings may need direct protection while the wider slug population declines.

    Install Copper Barriers

    Copper bands can discourage slugs by reacting with their mucus. However, the barrier must be wide enough, continuous, and free from bridging leaves or soil.

    I find copper most practical around containers and raised beds. Narrow tape placed through a crowded garden bed is less dependable.

    Use Iron Phosphate Carefully

    Iron phosphate bait can support an organic slug management plan when physical methods are not enough. The US Environmental Protection Agency reports that slugs and snails are especially sensitive to iron phosphate.

    However, “natural” does not mean careless. Oregon State University advises following bait labels and preventing access by children, pets, and wildlife.

    I scatter pellets according to the label rather than forming piles. Piles increase the chance of accidental consumption and waste product.

    Protect Young Seedlings

    My most useful tested strategy is the “seven-night seedling shield.” I combine morning watering, nightly inspections, and a physical collar around new transplants for their first week.

    This short protection window matters because a mature plant can survive minor leaf loss. A slug can destroy a new seedling in one night.

    Encourage Natural Slug Predators

    A diverse garden can provide long-term support against slugs. Ground beetles, birds, frogs, and toads may feed on slugs or their eggs.

    Create Shelter for Helpful Wildlife

    A small rock pile, native border, shallow wildlife water source, or undisturbed garden edge can support predators. I place these features away from tender seedlings so they do not create new slug shelters beside crops.

    Avoid Harming Ground Beetles

    Broad-spectrum insecticides can kill beneficial insects along with pests. Research reviews identify ground beetles and parasitic nematodes among the natural enemies studied for slug control.

    I leave some stable habitat at the garden perimeter while keeping vegetable rows open and easy to inspect.

    Consider Beneficial Nematodes

    Beneficial nematodes offer another biological option. Phasmarhabditis hermaphrodita enters susceptible slugs and can kill them within 4 to 21 days after soil application.

    Availability and product registration vary by location. US gardeners should confirm that a product is approved and intended for local slug species before purchasing it.

    Nematodes need suitable soil moisture and temperature. They are not a substitute for better watering, drainage, or sanitation.

    Natural Slug Remedies That Often Disappoint

    Eggshells, coffee grounds, sharp sand, and diatomaceous earth receive plenty of attention online. In my experience, they become unreliable after rain, irrigation, soil movement, or decomposition.

    Salt kills slugs but also damages soil and plants. I never apply it in vegetable beds.

    A better use of time is removing shelters, checking traps, and protecting high-value seedlings. These actions address slug behavior instead of depending on a fragile ring of household material.

    FAQs

    1. How Do I Stop Slugs Eating Vegetable Seedlings Naturally?

    Use morning watering, remove nearby shelters, inspect after dark, and protect each seedling with a collar or copper barrier.

    2. What Is the Fastest Natural Way to Remove Slugs?

    Nighttime hand-picking and morning board-trap checks usually reduce active slugs faster than habitat changes alone.

    3. Do Beer Traps Eliminate Slugs From a Garden?

    No. Beer traps attract nearby slugs, but they work best alongside moisture control, sanitation, and plant barriers.

    4. Are Natural Ways to Control Slugs in a Vegetable Garden Safe for Pets?

    Physical barriers and hand removal create little risk, while baits and beer traps must remain inaccessible and follow label directions.

    Don’t Let Slugs Run the Salad Bar

    Successful natural ways to control slugs in a vegetable garden focus on the whole environment. I start by watering early, removing shelters, and correcting wet areas. Then I trap active slugs and protect vulnerable plants.

    Tonight, place two boards beside the most damaged vegetables. Check beneath them tomorrow morning. That simple inspection will reveal where the slugs are hiding and where your control efforts should begin.

  • How to Get Rid of Fungus Gnats in Houseplants Naturally

    How to Get Rid of Fungus Gnats in Houseplants Naturally

    The first time tiny black flies started hovering around my indoor plants, I assumed a few insects had entered through an open window. Within days, they appeared whenever I watered, moved a pot, or walked near my plant shelf. Learning how to get rid of fungus gnats in houseplants naturally showed me that trapping the flying insects was only part of the solution.

    Adult gnats are annoying, but most of the infestation develops inside moist potting soil. A successful treatment must catch adults, control larvae, and correct the damp conditions that allow the insects to reproduce.

    The Fastest Natural Fungus Gnat Control Plan

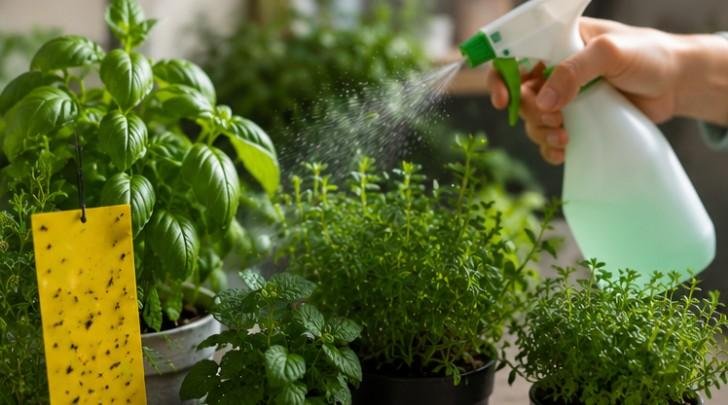
    Begin by isolating heavily affected plants from the rest of your collection. Place yellow sticky traps near the soil to catch adults, and inspect every pot for excessive moisture, blocked drainage holes, standing water, and decaying leaves.

    Next, choose a soil treatment that targets larvae. Biological controls containing Bacillus thuringiensis israelensis, commonly called BTI, or beneficial nematodes are widely used for this purpose.

    Continue the treatment long enough to interrupt the entire life cycle. Removing the adults you see will not eliminate eggs, larvae, or pupae already developing underground.

    Make Sure the Insects Are Fungus Gnats

    Fungus gnats are small, dark insects with slender bodies, long legs, and delicate wings. They often resemble miniature mosquitoes and usually remain close to houseplants.

    Fruit flies have rounder bodies and are more likely to gather around ripe fruit, drains, garbage, or fermenting food. Fungus gnats commonly crawl across potting soil or fly upward when the plant is watered.

    You can also inspect the soil. Fungus gnat larvae are tiny, pale, or nearly transparent worms with dark heads. They may be visible near the surface of consistently wet potting mix.

    Why Fungus Gnats Invade Houseplants

    Why Fungus Gnats Invade Houseplants

    Adult fungus gnats are attracted to damp, organic growing media where they can lay eggs. The larvae feed mainly on fungi, algae, and decomposing plant material.

    Several common indoor gardening habits create favorable breeding conditions:

    • Watering on a fixed schedule instead of checking the soil
    • Allowing water to remain in saucers or decorative pots
    • Using dense potting soil that drains slowly
    • Growing plants in containers without drainage holes
    • Leaving fallen leaves on the soil surface
    • Bringing home an infested plant or bag of potting mix

    Large, established plants can often tolerate a small population. Seedlings, cuttings, and weakened plants are more vulnerable because numerous larvae may disturb tender roots.

    Catch Adult Fungus Gnats With Sticky Traps

    Yellow sticky traps help reduce the number of egg-laying adults. Position each trap slightly above the soil or place a small horizontal trap close to the potting mix.

    Check the traps every few days and replace them when they become dusty or crowded. Sticky cards also provide a simple way to track whether the infestation is improving.

    Traps alone are not a complete treatment because they cannot reach larvae underground. However, they prevent many adults from reproducing while your soil treatment begins working.

    Allow the Soil Surface to Dry Safely

    Fungus gnat larvae need moisture. Allowing the upper layer of potting mix to dry makes the environment less suitable for their development.

    Check moisture with your finger, a wooden skewer, or the weight of the container rather than relying only on the appearance of the soil. Empty drainage saucers after watering and confirm that decorative cachepots are not holding hidden water.

    Plant placement also affects how quickly potting soil dries. Houseplants kept near balconies, patios, or brighter windows may receive stronger airflow and light, while apartment outdoor living ideas can help residents create better-organized plant areas that support healthier moisture control and easier pest monitoring.

    Avoid severely drying ferns, calatheas, seedlings, and other moisture-sensitive plants. For these plants, focus on better drainage, increased airflow, careful watering, and biological larval controls instead of allowing the entire root ball to become dry.

    Treat Fungus Gnat Larvae in the Soil

    Treat Fungus Gnat Larvae in the Soil

    Use BTI as a Biological Control

    BTI is a naturally occurring bacterium used in certain mosquito-control products. When applied correctly, it targets susceptible fly larvae without functioning like a broad-spectrum chemical pesticide.

    Prepare and apply the product according to its label. Product concentrations and application directions differ, so avoid copying a universal dilution from an unrelated package or online post.

    Repeated applications may be necessary because eggs and pupae are not all affected at the same moment.

    Apply Beneficial Nematodes

    Beneficial nematodes are microscopic organisms that seek out certain soil-dwelling pests. Steinernema feltiae is commonly used against fungus gnat larvae.

    Apply nematodes soon after receiving them, follow the storage directions, and keep the growing medium appropriately moist during establishment. They can be especially useful for large plant collections or recurring infestations.

    Repot Severe Infestations

    Repotting may help when the soil remains waterlogged, smells sour, has broken down, or contains an overwhelming number of larvae.

    Remove the plant carefully, discard the old potting mix, trim damaged roots with clean tools, and wash the container before adding fresh, well-draining mix. Repotting can stress plants, so reserve it for situations where correcting watering and treating the soil are insufficient.

    Do Popular Home Remedies Work?

    Hydrogen peroxide soil drenches are frequently recommended, but strong or repeated mixtures may irritate roots and disrupt beneficial soil organisms. They should not replace moisture correction and a reliable larval treatment.

    Vinegar traps are more effective for fruit flies than fungus gnats. They may catch occasional adults but will not control the larvae in plant soil.

    Cinnamon may have antifungal qualities, yet sprinkling it on the surface is unlikely to eliminate an established infestation. Coffee grounds can retain moisture and add organic material, potentially making conditions worse.

    Diatomaceous earth only works effectively while dry. Watering and humid soil quickly reduce its usefulness, and the fine dust should not be inhaled.

    How to Prevent Fungus Gnats From Returning

    How to Prevent Fungus Gnats From Returning

    Quarantine new plants for at least a couple of weeks and inspect their soil before placing them near established houseplants. Store unused potting mix in a sealed, dry container.

    Choosing resilient plants can also make moisture management and pest prevention easier for new growers.

    The best low maintenance houseplants for beginners generally tolerate minor watering mistakes and adapt well to ordinary indoor conditions, reducing the stress that can make plants more vulnerable to recurring problems.

    Use clean pots with open drainage holes, remove dead leaves promptly, and choose a potting mixture appropriate for the plant. Water only when the plant and soil actually need it.

    Continue monitoring with a few sticky traps after the visible infestation disappears. A sudden increase in trapped adults can warn you about a new breeding site before the population becomes difficult to manage.

    Frequently Asked Questions

    1. How long does natural fungus gnat control take?

    Noticeable improvement may occur within several days, but complete control often requires repeated treatment over several weeks because insects are present at different life stages.

    2. Does bottom watering prevent fungus gnats?

    Bottom watering may keep the surface drier, but soil can still remain overly moist. It works best when combined with proper drainage and careful moisture checks.

    3. Can fungus gnats kill houseplants?

    A small infestation rarely kills a mature, healthy plant. Heavy larval populations may contribute to root damage in seedlings, cuttings, or already stressed plants.

    4. How to get rid of fungus gnats in houseplants naturally without repotting?

    Let the surface dry as the plant permits, catch adults with sticky traps, remove decaying debris, and apply a properly labeled BTI product or beneficial nematodes to target larvae.

    A Gnat-Free Finish

    I found that patience and consistency mattered more than any viral one-step remedy. Once I stopped concentrating only on the flying adults and began treating the larvae and wet soil, the number of gnats steadily declined.

    The most dependable approach is simple: improve watering and drainage, trap adults, treat larvae, and keep monitoring the plants. When all parts of the infestation are addressed together, houseplants can recover without relying on harsh indoor pesticides.

  • Save Your Plants: How to Keep Bugs Off Indoor Herbs

    Save Your Plants: How to Keep Bugs Off Indoor Herbs

    Bringing fresh basil to the dinner table feels like absolute magic until unwanted pests invade the kitchen counter. Learning how to keep bugs off indoor herbs rescued my personal windowsill garden from an embarrassing spider mite catastrophe. 

    Growing culinary greens inside your home should bring vibrant flavor to your daily cooking without an unexpected swarm of bugs. Simple routine checks and organic care habits turn your windowsill into a thriving, green sanctuary for delicious home cooking.

    Key Takeaways

    1. Provide bright light daily.
    2. Dry topsoil between waterings.
    3. Inspect all new plants.
    4. Rinse foliage with water.
    5. Spray diluted Castile soap.

    Keep Bugs Off Indoor Herbs Easy Way

    Nobody likes seasoning their homemade pasta sauce with unexpected leafy critters or sticky insect webs. Discovering how to keep bugs off indoor herbs preserves your hard work and keeps your culinary dishes completely appetite friendly. 

    Fresh indoor herbs bring lively aromas and bright colors into your kitchen, so keeping pests away ensures every single leaf remains appetizing, clean, and delicious whenever hunger strikes.

    Essential Prevention Practices for Pests

    Building a solid defensive routine keeps your potted greens growing strong while shutting down bug infestations before they start.

    Providing Bright Light for Stronger Foliage

    Herbs growing on indoor windowsills need plenty of direct sunlight or artificial illumination to maintain strong plant walls. Weak, leggy plants growing in dark corners become stressed quickly, making them super attractive targets for hungry insects. Placing your herb pots near a bright south-facing window or setting up simple LED grow lights builds tough plant tissues that resist damage.

    Healthy plants withstand minor bug attacks much better than shaded, struggling greenery. When herbs receive six to eight hours of bright light each day, their natural defense systems stay strong. Strong foliage creates a sturdy natural barrier that deters soft-bodied insects from settling down and laying eggs on your precious kitchen crops.

    Managing Soil Moisture to Prevent Gnats

    Managing Soil Moisture to Prevent Gnats

    Overwatering your potted greens creates the ultimate wet breeding ground for soil pests like tiny fungus gnats. Allowing the top layer of potting soil to dry out completely between waterings starves developing larvae and breaks their life cycle effectively. Checking soil moisture with your finger before grabbing the watering can prevents soggy conditions that attract unwanted bugs.

    Bottom watering by letting pots sit in a shallow tray of water for twenty minutes supplies deep moisture directly to roots. This clever technique keeps the topsoil surface bone dry while satisfying your plant’s hydration needs. Uninviting dry topsoil ensures flying pests look elsewhere to lay their eggs, keeping your kitchen counter clean and pest free.

    Inspecting and Isolating New Kitchen Plants

    Bringing home fresh potted parsley or mint from the local grocery store often invites sneaky hitchhikers right onto your counter. Always perform a thorough visual inspection under leaves and along stems before placing new pots next to existing greens. A quick inspection catches tiny aphids or webbed mites before they spread throughout your entire indoor container collection.

    Keeping fresh plants separated in a different room for two weeks isolates hidden pests so your main herb garden stays entirely protected. During this quarantine window, monitor leaf undersides and soil surfaces for any signs of movement. Catching hitchhikers early saves you from battling a widespread houseplant invasion down the road.

    Practical Methods on How to Keep Bugs Off Indoor Herbs

    Applying safe organic fungicides directly eliminates active pests without placing dangerous chemical residues on your culinary leaves.

    Practical Methods on How to Keep Bugs Off Indoor Herbs

    Rinsing Foliage with Tepid Water

    A gentle shower at your kitchen sink works wonders for removing soft-bodied insects from delicate herb leaves instantly. Adjust your faucet to produce a lukewarm, soft spray and carefully wash both upper and lower leaf surfaces. Knocking off aphids and whiteflies physically reduces pest populations without needing any fancy chemicals or complex equipment.

    Placing a small plastic bag over the potting soil during this shower prevents loose bugs from falling into the dirt. Protecting the soil ensures washed-off pests swirl right down the drain instead of crawling back up the stems later. Repeating this simple water rinse every few days keeps pest numbers ridiculously low.

    Spraying Natural Insecticidal Soap

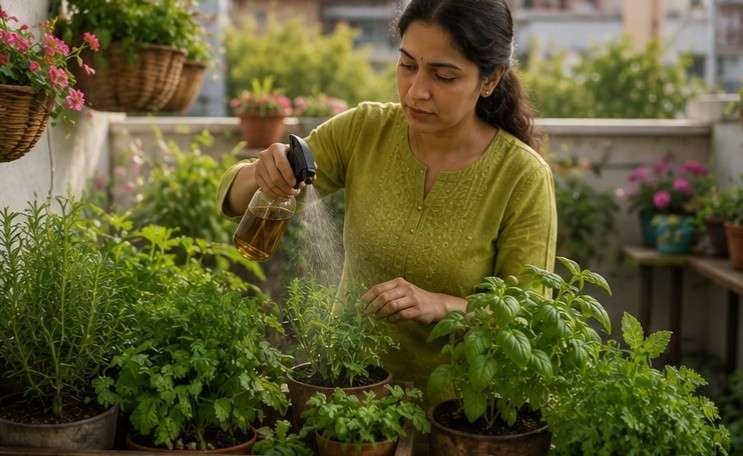
    Mixing pure liquid Castile soap with warm water creates an effective pest solution that disrupts soft insect coats on contact. Combine one tablespoon of mild soap per quart of water inside a clean spray bottle and shake the contents thoroughly. Mild soap sprays break down the protective coating of aphids and spider mites without harming fragile plant tissues.

    Lightly misting affected leaves every few days breaks down persistent pest populations while leaving your culinary greens completely food safe. Make sure to spray the undersides of leaves where insects love to hide from view. A quick rinse under tap water before cooking easily removes any soapy residue.

    Applying Organic Neem Oil and Rubbing Alcohol

    Pure organic neem oil acts as a fantastic natural treatment that smothers persistent pests and disrupts their reproductive development. Spraying a light neem mixture during evening hours protects tender leaves from potential light burn under strong sun or grow lights. Neem oil provides long-lasting protection by preventing young insects from maturing into egg-laying adults.

    For stubborn individual bugs like mealybugs or scale, dab a cotton swab dipped in standard rubbing alcohol directly onto the insect. The alcohol dissolves their protective waxy coating instantly, neutralizing the pest on contact without harming surrounding foliage. This targeted spot treatment works exceptionally well for small, localized insect clusters.

    Food Safety and Harvest Guidelines After Spraying

    Protecting your plants requires sensible post-treatment care so your harvested herbs remain delicious and clean for cooking.

    Food Safety and Harvest Guidelines After Spraying

    Observing Proper Post-Treatment Wait Times

    Even organic remedies like Castile soap and neem oil need a brief window of time to dissipate off plant tissue safely. Waiting twenty-four to forty-eight hours after applying any natural treatment prevents lingering bitter or soapy flavors from soaking into your dinner. Giving remedies time to dry ensures your herbs taste exactly as nature intended.

    This brief waiting period gives natural active ingredients time to defeat pests while protecting the aromatic essential oils packed inside your leaves. Rushing to harvest immediately after spraying can ruin delicate leaf flavors. Patience guarantees your home-cooked dishes stay rich and flavorful.

    Washing Harvested Leaves Before Cooking

    Cleaning your freshly picked herb sprigs right before meal prep ensures all organic residues and loose dust disappear completely. Submerge your harvested basil, cilantro, or thyme in a deep bowl of cold water and swish them gently for thirty seconds. Floating away debris leaves your fresh pickings looking crisp and appetizing.

    Patting leaves dry with clean paper towels leaves you with pristine greens ready to elevate your favorite culinary creations. Taking a few extra seconds to rinse and dry your harvest ensures ultimate peace of mind. Your food stays safe, clean, and delicious every single time.

    Frequently Asked Questions 

    1. How to keep bugs out of an indoor herb garden?

    Provide bright light, avoid overwatering topsoil, quarantine new plants, and spray leaves regularly with a mild liquid Castile soap solution to control soft-bodied pests naturally without using harmful chemical sprays around your kitchen.

    2. What can I use on my herbs to keep bugs away?

    Apply food-safe insecticidal sprays made from pure Castile soap, organic neem oil, or diluted rubbing alcohol directly onto stems and leaves to deter common houseplant insects safely without ruining edible foliage.

    3. What smell do most bugs hate?

    Most indoor pests dislike strong aromatic scents like peppermint, lavender, rosemary, citrus, and garlic, which naturally mask target plants and confuse searching insects while keeping your kitchen smelling fresh and clean.

    4. What can I put in my indoor plants to keep bugs away?

    Set yellow sticky traps near containers, sprinkle food-grade diatomaceous earth onto dry topsoil, or add ground cinnamon powder to deter fungus gnats and crawling insects from taking over indoor pots.

    Creative Ways to Enjoy Bug-Free Indoor Herbs

    Mastering how to keep bugs off indoor herbs gives you the freedom to pick fresh, aromatic leaves directly from your windowsill whenever hunger strikes. With good light, proper watering, and simple natural sprays, your indoor garden will thrive without pests. Enjoy growing clean, tasty greens and elevate every meal with healthy, homegrown flavor all year long!

  • Pest Control Using Neem Oil on Edible Herbs

    Pest Control Using Neem Oil on Edible Herbs

    Fresh herbs make meals special, so pest damage feels personal. My first concern with using neem oil on edible herbs was not only whether it would remove aphids, but whether the leaves would stay healthy, flavorful, and suitable for the kitchen.

    Neem oil can help with selected pests, but formulas and harvest rules vary. Safe use depends on label directions, correct dilution, patch testing, careful timing, and thorough washing.

    Key Takeaways

    • Read the label first. 
    • Dilute accurately. 
    • Patch-test one leaf. 
    • Avoid heat and flowers. 
    • Wash harvested herbs before eating.

    Benefits of Neem Oil on Herbs

    Using neem oil on edible herbs is worth understanding because nobody wants aphids as a surprise garnish. Herb leaves are often eaten raw, so careless spraying can affect foliage, flavor, pollinators, and harvest timing. A treatment that suits a rose may scorch cilantro or leave basil unpleasantly oily.

    Good pest control means identifying the pest, choosing a suitable product, and treating only affected areas. This protects useful insects, reduces waste, and keeps the garden productive.

    Understanding Neem Oil

    Neem products do not all work the same way. Clarified hydrophobic neem oil mainly coats soft-bodied pests, while products containing azadirachtin may disrupt feeding, growth, and reproduction. Common targets include aphids, whiteflies, spider mites, thrips, mealybugs, and some young caterpillars.

    Some products are also labeled for powdery mildew, rust, and leaf spots. Neem will not repair damaged foliage or cure every disease, so inspect plants before reapplying.

    Check The Product Type

    Ready-to-use sprays, concentrates, cold-pressed oils, and azadirachtin products are not interchangeable. Their approved crops, mixing rates, application limits, and pre-harvest intervals may differ, so a universal online recipe can be unsafe or ineffective.

    The product label controls safe use. The National Pesticide Information Center and EPA pesticide label database provide dependable guidance on registered directions.

    Identify The Problem

    Inspect leaf undersides, tender stems, and new growth. Aphids gather in clusters, whiteflies rise when disturbed, and spider mites may leave pale speckles or fine webbing. Old holes do not prove that a pest is still present.

    Wind, sunscald, drought, overwatering, and nutrient stress can resemble insect injury. Correct identification prevents needless spraying and further plant stress.

    Identify The Problem

    Start Gently

    Water, hand removal, pruning, insect netting, sticky traps, and better airflow may solve a small infestation without leaving residue.

    Neem makes more sense when pests return, damage is increasing, and the label lists both the herb and target pest. Routine preventive spraying is rarely needed in a healthy kitchen garden.

    Protect Sensitive Herbs

    Basil, cilantro, dill, parsley, chervil, fennel foliage, and young chives can develop pale patches, brown edges, curling, or leaf drop after a strong or badly timed oil spray.

    Rosemary, sage, bay, oregano, mint, and thyme may be tougher, but heat, drought, intense sun, excessive concentration, or repeated spraying can still burn mature foliage.

    Handle Seedlings Carefully

    Seedlings have thin leaves and limited energy. Avoid neem unless the label permits that growth stage; rinsing, isolation, or labeled insecticidal soap may be safer.

    Cultivars may react differently within the same herb species. Success on one basil plant does not guarantee the same response from another, which makes patch testing important every time.

    Using Neem Oil On Edible Herbs Correctly

    Using neem oil on edible herbs starts with the label, not the sprayer. Confirm the crop and pest, note the pre-harvest interval, wear required protection, and measure concentrate exactly. Add water and mild soap only when the label directs you to use an emulsifier.

    Mix only what you need. Excess oil can leave residue and raise burn risk, so keep the mixture evenly combined as directed.

    Using Neem Oil On Edible Herbs Correctly

    Run A Patch Test

    Treat one small leaf or stem and wait at least twenty-four hours, or longer when directed. Check for spotting, curling, discoloration, or wilting before treating more of the plant.

    Testing is vital for delicate herbs, seedlings, transplants, and plants recovering from heat or water stress.

    Spray At The Right Time

    Apply during the cool evening or early morning, following the label. Avoid midday sun, extreme heat, wind, rain, drought stress, and recently saturated foliage.

    Lightly coat affected stems and leaf surfaces without dripping. Target pest locations and reapply only at the permitted interval.

    Protect Flowers And Pollinators

    Flowering basil, mint, oregano, thyme, rosemary, sage, cilantro, dill, fennel, and chives attract bees. Do not spray open flowers or apply neem while pollinators are visiting.

    Evening treatment reduces direct exposure, but residue may remain. Target nonflowering foliage or use pruning where bees visit heavily.

    Control Spray Drift

    Use a controlled nozzle on a calm day and shield nearby flowers with cardboard. Keep neem, spills, and rinse water away from ponds, drains, and streams because some formulations can harm aquatic organisms.

    Spot treatment protects helpful lady beetles and lacewings better than spraying healthy plants.

    Harvest And Wash Safely

    Pre-harvest intervals differ, so never replace the bottle’s direction with a general online claim. Harvest mature leaves before treatment when practical to reduce residue and waste.

    Harvest And Wash Safely

    Clean Leaves Well

    Rinse sturdy herbs under cool running water while gently rubbing the surfaces. Swish delicate herbs in a clean bowl, drain, repeat with fresh water, and dry with a clean towel or salad spinner.

    Washing does not replace the harvest interval. Discard greasy, unusual-smelling, or badly damaged leaves.

    Repair Leaf Burn

    Neem injury may appear as pale patches, dark speckles, crisp edges, curling, wilting, or sudden leaf drop. Symptoms often become noticeable after treated foliage receives strong sunlight.

    Stop spraying, move container herbs away from harsh afternoon sun, maintain even soil moisture, and remove only badly damaged or rotting leaves. Partly green foliage can still help the plant recover.

    Change The Treatment

    Wait for healthy growth before applying another pesticide. Use water, pruning, hand removal, netting, or labeled insecticidal soap instead. Combining treatments can add stress. Correct watering, spacing, clean tools, harvesting, and airflow reduce future problems.

    Frequently Asked Questions

    1. Which Plants Should You Not Use Neem Oil On?

    Avoid crops absent from the label, severely stressed plants, tiny seedlings, and delicate herbs unless a patch test shows no injury after at least twenty-four hours.

    2. Is Neem Oil Safe To Spray On Basil?

    It may be safe when the label permits basil. Patch-test first, avoid hot sunlight, follow harvest directions, and wash treated leaves thoroughly before use.

    3. Can You Use Neem Oil On Edibles?

    Yes, using neem oil on edible herbs and vegetables can be acceptable when the product lists those crops and all dilution, timing, application, and harvest instructions are followed.

    4. Can You Eat Veggies That Have Been Sprayed With Neem Oil?

    Yes, after observing the labeled pre-harvest interval. Rinse produce thoroughly under clean running water and discard vegetables with stubborn oily residue or obvious spray damage.

    Keep Bugs Out And Flavor In

    Simillarly, you can harvest basil for continuous growth. And using neem oil on edible herbs protects flavor, pollinators, plant health, and harvest quality. Identify the pest, follow the label, dilute accurately, patch-test, spray in cooler hours, and wash every harvest. Used with restraint, neem can support an edible garden without becoming the automatic answer to every spotted leaf or visiting insect.

  • How to Grow Herbs Indoors Year Round for Fresh Flavor 

    How to Grow Herbs Indoors Year Round for Fresh Flavor 

    Fresh basil beside the stove and mint ready for evening tea can make an ordinary kitchen feel more alive. Learning how to grow herbs indoors year round helped me stop buying oversized herb bundles that wilted before I could use them. With suitable light, drainage, and regular harvesting, an indoor edible garden can remain productive in every season.

    Key Takeaways

    • Start small: Choose three easy herbs.
    • Add light: Winter windows may be insufficient.
    • Drain well: Never leave roots sitting in water.
    • Harvest often: Regular trimming encourages fresh growth.
    • Replant wisely: Short-lived herbs need repeat sowing.

    Pick Herbs That Suit Your Home

    The best indoor herb garden begins with plants that match your available light, room temperature, cooking habits, and experience.

    Begin With Reliable Herbs

    Mint, chives, parsley, thyme, oregano, and rosemary are dependable choices for beginners. Mint tolerates slightly lower light and enjoys evenly moist soil, while thyme and oregano prefer brighter conditions and drier roots.

    Basil is productive and useful, but it needs warmth and strong light. Rosemary also needs excellent drainage and good air circulation. Growing each herb in a separate pot makes care easier because their moisture needs differ.

    Understand Short-Lived Herbs

    Cilantro and dill grow quickly, but one plant will not produce leaves forever. Both naturally mature, flower, and set seed. Once this happens, their leaf quality and flavor decline.

    For a steady supply, sow a small batch of cilantro or dill every three to four weeks. This method, known as succession sowing, keeps younger plants developing as older ones finish.

    Match Herbs to Your Cooking

    Grow plants you regularly use rather than choosing herbs only because they look attractive. Basil suits pesto and pasta, cilantro works well in salsa, parsley freshens soups and salads, and rosemary adds flavor to roasted vegetables.

    Starting with three or four favorites keeps the garden manageable. Once those plants are healthy, you can add less familiar options such as sage, chervil, marjoram, or lemon balm.

    Build the Right Indoor Setup

    Build the Right Indoor Setup

    Your growing area does not need to be expensive, but it must provide light, drainage, airflow, and enough room for each plant.

    Choose Pots With Good Drainage

    Always use containers with drainage holes to prevent water from collecting around the roots, which can lead to root rot. Small 4- to 6-inch pots are suitable for young herbs, while larger varieties like rosemary, basil, and mint will eventually need bigger containers. Terra-cotta pots are ideal for drought-tolerant herbs, whereas plastic or glazed ceramic pots retain moisture better for herbs that prefer consistently damp soil.

    Use Quality Potting Mix

    Avoid using garden soil indoors, as it compacts easily and may introduce pests or diseases. Instead, choose a lightweight potting mix designed for containers. Mixing in perlite improves drainage, especially for herbs like rosemary, thyme, oregano, and sage.

    Choosing the best soil for indoor herb garden growth helps roots stay aerated, hold balanced moisture, and avoid the compaction that often weakens indoor herbs.

    Grow Herbs in Separate Pots

    Planting herbs individually makes watering, repotting, and disease management much easier since different herbs have different moisture needs.

    Give Herbs Enough Light

    Light is the factor most likely to determine whether indoor herbs grow thick and flavorful or become pale and weak.

    Test Your Window First

    Watch your chosen windowsill for a full day before placing plants there. Most culinary herbs perform best with at least six hours of strong light, and a south-facing window generally provides the best winter exposure.

    A west-facing window may work for mint, parsley, and chives. However, window direction alone does not guarantee enough light. Nearby buildings, trees, screens, and cloudy winter weather can reduce its intensity.

    Penn State Extension recommends about six hours of direct sunlight for most herbs and suggests using a sunny southern exposure where possible. Read its indoor herb guidance.

    Add a Grow Light

    A full-spectrum LED grow light offers the most dependable way to maintain a year-round kitchen garden. Position it above the plants rather than beside them so stems grow upright.

    Run the light on a timer for roughly 12 to 14 hours daily, then give plants a dark resting period. The University of Minnesota Extension notes that around 12 hours of artificial light can support many indoor herbs. Explore its herb-growing recommendations.

    Follow the manufacturer’s recommended hanging height because light strength varies by fixture. Raise the lamp as the plants grow to prevent scorched leaves.

    Read the Plant’s Signals

    Long stems, wide gaps between leaves, pale color, and plants leaning toward a window commonly indicate insufficient light. Move the herbs closer to the light source or extend the lighting period gradually.

    Brown, bleached patches may indicate that a powerful lamp is too close. Raise it slightly and observe new growth rather than expecting damaged leaves to recover.

    Keep the Harvest Coming

    Keep the Harvest Coming

    Continuous production depends on careful feeding, timely pruning, and replacing plants that naturally reach the end of their cycle.

    Feed Lightly

    Indoor herbs generally grow more slowly than outdoor plants, so heavy feeding is unnecessary. Too much fertilizer can produce weak growth and may reduce the concentrated flavor gardeners want from culinary herbs.

    During active growth, apply a balanced liquid fertilizer at half the label strength every four to six weeks. Reduce feeding when growth slows in winter unless the plants are under strong grow lights and remain actively productive.

    Harvest for Regrowth

    Never remove most of a young plant at once. Begin with small harvests after the herb has developed enough healthy growth to recover.

    Pinch basil just above a pair of leaves to encourage two new branches. Cut chives near the base while leaving some growth behind. Harvest parsley from the outer stems first, and trim thyme, mint, oregano, and rosemary from healthy stem tips.

    Remove basil flower buds early if you want continued leaf production. Regular trimming keeps many herbs compact and prevents them from becoming woody or top-heavy.

    Replant on Schedule

    Perennial herbs such as rosemary, thyme, oregano, mint, and chives may remain productive for a long time with proper care. Basil can also live indoors for months, although older plants often become woody.

    Cilantro, dill, and chervil are better managed as repeating crops. Sow new containers regularly instead of trying to keep one aging plant alive indefinitely.

    Adjust Care Through the Seasons

    Adjust Care Through the Seasons

    Indoor conditions still change throughout the year, even though the herbs remain protected from outdoor frost and extreme heat.

    Manage Winter Conditions

    Short winter days usually require supplemental lighting. Keep tender herbs away from cold window glass, exterior doors, and chilly drafts. Basil is especially sensitive to low temperatures.

    Heating systems can dry the air and soil. Grouping plants can slightly increase local humidity, but keep enough space between them for airflow. A small humidifier may help in very dry homes.

    Avoid compensating for dry air by keeping the soil constantly wet. Root health depends on correct soil moisture, while leaf humidity is a separate issue.

    Handle Summer Heat

    Strong summer sunlight passing through glass can overheat leaves and containers. Move herbs a few inches back from the window or use a sheer curtain during the hottest part of the day.

    Plants may need more frequent watering in July because warmer conditions increase moisture loss. Check the potting mix more often rather than following a fixed calendar.

    Rotate and Inspect Weekly

    Turn containers one-quarter rotation each week so every side receives light. While rotating them, inspect the tops and undersides of leaves for pests.

    Indoor containers avoid many outdoor weed problems, but learning how to keep weeds out of a garden without chemicals can help when moving herbs between indoor and outdoor growing spaces.

    Also look for roots emerging through drainage holes, compacted soil, salt buildup, and stems leaning toward the light. Early correction is easier than rescuing a severely stressed plant.

    Frequently Asked Questions

    1. What Herbs Can I Grow Indoors All Year-Round?

    Mint, chives, parsley, thyme, oregano, rosemary, sage, and basil can grow indoors throughout the year. Cilantro and dill also work, but need regular reseeding.

    2. Can You Grow Herbs in the House All Year Long?

    Yes. Provide bright natural light or an LED grow light, suitable containers, well-draining potting mix, proper watering, airflow, and occasional feeding.

    3. What Are Common Mistakes Growing Indoor Herbs?

    The most common mistakes are overwatering, weak lighting, pots without drainage, crowding incompatible herbs together, excessive fertilizer, and harvesting too much growth at once.

    4. Is July Too Late to Grow Herbs?

    No. July is suitable for starting indoor herbs because household conditions can be controlled. Fast-growing basil, cilantro, dill, mint, parsley, and chives can all be planted during summer.

    Fresh Herbs, One Simple System

    Knowing how to grow herbs indoors year round is less about having a perfect green thumb and more about creating repeatable habits. Give each herb its own draining pot, provide reliable light, water according to the soil, and harvest little and often. Start with a few forgiving plants, learn their signals, and expand your edible windowsill as your confidence grows.

  • How an Outdoor Wellness Garden Can Change the Way You Unwind

    How an Outdoor Wellness Garden Can Change the Way You Unwind

    I didn’t think much about my backyard until I started spending a few quiet minutes there after work. At first, it was just a chair under a tree and a cup of coffee. Then I noticed something I hadn’t expected. I stopped checking my phone every few minutes, my mind felt less cluttered, and even the noise from the day seemed easier to leave behind. The space hadn’t changed much, but the way I felt in it certainly had.

    That experience made me realize an outdoor space doesn’t have to be large or expensive to become restorative. A few thoughtful changes can turn an ordinary yard into a place where your body naturally relaxes, and your mind slows down. That’s what makes an outdoor wellness garden different. It isn’t designed only to look beautiful. It’s created to help you feel better every time you step outside.

    What Makes an Outdoor Wellness Garden Different?

    What Makes an Outdoor Wellness Garden Different

    Most gardens are designed around appearance. They focus on colorful flowers, trimmed hedges, and decorative features that look great from the patio. An outdoor wellness garden takes a different approach by considering how every part of the space affects your body and mind.

    Research has shown that spending time in nature can lower stress hormones, reduce blood pressure, and improve mood. Fresh air, natural light, greenery, and gentle movement work together to calm an overstimulated nervous system. Instead of constantly reacting to screens, traffic, and artificial lighting, your senses begin responding to softer, more natural surroundings.

    The goal isn’t creating a luxury retreat. It’s designing a space that encourages you to pause, breathe, and recharge.

    Start With the Senses Instead of the Scenery

    One reason wellness gardens feel so calming is that they engage more than just your eyes. Every element contributes to the overall experience.

    Natural sounds are often the first thing people notice. A small recirculating fountain or simple stone bubbler creates steady background noise that masks traffic and neighborhood distractions. Ornamental grasses planted along pathways sway with the breeze and add another layer of gentle sound without requiring much maintenance.

    Fragrance also plays a bigger role than many homeowners realize. Lavender, rosemary, and lemon balm release calming oils when brushed or gently crushed, making them ideal near seating areas. If you enjoy spending evenings outdoors, climbing jasmine or wisteria can fill the air with fragrance after sunset, creating a completely different atmosphere from daytime.

    Design Spaces That Invite You to Stay

    Design Spaces That Invite You to Stay

    Many outdoor spaces go unused because they don’t encourage people to slow down. A wellness garden works best when every area has a purpose.

    A comfortable chair beneath a tree becomes a reading spot. A small deck surrounded by greenery can double as a morning stretching area. Even a quiet corner with soft planting gives you somewhere to sit without feeling exposed.

    Privacy matters just as much as comfort. Tall ornamental grasses, native shrubs, climbing vines, or a simple pergola help create natural boundaries. Feeling sheltered makes it much easier to relax because your attention stays on the environment rather than everything happening beyond it.

    Create a Space That Supports Recovery

    Outdoor wellness isn’t limited to quiet reflection. It can also help the body recover after physical activity.

    More homeowners are adding cedar barrel saunas, compact cold plunge pools, or dedicated yoga platforms to their landscapes. Alternating heat and cold may help reduce muscle soreness after exercise, while a simple wooden deck surrounded by plants creates an inviting place for stretching, meditation, or breathing exercises.

    You don’t need every feature to enjoy the benefits. Even setting aside one peaceful corner for movement and mindfulness creates a stronger connection between your outdoor space and your daily routine.

    Let Nature Work With Your Daily Rhythm

    Let Nature Work With Your Daily Rhythm

    The most effective wellness gardens follow natural patterns instead of fighting them.

    A bench facing east becomes the perfect place to enjoy the morning sun, while an evening seating area positioned toward the west allows you to unwind as daylight fades. Spending time outside during sunrise or sunset helps support your body’s natural circadian rhythm, making it easier to feel alert during the day and relaxed at night.

    Layering the landscape also makes a difference. Native trees provide long-term shade, shrubs add structure throughout the seasons, and fragrant herbs soften pathways while supporting pollinators. The result feels balanced without demanding constant maintenance.

    Even if you have limited space, many of these ideas still work. People looking for apartment outdoor living ideas often discover that container gardens, folding furniture, fragrant herbs, and compact water features can create the same calming experience on a balcony or small patio.

    Small Changes Often Leave the Biggest Impression

    An outdoor wellness garden doesn’t come together overnight, and it doesn’t need to. Start by observing how sunlight moves across your yard, where you naturally like to sit, and which areas feel the most peaceful. Those simple observations often become the best blueprint for creating a space you’ll genuinely enjoy using.

    The most successful wellness gardens aren’t the ones with the highest budget. They’re the ones that fit naturally into everyday life and quietly encourage you to spend a little more time outside.

    FAQs: How an Outdoor Wellness Garden Can Change the Way You Unwind

    1. What is an outdoor wellness garden?
    An outdoor wellness garden is a space designed to support relaxation through natural elements like plants, water, shade, fragrance, and comfortable seating rather than focusing only on appearance.

    2. Do I need a large backyard to create one?
    No. A small patio, balcony, courtyard, or compact garden can provide many of the same wellness benefits with thoughtful planning.

    3. Which plants work well in a wellness garden?
    Lavender, rosemary, lemon balm, jasmine, ornamental grasses, native shrubs, and flowering plants that attract birds and pollinators are all excellent choices.

    4. How can I start without spending a lot?
    Begin with one seating area, a few fragrant plants, and simple pathways. You can expand the space over time as your needs and budget grow.

    The Best Outdoor Spaces Are the Ones You Actually Use

    A wellness garden isn’t measured by the number of plants you own or how closely it resembles a magazine landscape. Its value comes from how it makes you feel after spending ten quiet minutes outdoors. When the space encourages you to slow down, breathe deeply, and disconnect from constant distractions, it’s already doing exactly what it was designed to do.

    Sometimes the most meaningful upgrade to your home isn’t another room. It’s rediscovering the one waiting just outside your door.

  • How to Revive a Dried-Out Boston Fern and Bring Back Its Lush Green Glory 

    How to Revive a Dried-Out Boston Fern and Bring Back Its Lush Green Glory 

    A Boston fern can look completely ruined after its soil dries out. The fronds may turn brown, curl inward, shed leaves, or collapse over the side of the pot. I have learned, however, that a crispy-looking fern is not always a dead fern.

    Knowing how to revive a dried-out Boston fern starts with checking whether the crown and roots are still alive. If the plant has a firm crown, flexible stems near the base, or healthy roots, it may recover with careful watering, pruning, humidity, and patience.

    The key is to rehydrate the plant without drowning already stressed roots.

    Can a Dried-Out Boston Fern Come Back?

    A dried-out Boston fern can recover if its crown and root system are still alive. Dead fronds will not turn green again, but the plant may produce fresh fiddleheads from the center once conditions improve.

    Before starting treatment, I check three areas: the crown, the stems, and the roots.

    How Do I Know If My Boston Fern Is Still Alive?

    The crown sits near the soil line where the fronds emerge. A living crown usually feels firm and may show pale green or reddish-brown growth points. Small curled shoots are an especially encouraging sign.

    I also inspect several stems close to the base. If they remain slightly flexible or show green tissue when lightly scratched, the plant still has a chance.

    A fern may be beyond recovery when the entire crown feels hollow, brittle, black, or mushy. A sour smell, slimy roots, and collapsing tissue usually indicate advanced root rot rather than simple dehydration.

    Why Did My Boston Fern Dry Out?

    Why Did My Boston Fern Dry Out?

    Boston ferns prefer consistently moist soil and moderate to high humidity. Their thin fronds and fibrous roots lose moisture quickly, especially indoors.

    Central heating and air conditioning can dry the air inside US homes. A fern placed near a furnace vent, fireplace, sunny window, or exterior door may lose water faster than expected.

    Other common causes include a root-bound pot, compacted soil, direct afternoon sun, infrequent watering, and a lightweight hanging basket that dries rapidly. Peat-based potting mixes can also become hydrophobic when they dry completely. Water then runs around the root ball instead of soaking into it.

    How to Revive a Dried-Out Boston Fern Step by Step

    1. Move the Fern Away From Direct Sun

    I begin by moving the plant into bright, indirect light. Direct sunlight increases water loss and can scorch already weakened fronds.

    An east-facing window often works well because it provides gentle morning light. Near a south- or west-facing window, I place the fern several feet back or filter the light with a sheer curtain.

    I also keep the plant away from heating vents, air-conditioning registers, ceiling fans, and cold drafts.

    2. Remove Fully Brown and Crispy Fronds

    Next, I cut off fronds that are completely brown, dry, or brittle. These fronds cannot recover, and removing them makes it easier to inspect the crown and monitor new growth.

    I use clean, sharp scissors or pruning shears and cut each dead frond near the soil line without damaging healthy stems.

    I do not automatically remove every frond with a brown tip. A partly green frond can still photosynthesize and support the plant during recovery.

    If nearly the entire fern is brown but the crown remains alive, I may cut the plant back to about 1 or 2 inches above the soil. This can look drastic, but it allows the fern to direct energy toward new growth.

    3. Rehydrate the Root Ball Thoroughly

    A severely dry Boston fern often needs more than a quick watering from the top. When the potting mix becomes hydrophobic, poured water may run directly through the drainage holes while the center stays dry.

    I place the nursery pot in a sink, bucket, or basin filled with room-temperature water. The water should rise high enough to soak most of the root ball without covering the crown.

    I let the pot absorb water until the soil feels evenly moist and air bubbles slow down. This often takes between 20 and 60 minutes, depending on the pot size and how dry the soil has become.

    After soaking, I lift the pot out and allow it to drain completely. I never leave the Boston fern standing permanently in water because saturated soil can suffocate the roots and cause rot.

    4. Check the Roots and Potting Soil

     Check the Roots and Potting Soil

    If the fern remains wilted after rehydration, I slide it gently out of the pot and examine the roots.

    Healthy Boston fern roots usually look pale, tan, or light brown and feel firm. Black, slimy, foul-smelling roots indicate root rot. Dry, brittle roots may have died from prolonged dehydration.

    I trim away rotten roots with sanitized scissors. If the remaining soil is compacted, sour-smelling, or unable to absorb water evenly, I repot the fern in fresh houseplant potting mix with added perlite or fine orchid bark for drainage.

    I choose a container with drainage holes. An oversized pot can hold too much moisture, so I use one only slightly larger than the remaining root system.

    5. Raise Humidity Around the Fern

    Low humidity can prevent a stressed Boston fern from recovering, even when the soil stays moist.

    I aim for humidity near 50% or higher. A room humidifier provides the most consistent improvement. Grouping plants together can also create a slightly more humid microclimate.

    A pebble tray may help a little, but the pot must sit above the water rather than inside it. Misting can temporarily wet the leaves, but it does not raise room humidity for long.

    For a severely damaged plant, I sometimes place a loose, clear plastic bag around the foliage to create a temporary humidity chamber. I keep the plastic from pressing against the fronds and open it daily for ventilation. Once new growth appears, I gradually remove the cover.

    6. Keep the Soil Evenly Moist

    After the initial soak, I do not follow a rigid watering schedule. Instead, I check the soil frequently.

    I water when the surface begins to feel slightly dry but the root zone still contains some moisture. The goal is evenly moist soil, not swampy soil.

    Hanging Boston ferns may need water more often than plants in ceramic or plastic containers. During hot US summers, outdoor ferns can dry surprisingly fast. Indoor plants may need less frequent watering during winter, although heating systems can still create very dry conditions.

    7. Wait Before Fertilizing

    I avoid fertilizing a newly rescued Boston fern. Damaged roots cannot use nutrients efficiently, and fertilizer salts may worsen stress or burn the remaining roots.

    I wait until the plant produces healthy new fronds and shows steady growth. I then apply a diluted, balanced houseplant fertilizer during the active growing season.

    More fertilizer will not make a dehydrated fern recover faster. Water, humidity, indirect light, and stable temperatures matter much more during the first few weeks.

    How Long Does a Boston Fern Take to Recover?

    Recovery depends on how long the plant remained dry and how much living tissue remains.

    During the first 24 hours, surviving green fronds may become slightly more upright. Dead, crispy fronds will not improve.

    Within one to two weeks, the crown may begin showing small curled fiddleheads. New growth often becomes more noticeable after two to four weeks.

    A severely damaged fern may need four to eight weeks to regain a fuller shape. I continue checking the crown during this period rather than judging the plant by its old brown foliage.

    If no new growth appears after six to eight weeks and the crown becomes brittle or mushy, the plant may not be viable.

    Should I Repot a Dried-Out Boston Fern Immediately?

    I repot immediately only when the soil has become unusable, the fern is badly root-bound, or the roots show signs of rot.

    Repotting creates additional stress, so a plant with healthy soil and roots may benefit from stabilizing first. After rehydration, I usually give it several days before deciding whether a new pot is necessary.

    When repotting, I avoid removing all the old soil from healthy roots. I loosen the outer root mass gently and place the plant at the same depth it previously grew.

    What Should I Avoid While Reviving a Boston Fern?

    The most common mistake is overcorrecting. A dry fern needs thorough rehydration, but it does not need to sit in soggy soil for days.

    I also avoid placing it in intense sunlight, applying strong fertilizer, misting constantly without improving humidity, or cutting into the living crown.

    Another mistake is assuming every brown fern needs more water. Brown fronds can also result from root rot, fertilizer burn, spider mites, salt buildup, cold injury, or direct sun exposure. Checking the soil and roots prevents the wrong treatment.

    How Can I Prevent My Boston Fern From Drying Out Again?

    How Can I Prevent My Boston Fern From Drying Out Again?

    Once I understand how to revive a dried-out Boston fern, prevention becomes much easier. I keep the plant in bright indirect light, check its soil several times a week, and maintain steady humidity.

    I also avoid allowing the potting mix to become bone-dry. If water starts running immediately through the pot, I check whether the root ball has become compacted or water-repellent.

    During warm weather, I monitor outdoor hanging baskets daily. Indoors, I pay extra attention when the furnace or air conditioner runs frequently.

    Consistent care works better than repeatedly soaking a fern after severe dehydration.

    Frequently Asked Questions (FAQs)

    1. Can a Completely Brown Boston Fern Grow Back?

    Yes, a completely brown fern may grow back if the crown and part of the root system remain alive. Cut away dead fronds, rehydrate the soil, and watch for new fiddleheads.

    2. Should I Cut All the Dead Leaves Off My Boston Fern?

    Remove fronds that are fully brown and brittle. Leave partly green fronds in place unless they are diseased or heavily damaged.

    3. Can I Soak a Boston Fern in Water?

    Yes. Soaking can rehydrate a severely dry or hydrophobic root ball. Remove the pot after the soil becomes evenly moist and let it drain thoroughly.

    4. Why Is My Boston Fern Still Crispy After Watering?

    Dead fronds stay crispy after watering. Recovery appears through new growth from the crown, not through old brown leaves turning green again.

    5. How Often Should I Water a Recovering Boston Fern?

    Water when the soil surface begins to dry slightly. Check the plant rather than relying on a fixed weekly schedule because temperature, humidity, pot size, and light affect moisture loss.

    6. Can Misting Revive a Dying Boston Fern?

    Misting alone will not revive the plant. It may briefly wet the foliage, but thorough root hydration and consistently higher humidity are more effective.

    Give the Fern Time to Prove It Is Alive

    I never discard a dried Boston fern based only on its brown foliage. I first inspect the crown, rehydrate the root ball, remove dead growth, and give the plant several weeks in stable conditions. I also monitor the soil carefully because learning how to get rid of fungus gnats without harming pets often begins with avoiding persistently wet potting mix.

    A severely stressed fern may look bare before new fronds emerge, but a firm crown can hold surprising recovery potential. With evenly moist soil, bright indirect light, better humidity, and no fertilizer during the early recovery period, the plant may gradually rebuild itself.

  • How To Grow Mint In Containers At Home In Easy Steps

    How To Grow Mint In Containers At Home In Easy Steps

    Growing mint in pots is an easy and effective way to enjoy fresh herbs while stopping the plant from spreading aggressively in your garden. To succeed, use a large pot at least ten to twelve inches wide with drainage holes, standard all-purpose potting mix, and keep the soil consistently moist. This simple practice ensures you get an endless supply of vibrant leaves for your morning teas and weekend cooking experiments.

    Mint has a wild reputation for trying to take over every single inch of garden space it touches. Understanding how to grow mint in containers solves this dilemma by locking those adventurous underground roots securely behind plastic or glazed walls. You get to enjoy all the fragrant benefits without turning your entire backyard into a massive jungle of mint.

    Key Takeaways

    • Plant mint in containers to prevent aggressive roots from taking over your garden space.
    • Choose a 10 to 12-inch wide pot with adequate drainage holes for optimal root health.
    • Keep soil consistently moist using an organic potting mix amended with quality compost.
    • Harvest stems frequently to encourage bushier growth and prevent early flowering.
    • Provide at least six hours of sunlight daily for vibrant flavor and strong stems.

    Container Gardening Saves Your Yard

    Planting herbs in confined vessels protects your favorite landscape features from aggressive botanical takeover attempts. Mint sends out underground runners that easily choke out neighboring plants if given open ground. Keeping your herbs neatly isolated gives you total control over your garden layout and overall yard health.

    Confined planting also makes it remarkably easy to chase the best sunlight angles across your property. You can shift your pots instantly when seasonal weather shifts or when scorching summer afternoon rays threaten tender leaves. This mobility ensures your green investments always stay comfortable and productive.

    Container Control Secrets

    Managing aggressive root systems is the primary reason why container planting is essential for success with this herb. Mint sends out underground runners called rhizomes that will quickly colonize nearby flower beds if given the chance. Restricting your plants to individual pots blocks these escape routes entirely.

    Preventing Soil Nutrient Theft

    Crowded garden beds often lead to aggressive root competition where vigorous herbs starve neighboring vegetables of vital nutrients. Setting your pots directly on patios or hardscaping ensures your mint stays isolated. This smart layout protects your delicate crops like lettuce and tomatoes from aggressive botanical bullies.

    Mobility And Microclimates

    Portable containers allow you to shift your herbs effortlessly as seasonal sunlight patterns change across your yard or balcony. You can easily chase the warm rays in spring or slide pots into protective shade during scorching summer afternoons. This flexibility ensures your plants stay comfortable year-round without stress.

    Selecting The Ideal Pot And Soil

    Selecting The Ideal Pot And Soil

    Choosing a container at least ten to twelve inches wide gives the rapid roots enough room to expand comfortably. Plastic or glazed pots work best because they hold moisture well and reduce daily watering chores. 

    Avoid unlined terracotta, as it dries out the soil too quickly under intense summer heat. Always make sure the bottom has clear holes so the roots do not rot in standing water. Use a rich, well-draining potting mix blended with a little organic compost to kickstart healthy leaf development.

    While containers use potting mix instead of garden soil, understanding how to improve clay soil for a vegetable garden is helpful if you later decide to transplant mint into outdoor beds.

    Proper vessel selection acts as the solid foundation for all your future culinary harvests and plant vitality. When roots have enough space and clean drainage, they absorb nutrients efficiently without stress. Taking your time during this initial setup phase saves you from messy transplanting jobs later in the season.

    Mastering Sunlight And Perfect Placement

    Mastering Sunlight And Perfect Placement

    Place the pot in an area with four to six hours of direct sun daily to maximize flavorful essential oils. Morning sun and afternoon shade work best if you live in a very hot region during peak summer months. Keeping the pot outdoors is ideal, as mint struggles with low light inside standard homes unless placed under a strong grow light.

    Keeping one pot near a bright window also makes it easier to learn how to grow herbs indoors year round when outdoor conditions become too cold or harsh.

    Positioning your herbs near a kitchen door or patio seating area encourages frequent daily harvesting and enjoyment. The brilliant green foliage also adds instant visual charm to dull balconies or empty porch corners. Strategic placement guarantees your plants receive the exact environmental cues they need to thrive.

    Watering And Regular Maintenance Secrets

    Watering And Regular Maintenance Secrets

    Check the top inch of soil weekly or daily during hot spells, and water deeply whenever it feels dry. Potted mint needs more water than mint planted straight in the ground because containers dry out much faster. 

    Harvest and trim the stems often to encourage a thick, bushy shape and to prevent the plant from flowering prematurely. Refresh the soil or divide the crowded roots into new pots every couple of years to maintain strong growth.

    Consistent pruning tricks the plant into branching outward rather than stretching up toward the sky in a leggy mess. Pair your trimming routine with a light organic fertilizer once a month during spring for massive harvests. Staying proactive with hydration keeps the leaves crisp and bursting with flavor.

    Frequently Asked Questions

    1. Does Mint Grow Well In A Container?

    Yes, mint grows exceptionally well in containers because pots successfully restrict its aggressive underground runners, keeping the plant tidy, manageable, and highly productive for everyday kitchen use right outside your door.

    2. Does Mint Grow Back Every Year In Pots?

    Mint is a remarkably resilient perennial plant that usually dies back during freezing winter weather before sending up fresh green shoots from its surviving underground root system every single spring.

    3. Does Mint Grow Better In Plastic Or Terracotta Pots?

    Plastic pots are generally superior because they retain essential moisture much longer than unlined terracotta, which tends to dry out the surrounding potting soil way too fast during warm summer days.

    4. Do Coffee Grounds Help Mint Plants?

    Used coffee grounds can provide mild organic matter and slight acidity to the soil when mixed in moderation with compost, helping your container mint plants stay nourished without compacting the potting mix.

    Fresh Mint Magic Awaits You

    Embracing how to grow mint in containers turns any sunny patio or small balcony into an abundant herb paradise. With a roomy pot, rich soil, and regular watering, you unlock endless flavor for your kitchen adventures. Start planting today and enjoy homegrown freshness right at your fingertips.

  • Best Low Maintenance Houseplants for Beginners

    Best Low Maintenance Houseplants for Beginners

    When I first started growing plants indoors, I assumed every drooping leaf meant the plant was dying. I watered too frequently, moved pots from room to room, and chose attractive plants without considering whether my home provided suitable light. Everything became easier once I selected the best low maintenance houseplants for beginners based on their tolerance of common mistakes.

    A beginner-friendly plant should handle occasional missed watering, average indoor humidity, minor temperature changes, and less-than-perfect lighting. It should also recover reasonably well when care is adjusted. The following plants offer that forgiving nature while bringing colour, texture, and life into indoor spaces.

    What Makes a Houseplant Low Maintenance?

    Low maintenance does not mean a plant can survive without care. It means the plant adapts well to ordinary indoor conditions and does not require constant attention.

    The easiest indoor plants usually share several qualities:

    • They tolerate slightly dry soil.
    • They grow in a range of light levels.
    • They do not require frequent repotting.
    • They manage well in average household humidity.
    • They show clear signs when something is wrong.
    • They recover after minor care mistakes.

    Your routine matters as much as the plant. Someone who forgets to water may succeed with a snake plant, while someone who waters frequently might prefer to grow a spider plant or peace lily.

    15 Easy Houseplants for New Plant Owners

    15 Easy Houseplants for New Plant Owners

    1. Snake Plant

    Snake plants are among the most forgiving indoor plants available. Their thick, upright leaves store moisture, allowing the soil to dry between waterings.

    They grow best in bright, indirect light but can tolerate dimmer rooms. Overwatering is their greatest risk, so use a container with drainage holes and water only when the soil feels dry.

    2. ZZ Plant

    The ZZ plant has glossy leaves and underground rhizomes that store water. It is an excellent choice for offices, bedrooms, and rooms where natural light is limited.

    Allow the potting mixture to dry before watering again. Slow growth means it rarely needs pruning or repotting.

    3. Golden Pothos

    Golden pothos produces trailing vines with green and yellow leaves. It adapts to shelves, hanging baskets, bookcases, and elevated planters.

    Bright, indirect light supports stronger colour, although the plant can tolerate lower light. Water when the upper layer of soil becomes dry. Trim long vines to encourage fuller growth.

    4. Spider Plant

    Spider plants have arching leaves and produce small plantlets that hang from mature stems. They are adaptable, fast-growing, and easy to propagate.

    Place one in medium to bright indirect light. Water when the upper soil begins to dry, but avoid leaving the roots in standing water.

    5. Cast Iron Plant

    The cast iron plant earns its name from its ability to tolerate neglect. Its dark green leaves grow slowly and remain attractive without frequent maintenance.

    It performs well in low or moderate indirect light. Let the soil dry slightly between waterings and keep it away from intense afternoon sun.

    6. Heartleaf Philodendron

    This trailing plant has soft, heart-shaped leaves and grows well in hanging baskets or on shelves. It adapts to average indoor temperatures and moderate humidity.

    Water when the top layer of soil feels dry. Pinching the growing tips can create a fuller, more compact plant.

    7. Baby Rubber Plant

    Baby rubber plants, or Peperomia obtusifolia, have thick leaves that hold moisture. Their compact size makes them suitable for desks, windowsills, and small apartments.

    They prefer bright, filtered light and light watering. Constantly wet soil can quickly damage their roots.

    8. Ponytail Palm

    Despite its name, the ponytail palm is not a true palm. Its swollen trunk stores water, making it ideal for people who occasionally forget their watering routine.

    Place it near a bright window and allow the soil to dry thoroughly before watering. It grows slowly and usually remains manageable indoors.

    9. Chinese Evergreen

    Chinese evergreens are valued for their patterned leaves and ability to tolerate moderate or lower light. They bring colour to rooms where flowering plants may struggle.

    Water after the upper soil has dried slightly. Protect the plant from cold drafts and sudden temperature changes.

    10. Haworthia

    Haworthia is a small succulent with firm, patterned leaves. It fits neatly on sunny shelves and requires less direct light than many other succulents.

    Use fast-draining soil and water only after the mixture has dried. A small pot with proper drainage helps prevent root rot.

    11. Jade Plant

    Jade plants have fleshy leaves and sturdy stems that can eventually resemble miniature trees. They prefer bright light and infrequent watering.

    Allow the soil to dry deeply before adding more water. Rotate the pot occasionally so the plant develops evenly.

    12. Hoya

    Hoyas have waxy leaves, trailing stems, and clusters of fragrant flowers when conditions are suitable. Their thick foliage helps them tolerate occasional dry periods.

    Provide bright, indirect light and avoid watering until part of the soil has dried. Hoyas often perform better when slightly root-bound.

    13. Dracaena

    Dracaenas offer upright growth and colourful, strap-shaped leaves. Different varieties suit floors, tabletops, and narrow corners.

    They prefer filtered light and moderate watering. Browning leaf tips may indicate dry air, excess fertiliser, or minerals in the water.

    14. Parlor Palm

    The parlor palm brings a soft, tropical appearance without demanding intense sunlight. It grows slowly and remains suitable for indoor living for many years.

    Keep it in moderate indirect light and water when the upper soil feels dry. Avoid placing it beside heating or cooling vents.

    15. Peace Lily

    Peace lilies have glossy foliage and elegant white blooms. Their leaves droop noticeably when the plant becomes thirsty, making their needs easier to recognise.

    They prefer evenly moist soil but should never remain waterlogged. Bright, indirect light encourages flowering, while lower light supports foliage growth.

    Choose a Plant That Matches Your Home

    Choose a Plant That Matches Your Home

    Before buying a plant, study the area where it will live. A decorative corner may look ideal but receive too little light for healthy growth.

    Gardeners who want to expand beyond indoor plants can also learn how to start a no-dig garden bed over grass to create an outdoor growing area without removing turf or heavily disturbing the soil.

    Check the room at different times of day. Bright indirect light usually appears near a window without strong rays striking the leaves. Low light means the room receives limited natural brightness, not complete darkness.

    Also consider your habits. Choose snake plants, ZZ plants, ponytail palms, or jade plants when you often forget to water. Consider spider plants or peace lilies when you prefer checking soil more regularly.

    Pet owners should research every plant before bringing it home. Pothos, philodendrons, ZZ plants, snake plants, peace lilies, dracaenas, and several other common houseplants may cause problems when chewed or swallowed.

    Plant selection can also extend beyond indoor decoration. Those  interested in creating a productive outdoor space can explore companion planting herbs with vegetables to learn how compatible plants may support pollinators, improve space use, and simplify garden planning.

    Five Rules That Keep Houseplants Healthy

    Use Pots With Drainage

    Drainage holes allow excess moisture to escape. Decorative pots without holes can be used as outer covers, but standing water should always be emptied.

    Check the Soil Before Watering

    Do not rely entirely on a fixed calendar. Push a finger into the soil and water according to the plant’s actual moisture level.

    Avoid Oversized Containers

    A pot that is too large holds moisture longer than the roots can use it. Move up only one container size when repotting.

    Introduce Changes Gradually

    Sudden changes in light, temperature, or watering can cause leaf loss. Move plants gradually when changing their position.

    Inspect New Plants

    Check beneath leaves, around stems, and across the soil for pests before placing a new plant beside an established collection.

    Frequently Asked Questions

    1. What are the best low maintenance houseplants for beginners in low light?

    ZZ plants, snake plants, cast iron plants, Chinese evergreens, and heartleaf philodendrons tolerate lower light better than many common indoor plants.

    2. Which houseplants survive missed watering?

    Snake plants, ZZ plants, jade plants, ponytail palms, hoyas, and haworthias store moisture and generally handle short dry periods.

    3. What is the easiest houseplant to keep alive?

    A snake plant is often the easiest because it tolerates varied lighting, average humidity, and infrequent watering.

    4. Should beginner houseplants be watered weekly?

    Not automatically. Watering depends on the plant, pot size, soil, temperature, season, and available light. Check the soil before adding water.

    Final Thoughts

    When I choose a new indoor plant, I now focus less on appearance alone and more on whether its natural needs match my home and routine. Starting with one or two forgiving varieties makes it easier to understand light, drainage, watering, and seasonal growth without feeling overwhelmed.

    The best low maintenance houseplants for beginners are not plants that survive complete neglect. They are resilient varieties that give new growers room to learn. With a suitable pot, sensible watering, and the right location, even a first plant can become a healthy and lasting part of the home.

  • Apartment Outdoor Living Ideas for Creating a Cozy Everyday Escape

    Apartment Outdoor Living Ideas for Creating a Cozy Everyday Escape

    I used to think an apartment balcony was just extra space that happened to be outside. Mine held a couple of chairs that barely got used, a few forgotten planters, and whatever didn’t fit inside the apartment. It wasn’t until I started spending more time at home that I realized how much potential those few square feet actually had.

    Once I stopped trying to make it look like a backyard and started designing it around how I wanted to feel, everything changed. A comfortable chair, softer lighting, and a handful of plants made it a place I genuinely wanted to sit every morning. That’s what makes the best apartment outdoor living ideas so effective. They aren’t about filling a space. They’re about making a small space feel like part of your everyday life.

    Start With Comfort Instead of Decoration

    Start With Comfort Instead of Decoration

    One of the biggest mistakes people make is buying decorative pieces before thinking about comfort. A beautiful balcony won’t get much use if the seating is uncomfortable or the layout feels cramped.

    Start with furniture that matches the size of your space. Folding bistro chairs, a compact table, or a slim outdoor bench can provide everything you need without making the area feel crowded. Pieces that fold away or serve more than one purpose also make it easier to adapt the space when friends visit.

    Once the furniture is in place, think about how the space feels underfoot. A weather-resistant outdoor rug instantly softens concrete while helping define the seating area. It also creates a visual transition between your indoor and outdoor spaces, making the balcony feel like a natural extension of your home.

    Layer Soft Textures That Invite You to Stay

    Comfort rarely comes from furniture alone.

    Outdoor cushions made with fade-resistant fabric add support while introducing color and personality. Weather-safe poufs provide flexible seating when guests stop by, and an outdoor throw blanket makes cool evenings much more enjoyable.

    Instead of matching everything perfectly, combine a few complementary colors and textures. That layered look feels relaxed and lived in rather than staged.

    The goal isn’t to create a showroom. It’s to build a space where reading a book, enjoying a morning coffee, or simply sitting outside becomes part of your routine.

    Lighting Changes the Mood More Than Anything Else

    Lighting Changes the Mood More Than Anything Else

    Natural light disappears quickly after sunset, but that doesn’t mean your outdoor space has to lose its appeal.

    String lights remain one of the simplest ways to create warmth without taking up valuable room. Edison-style bulbs or smaller fairy lights can be attached to railings with removable clips or zip ties, adding soft illumination that feels welcoming instead of harsh.

    Solar lanterns and LED candles also work well because they don’t require electrical outlets. Placing a few around seating areas creates gentle layers of light that make even the smallest balcony feel cozy during the evening.

    Bring Life Into the Space With Plants

    Plants do far more than decorate an apartment balcony. They soften hard surfaces, improve the atmosphere, and create a stronger connection with nature.

    If floor space is limited, think vertically. Railing planters, hanging baskets, wall-mounted containers, and leaning trellises allow you to add greenery without sacrificing room for seating.

    Combining different plant heights creates a fuller look. Tall ornamental grasses provide privacy, while trailing vines and flowering plants bring movement and color throughout the season.

    Choose varieties that match the amount of sunlight your balcony receives. Healthy plants always have a bigger impact than struggling ones.

    Make Every Corner Work Harder

    Make Every Corner Work Harder

    Small outdoor spaces benefit from thoughtful planning more than expensive furniture.

    A narrow storage bench can hide gardening tools while doubling as seating. Foldable side tables offer a place for drinks without becoming permanent obstacles. Wall-mounted shelves hold candles, small pots, or decorative accents while keeping the floor clear.

    These practical additions help the space stay organized, making it easier to enjoy every day instead of constantly rearranging it.

    If you’re planning additional improvements around your property, exploring outdoor projects that increase home appeal can also provide ideas that complement your outdoor living space without overwhelming it.

    Add Personal Details Without Creating Clutter

    The most inviting outdoor spaces usually include a few personal touches instead of dozens of decorative items.

    A favorite coffee mug, a small lantern, a couple of textured planters, or artwork designed for outdoor use can give the space character without making it feel busy.

    Before adding something new, ask whether it improves comfort or simply fills empty space. That simple question helps prevent clutter while keeping the area functional.

    Small Spaces Can Still Feel Like an Escape

    Small Spaces Can Still Feel Like an Escape

    You don’t need a large patio or private backyard to enjoy spending time outdoors. What matters most is creating a space that supports the way you actually live.

    When comfortable seating, soft lighting, practical furniture, and healthy plants work together, even the smallest apartment balcony becomes somewhere you naturally want to spend time. Those quiet moments outside often become the best part of the day.

    FAQs: Apartment Outdoor Living Ideas for Creating a Cozy Everyday Escape

    1. How can I make a small apartment balcony feel bigger?
    Choose compact furniture, use vertical planters, and keep the floor as open as possible. Light colors and simple layouts also help create a more spacious feel.

    2. What plants work well on apartment balconies?
    It depends on sunlight, but herbs, ornamental grasses, succulents, trailing vines, and flowering annuals are popular choices for containers.

    3. Are outdoor rugs worth buying for apartments?
    Yes. They make hard surfaces more comfortable, define seating areas, and help the balcony feel like part of your home.

    4. How do I decorate without overcrowding the space?
    Focus on a few useful pieces, layer textures, and avoid filling every corner. Prioritizing comfort usually creates a cleaner and more inviting outdoor area.

    Why the Best Outdoor Spaces Always Feel Personal

    The most memorable outdoor spaces aren’t usually the largest or the most expensive. They’re the ones that make you slow down, breathe a little deeper, and enjoy a quiet moment outside. A thoughtfully arranged balcony can do exactly that with just a handful of well-chosen pieces and a layout that fits your everyday routine.

    When a small outdoor space feels comfortable enough to use every day, it becomes much more than another corner of the apartment.